Adding 3D items to a shop page
6/6/2024
Mihail Todorov
One of the more interesting features of Gameface/Prysm are Live Views . It provides the ability to render dynamic textures from engine directly into the UI.
This allows for users to add things like 3D models, videos or views of the world inside their UI.
In this tutorial we’ll be showing you how add 3D items to a shop page and rotate them using the keyboard.
Prerequisites
For this tutorial we’ll be extending a sample that we have, called Parallax UI which utilizes React 18 with React Router 6. Apart from that we’ll be using our component scrollable container and the Interaction Manager library to help with the keyboard interactions.
Getting started
The first thing we’ll get started with is to set up the backend. In this case it will be an Unreal Engine 5.3 project in order to show the required flow by using a visual tool like the Unreal blueprints.
We’ll be using an existing project with Gameface integrated, but you can also do it for a blank project, which can be set up by following the documentation .
Adding our items
To start, we’ll create a Blueprint Class called Weapon which will contain all of our weapons. And inside we’ll place a SceneCaptureComponent2D that will be the camera that renders onto our UI, along with an Arrow component that will hold all of our weapons.
The idea is that we’ll place all of our weapons in the same place as static meshes and we’ll use some logic to switch between them. And to make rotating them easier, we’ll rotate the whole Arrow instead of each one individually.
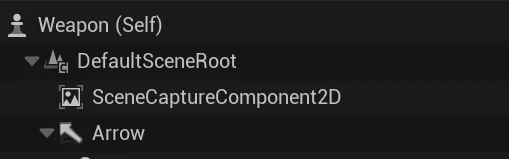
In a larger project you may want to create a separate actor for each item as it will have more data than what we’ll be doing here, but for the purpose of this demonstration we’ll go with this approach.
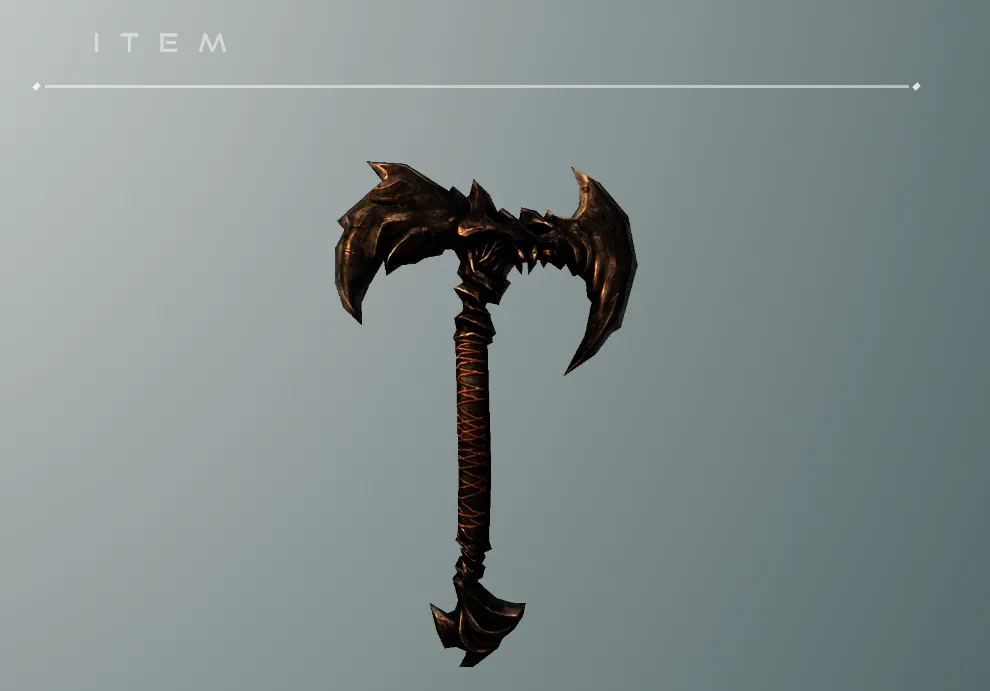
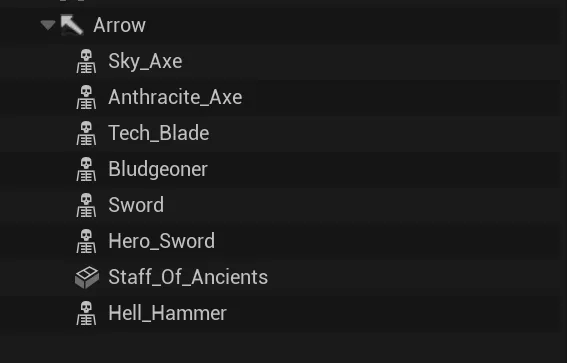
For the weapons themselves we’ll be using the Infinity Blade: Weapons pack by Epic Games in the Unreal Engine Marketplace.
After we’ve added it to our project we can add some of the weapons that we like. In this case we’ve gone with the following 7.
Setting up the live view
In our case it’s pretty straightforward, we’ll follow the guide in our documentation . Since we’ll be showing the weapons inside the shop page in our UI, we’ll need to follow the second part of the tutorial in the documentation for Transparent Live Views .
Rotating the items
To rotate our Arrow component, we’ll be using events triggered from the UI. In our case, when we press the A and D button on the keyboard we’ll call the rotateCameraLeft and rotateCameraRight events respectively.
We’ll start by casting in the Weapon actor Event Graph to the CohtmlGameHUD in order to get the GamefaceHUD object.
   Begin Object Class=/Script/BlueprintGraph.K2Node_Event Name="K2Node_Event_0" ExportPath="/Script/BlueprintGraph.K2Node_Event'/Game/Weapon.Weapon:EventGraph.K2Node_Event_0'"
   EventReference=(MemberParent="/Script/CoreUObject.Class'/Script/Engine.Actor'",MemberName="ReceiveBeginPlay")
   bOverrideFunction=True
   NodePosX=368
   bCommentBubblePinned=True
   NodeGuid=C4C5A4964C2F7E2FF3A8E2A968A0FAD4
   CustomProperties Pin (PinId=DE690A9F44A7126164E61FA2506D4B48,PinName="OutputDelegate",Direction="EGPD_Output",PinType.PinCategory="delegate",PinType.PinSubCategory="",PinType.PinSubCategoryObject=None,PinType.PinSubCategoryMemberReference=(MemberParent="/Script/CoreUObject.Class'/Script/Engine.Actor'",MemberName="ReceiveBeginPlay"),PinType.PinValueType=(),PinType.ContainerType=None,PinType.bIsReference=False,PinType.bIsConst=False,PinType.bIsWeakPointer=False,PinType.bIsUObjectWrapper=False,PinType.bSerializeAsSinglePrecisionFloat=False,PersistentGuid=00000000000000000000000000000000,bHidden=False,bNotConnectable=False,bDefaultValueIsReadOnly=False,bDefaultValueIsIgnored=False,bAdvancedView=False,bOrphanedPin=False,)
   CustomProperties Pin (PinId=1E50F67642D04E8252DD92936292CA6E,PinName="then",Direction="EGPD_Output",PinType.PinCategory="exec",PinType.PinSubCategory="",PinType.PinSubCategoryObject=None,PinType.PinSubCategoryMemberReference=(),PinType.PinValueType=(),PinType.ContainerType=None,PinType.bIsReference=False,PinType.bIsConst=False,PinType.bIsWeakPointer=False,PinType.bIsUObjectWrapper=False,PinType.bSerializeAsSinglePrecisionFloat=False,LinkedTo=(K2Node_DynamicCast_0 917AEA744E9924FE476F658EEB5D7CB4,),PersistentGuid=00000000000000000000000000000000,bHidden=False,bNotConnectable=False,bDefaultValueIsReadOnly=False,bDefaultValueIsIgnored=False,bAdvancedView=False,bOrphanedPin=False,)
End Object
Begin Object Class=/Script/BlueprintGraph.K2Node_DynamicCast Name="K2Node_DynamicCast_0" ExportPath="/Script/BlueprintGraph.K2Node_DynamicCast'/Game/Weapon.Weapon:EventGraph.K2Node_DynamicCast_0'"
   TargetType="/Script/CoreUObject.Class'/Script/CohtmlPlugin.CohtmlGameHUD'"
   NodePosX=912
   ErrorType=3
   NodeGuid=F4645D51402BE9C6581752831B828692
   CustomProperties Pin (PinId=917AEA744E9924FE476F658EEB5D7CB4,PinName="execute",PinType.PinCategory="exec",PinType.PinSubCategory="",PinType.PinSubCategoryObject=None,PinType.PinSubCategoryMemberReference=(),PinType.PinValueType=(),PinType.ContainerType=None,PinType.bIsReference=False,PinType.bIsConst=False,PinType.bIsWeakPointer=False,PinType.bIsUObjectWrapper=False,PinType.bSerializeAsSinglePrecisionFloat=False,LinkedTo=(K2Node_CallFunction_1 C9627ED047925BE492C2ED8292875066,K2Node_Event_0 1E50F67642D04E8252DD92936292CA6E,),PersistentGuid=00000000000000000000000000000000,bHidden=False,bNotConnectable=False,bDefaultValueIsReadOnly=False,bDefaultValueIsIgnored=False,bAdvancedView=False,bOrphanedPin=False,)
   CustomProperties Pin (PinId=E4C47558417AA95F71E529AA81C3F285,PinName="then",Direction="EGPD_Output",PinType.PinCategory="exec",PinType.PinSubCategory="",PinType.PinSubCategoryObject=None,PinType.PinSubCategoryMemberReference=(),PinType.PinValueType=(),PinType.ContainerType=None,PinType.bIsReference=False,PinType.bIsConst=False,PinType.bIsWeakPointer=False,PinType.bIsUObjectWrapper=False,PinType.bSerializeAsSinglePrecisionFloat=False,LinkedTo=(K2Node_AssignDelegate_1 D453DB184A8026BC0D3EE99AC0265352,),PersistentGuid=00000000000000000000000000000000,bHidden=False,bNotConnectable=False,bDefaultValueIsReadOnly=False,bDefaultValueIsIgnored=False,bAdvancedView=False,bOrphanedPin=False,)
   CustomProperties Pin (PinId=8E41CB7241DF0A09379ABA998E389A24,PinName="CastFailed",Direction="EGPD_Output",PinType.PinCategory="exec",PinType.PinSubCategory="",PinType.PinSubCategoryObject=None,PinType.PinSubCategoryMemberReference=(),PinType.PinValueType=(),PinType.ContainerType=None,PinType.bIsReference=False,PinType.bIsConst=False,PinType.bIsWeakPointer=False,PinType.bIsUObjectWrapper=False,PinType.bSerializeAsSinglePrecisionFloat=False,PersistentGuid=00000000000000000000000000000000,bHidden=False,bNotConnectable=False,bDefaultValueIsReadOnly=False,bDefaultValueIsIgnored=False,bAdvancedView=False,bOrphanedPin=False,)
   CustomProperties Pin (PinId=3C9251E64E92FB5B79E42283A62168A8,PinName="Object",PinType.PinCategory="Object",PinType.PinSubCategory="",PinType.PinSubCategoryObject="/Script/CoreUObject.Class'/Script/CoreUObject.Object'",PinType.PinSubCategoryMemberReference=(),PinType.PinValueType=(),PinType.ContainerType=None,PinType.bIsReference=False,PinType.bIsConst=False,PinType.bIsWeakPointer=False,PinType.bIsUObjectWrapper=False,PinType.bSerializeAsSinglePrecisionFloat=False,LinkedTo=(K2Node_CallFunction_12 6F33D0C3438E65764913DFA57CE7273C,),PersistentGuid=00000000000000000000000000000000,bHidden=False,bNotConnectable=False,bDefaultValueIsReadOnly=False,bDefaultValueIsIgnored=False,bAdvancedView=False,bOrphanedPin=False,)
   CustomProperties Pin (PinId=C90E80264407C7300095CC960EDD63B7,PinName="AsGameface GameHUD",Direction="EGPD_Output",PinType.PinCategory="Object",PinType.PinSubCategory="",PinType.PinSubCategoryObject="/Script/CoreUObject.Class'/Script/CohtmlPlugin.CohtmlGameHUD'",PinType.PinSubCategoryMemberReference=(),PinType.PinValueType=(),PinType.ContainerType=None,PinType.bIsReference=False,PinType.bIsConst=False,PinType.bIsWeakPointer=False,PinType.bIsUObjectWrapper=False,PinType.bSerializeAsSinglePrecisionFloat=False,LinkedTo=(K2Node_VariableGet_1 827482DD44648B588F3B0B9C124E49C4,),PersistentGuid=00000000000000000000000000000000,bHidden=False,bNotConnectable=False,bDefaultValueIsReadOnly=False,bDefaultValueIsIgnored=False,bAdvancedView=False,bOrphanedPin=False,)
   CustomProperties Pin (PinId=707244E24FB5E04A499B99A10654DDB5,PinName="bSuccess",Direction="EGPD_Output",PinType.PinCategory="bool",PinType.PinSubCategory="",PinType.PinSubCategoryObject=None,PinType.PinSubCategoryMemberReference=(),PinType.PinValueType=(),PinType.ContainerType=None,PinType.bIsReference=False,PinType.bIsConst=False,PinType.bIsWeakPointer=False,PinType.bIsUObjectWrapper=False,PinType.bSerializeAsSinglePrecisionFloat=False,PersistentGuid=00000000000000000000000000000000,bHidden=True,bNotConnectable=False,bDefaultValueIsReadOnly=False,bDefaultValueIsIgnored=False,bAdvancedView=False,bOrphanedPin=False,)
End Object
Begin Object Class=/Script/BlueprintGraph.K2Node_CallFunction Name="K2Node_CallFunction_10" ExportPath="/Script/BlueprintGraph.K2Node_CallFunction'/Game/Weapon.Weapon:EventGraph.K2Node_CallFunction_10'"
   bIsPureFunc=True
   FunctionReference=(MemberParent="/Script/CoreUObject.Class'/Script/Engine.GameplayStatics'",MemberName="GetPlayerController")
   NodePosX=384
   NodePosY=320
   NodeGuid=02C163F247EA95F560C93DA5BEF53983
   CustomProperties Pin (PinId=F117EB0A4FD45EBD3601DDB6061ABE59,PinName="self",PinFriendlyName=NSLOCTEXT("K2Node", "Target", "Target"),PinType.PinCategory="object",PinType.PinSubCategory="",PinType.PinSubCategoryObject="/Script/CoreUObject.Class'/Script/Engine.GameplayStatics'",PinType.PinSubCategoryMemberReference=(),PinType.PinValueType=(),PinType.ContainerType=None,PinType.bIsReference=False,PinType.bIsConst=False,PinType.bIsWeakPointer=False,PinType.bIsUObjectWrapper=False,PinType.bSerializeAsSinglePrecisionFloat=False,DefaultObject="/Script/Engine.Default__GameplayStatics",PersistentGuid=00000000000000000000000000000000,bHidden=True,bNotConnectable=False,bDefaultValueIsReadOnly=False,bDefaultValueIsIgnored=False,bAdvancedView=False,bOrphanedPin=False,)
   CustomProperties Pin (PinId=8CDB63A04646D207AD130089E12AFCAA,PinName="WorldContextObject",PinType.PinCategory="object",PinType.PinSubCategory="",PinType.PinSubCategoryObject="/Script/CoreUObject.Class'/Script/CoreUObject.Object'",PinType.PinSubCategoryMemberReference=(),PinType.PinValueType=(),PinType.ContainerType=None,PinType.bIsReference=False,PinType.bIsConst=True,PinType.bIsWeakPointer=False,PinType.bIsUObjectWrapper=False,PinType.bSerializeAsSinglePrecisionFloat=False,PersistentGuid=00000000000000000000000000000000,bHidden=True,bNotConnectable=False,bDefaultValueIsReadOnly=False,bDefaultValueIsIgnored=False,bAdvancedView=False,bOrphanedPin=False,)
   CustomProperties Pin (PinId=3662A1674A8D10633D499F9F05684A41,PinName="PlayerIndex",PinType.PinCategory="int",PinType.PinSubCategory="",PinType.PinSubCategoryObject=None,PinType.PinSubCategoryMemberReference=(),PinType.PinValueType=(),PinType.ContainerType=None,PinType.bIsReference=False,PinType.bIsConst=False,PinType.bIsWeakPointer=False,PinType.bIsUObjectWrapper=False,PinType.bSerializeAsSinglePrecisionFloat=False,DefaultValue="0",AutogeneratedDefaultValue="0",PersistentGuid=00000000000000000000000000000000,bHidden=False,bNotConnectable=False,bDefaultValueIsReadOnly=False,bDefaultValueIsIgnored=False,bAdvancedView=False,bOrphanedPin=False,)
   CustomProperties Pin (PinId=C91D6ACE4EE3439E1866C9A04A8C217D,PinName="ReturnValue",Direction="EGPD_Output",PinType.PinCategory="object",PinType.PinSubCategory="",PinType.PinSubCategoryObject="/Script/CoreUObject.Class'/Script/Engine.PlayerController'",PinType.PinSubCategoryMemberReference=(),PinType.PinValueType=(),PinType.ContainerType=None,PinType.bIsReference=False,PinType.bIsConst=False,PinType.bIsWeakPointer=False,PinType.bIsUObjectWrapper=False,PinType.bSerializeAsSinglePrecisionFloat=False,LinkedTo=(K2Node_CallFunction_12 D2DC0FF449ABEC29AC0CFBA7D7D00624,),PersistentGuid=00000000000000000000000000000000,bHidden=False,bNotConnectable=False,bDefaultValueIsReadOnly=False,bDefaultValueIsIgnored=False,bAdvancedView=False,bOrphanedPin=False,)
End Object
Begin Object Class=/Script/BlueprintGraph.K2Node_CallFunction Name="K2Node_CallFunction_12" ExportPath="/Script/BlueprintGraph.K2Node_CallFunction'/Game/Weapon.Weapon:EventGraph.K2Node_CallFunction_12'"
   bIsPureFunc=True
   bIsConstFunc=True
   FunctionReference=(MemberParent="/Script/CoreUObject.Class'/Script/Engine.PlayerController'",MemberName="GetHUD")
   NodePosX=704
   NodePosY=336
   NodeGuid=4B472C404AA82A9BB7F8299B9772E803
   CustomProperties Pin (PinId=D2DC0FF449ABEC29AC0CFBA7D7D00624,PinName="self",PinFriendlyName=NSLOCTEXT("K2Node", "Target", "Target"),PinType.PinCategory="object",PinType.PinSubCategory="",PinType.PinSubCategoryObject="/Script/CoreUObject.Class'/Script/Engine.PlayerController'",PinType.PinSubCategoryMemberReference=(),PinType.PinValueType=(),PinType.ContainerType=None,PinType.bIsReference=False,PinType.bIsConst=False,PinType.bIsWeakPointer=False,PinType.bIsUObjectWrapper=False,PinType.bSerializeAsSinglePrecisionFloat=False,LinkedTo=(K2Node_CallFunction_10 C91D6ACE4EE3439E1866C9A04A8C217D,),PersistentGuid=00000000000000000000000000000000,bHidden=False,bNotConnectable=False,bDefaultValueIsReadOnly=False,bDefaultValueIsIgnored=False,bAdvancedView=False,bOrphanedPin=False,)
   CustomProperties Pin (PinId=6F33D0C3438E65764913DFA57CE7273C,PinName="ReturnValue",Direction="EGPD_Output",PinType.PinCategory="object",PinType.PinSubCategory="",PinType.PinSubCategoryObject="/Script/CoreUObject.Class'/Script/Engine.HUD'",PinType.PinSubCategoryMemberReference=(),PinType.PinValueType=(),PinType.ContainerType=None,PinType.bIsReference=False,PinType.bIsConst=False,PinType.bIsWeakPointer=False,PinType.bIsUObjectWrapper=False,PinType.bSerializeAsSinglePrecisionFloat=False,LinkedTo=(K2Node_DynamicCast_0 3C9251E64E92FB5B79E42283A62168A8,),PersistentGuid=00000000000000000000000000000000,bHidden=False,bNotConnectable=False,bDefaultValueIsReadOnly=False,bDefaultValueIsIgnored=False,bAdvancedView=False,bOrphanedPin=False,)
End Object
Using it we’ll bind and event to Ready for Bindings so that when we access Gameface specific blueprints they will be available to us.
   Begin Object Class=/Script/BlueprintGraph.K2Node_DynamicCast Name="K2Node_DynamicCast_0" ExportPath="/Script/BlueprintGraph.K2Node_DynamicCast'/Game/Weapon.Weapon:EventGraph.K2Node_DynamicCast_0'"
   TargetType="/Script/CoreUObject.Class'/Script/CohtmlPlugin.CohtmlGameHUD'"
   NodePosX=1296
   NodePosY=-240
   ErrorType=3
   NodeGuid=F4645D51402BE9C6581752831B828692
   CustomProperties Pin (PinId=917AEA744E9924FE476F658EEB5D7CB4,PinName="execute",PinType.PinCategory="exec",PinType.PinSubCategory="",PinType.PinSubCategoryObject=None,PinType.PinSubCategoryMemberReference=(),PinType.PinValueType=(),PinType.ContainerType=None,PinType.bIsReference=False,PinType.bIsConst=False,PinType.bIsWeakPointer=False,PinType.bIsUObjectWrapper=False,PinType.bSerializeAsSinglePrecisionFloat=False,LinkedTo=(K2Node_CallFunction_1 C9627ED047925BE492C2ED8292875066,),PersistentGuid=00000000000000000000000000000000,bHidden=False,bNotConnectable=False,bDefaultValueIsReadOnly=False,bDefaultValueIsIgnored=False,bAdvancedView=False,bOrphanedPin=False,)
   CustomProperties Pin (PinId=E4C47558417AA95F71E529AA81C3F285,PinName="then",Direction="EGPD_Output",PinType.PinCategory="exec",PinType.PinSubCategory="",PinType.PinSubCategoryObject=None,PinType.PinSubCategoryMemberReference=(),PinType.PinValueType=(),PinType.ContainerType=None,PinType.bIsReference=False,PinType.bIsConst=False,PinType.bIsWeakPointer=False,PinType.bIsUObjectWrapper=False,PinType.bSerializeAsSinglePrecisionFloat=False,LinkedTo=(K2Node_AssignDelegate_1 D453DB184A8026BC0D3EE99AC0265352,),PersistentGuid=00000000000000000000000000000000,bHidden=False,bNotConnectable=False,bDefaultValueIsReadOnly=False,bDefaultValueIsIgnored=False,bAdvancedView=False,bOrphanedPin=False,)
   CustomProperties Pin (PinId=8E41CB7241DF0A09379ABA998E389A24,PinName="CastFailed",Direction="EGPD_Output",PinType.PinCategory="exec",PinType.PinSubCategory="",PinType.PinSubCategoryObject=None,PinType.PinSubCategoryMemberReference=(),PinType.PinValueType=(),PinType.ContainerType=None,PinType.bIsReference=False,PinType.bIsConst=False,PinType.bIsWeakPointer=False,PinType.bIsUObjectWrapper=False,PinType.bSerializeAsSinglePrecisionFloat=False,PersistentGuid=00000000000000000000000000000000,bHidden=False,bNotConnectable=False,bDefaultValueIsReadOnly=False,bDefaultValueIsIgnored=False,bAdvancedView=False,bOrphanedPin=False,)
   CustomProperties Pin (PinId=3C9251E64E92FB5B79E42283A62168A8,PinName="Object",PinType.PinCategory="Object",PinType.PinSubCategory="",PinType.PinSubCategoryObject="/Script/CoreUObject.Class'/Script/CoreUObject.Object'",PinType.PinSubCategoryMemberReference=(),PinType.PinValueType=(),PinType.ContainerType=None,PinType.bIsReference=False,PinType.bIsConst=False,PinType.bIsWeakPointer=False,PinType.bIsUObjectWrapper=False,PinType.bSerializeAsSinglePrecisionFloat=False,LinkedTo=(K2Node_CallFunction_12 6F33D0C3438E65764913DFA57CE7273C,),PersistentGuid=00000000000000000000000000000000,bHidden=False,bNotConnectable=False,bDefaultValueIsReadOnly=False,bDefaultValueIsIgnored=False,bAdvancedView=False,bOrphanedPin=False,)
   CustomProperties Pin (PinId=C90E80264407C7300095CC960EDD63B7,PinName="AsGameface GameHUD",Direction="EGPD_Output",PinType.PinCategory="Object",PinType.PinSubCategory="",PinType.PinSubCategoryObject="/Script/CoreUObject.Class'/Script/CohtmlPlugin.CohtmlGameHUD'",PinType.PinSubCategoryMemberReference=(),PinType.PinValueType=(),PinType.ContainerType=None,PinType.bIsReference=False,PinType.bIsConst=False,PinType.bIsWeakPointer=False,PinType.bIsUObjectWrapper=False,PinType.bSerializeAsSinglePrecisionFloat=False,LinkedTo=(K2Node_VariableGet_1 827482DD44648B588F3B0B9C124E49C4,),PersistentGuid=00000000000000000000000000000000,bHidden=False,bNotConnectable=False,bDefaultValueIsReadOnly=False,bDefaultValueIsIgnored=False,bAdvancedView=False,bOrphanedPin=False,)
   CustomProperties Pin (PinId=707244E24FB5E04A499B99A10654DDB5,PinName="bSuccess",Direction="EGPD_Output",PinType.PinCategory="bool",PinType.PinSubCategory="",PinType.PinSubCategoryObject=None,PinType.PinSubCategoryMemberReference=(),PinType.PinValueType=(),PinType.ContainerType=None,PinType.bIsReference=False,PinType.bIsConst=False,PinType.bIsWeakPointer=False,PinType.bIsUObjectWrapper=False,PinType.bSerializeAsSinglePrecisionFloat=False,PersistentGuid=00000000000000000000000000000000,bHidden=True,bNotConnectable=False,bDefaultValueIsReadOnly=False,bDefaultValueIsIgnored=False,bAdvancedView=False,bOrphanedPin=False,)
End Object
Begin Object Class=/Script/BlueprintGraph.K2Node_CustomEvent Name="K2Node_CustomEvent_2" ExportPath="/Script/BlueprintGraph.K2Node_CustomEvent'/Game/Weapon.Weapon:EventGraph.K2Node_CustomEvent_2'"
   CustomFunctionName="ReadyForBindings_Event"
   NodePosX=1632
   NodePosY=176
   NodeGuid=95EA719543BEB7F80CD9D4B8DBAE82D9
   CustomProperties Pin (PinId=4F16979C4AB46052ED5FFA958978AA15,PinName="OutputDelegate",Direction="EGPD_Output",PinType.PinCategory="delegate",PinType.PinSubCategory="",PinType.PinSubCategoryObject=None,PinType.PinSubCategoryMemberReference=(MemberParent="/Script/Engine.BlueprintGeneratedClass'/Game/Weapon.Weapon_C'",MemberName="ReadyForBindings_Event",MemberGuid=95EA719543BEB7F80CD9D4B8DBAE82D9),PinType.PinValueType=(),PinType.ContainerType=None,PinType.bIsReference=False,PinType.bIsConst=False,PinType.bIsWeakPointer=False,PinType.bIsUObjectWrapper=False,PinType.bSerializeAsSinglePrecisionFloat=False,LinkedTo=(K2Node_AssignDelegate_1 CB93B7924C7F3EAEEE40F79D7951ADA0,),PersistentGuid=00000000000000000000000000000000,bHidden=False,bNotConnectable=False,bDefaultValueIsReadOnly=False,bDefaultValueIsIgnored=False,bAdvancedView=False,bOrphanedPin=False,)
   CustomProperties Pin (PinId=7D3E23F74351592A70CF4583D47293E9,PinName="then",Direction="EGPD_Output",PinType.PinCategory="exec",PinType.PinSubCategory="",PinType.PinSubCategoryObject=None,PinType.PinSubCategoryMemberReference=(),PinType.PinValueType=(),PinType.ContainerType=None,PinType.bIsReference=False,PinType.bIsConst=False,PinType.bIsWeakPointer=False,PinType.bIsUObjectWrapper=False,PinType.bSerializeAsSinglePrecisionFloat=False,LinkedTo=(K2Node_CallFunction_4 73D112C043A553883FA599A50A179592,),PersistentGuid=00000000000000000000000000000000,bHidden=False,bNotConnectable=False,bDefaultValueIsReadOnly=False,bDefaultValueIsIgnored=False,bAdvancedView=False,bOrphanedPin=False,)
End Object
Begin Object Class=/Script/BlueprintGraph.K2Node_AssignDelegate Name="K2Node_AssignDelegate_1" ExportPath="/Script/BlueprintGraph.K2Node_AssignDelegate'/Game/Weapon.Weapon:EventGraph.K2Node_AssignDelegate_1'"
   DelegateReference=(MemberParent="/Script/CoreUObject.Class'/Script/CohtmlPlugin.CohtmlBaseComponent'",MemberName="ReadyForBindings")
   NodePosX=1760
   NodePosY=-240
   NodeGuid=8CD115D94CA9EAD377622D85540CF142
   CustomProperties Pin (PinId=D453DB184A8026BC0D3EE99AC0265352,PinName="execute",PinType.PinCategory="exec",PinType.PinSubCategory="",PinType.PinSubCategoryObject=None,PinType.PinSubCategoryMemberReference=(),PinType.PinValueType=(),PinType.ContainerType=None,PinType.bIsReference=False,PinType.bIsConst=False,PinType.bIsWeakPointer=False,PinType.bIsUObjectWrapper=False,PinType.bSerializeAsSinglePrecisionFloat=False,LinkedTo=(K2Node_DynamicCast_0 E4C47558417AA95F71E529AA81C3F285,),PersistentGuid=00000000000000000000000000000000,bHidden=False,bNotConnectable=False,bDefaultValueIsReadOnly=False,bDefaultValueIsIgnored=False,bAdvancedView=False,bOrphanedPin=False,)
   CustomProperties Pin (PinId=DFC74ED14D01F43A2881C8BA92DB093E,PinName="then",Direction="EGPD_Output",PinType.PinCategory="exec",PinType.PinSubCategory="",PinType.PinSubCategoryObject=None,PinType.PinSubCategoryMemberReference=(),PinType.PinValueType=(),PinType.ContainerType=None,PinType.bIsReference=False,PinType.bIsConst=False,PinType.bIsWeakPointer=False,PinType.bIsUObjectWrapper=False,PinType.bSerializeAsSinglePrecisionFloat=False,LinkedTo=(K2Node_MacroInstance_2 3C0A3DB149CAB436CF6620812EF520CB,),PersistentGuid=00000000000000000000000000000000,bHidden=False,bNotConnectable=False,bDefaultValueIsReadOnly=False,bDefaultValueIsIgnored=False,bAdvancedView=False,bOrphanedPin=False,)
   CustomProperties Pin (PinId=98B5F5C945A226E535BED6BED0CFED92,PinName="self",PinFriendlyName=NSLOCTEXT("K2Node", "BaseMCDelegateSelfPinName", "Target"),PinType.PinCategory="object",PinType.PinSubCategory="",PinType.PinSubCategoryObject="/Script/CoreUObject.Class'/Script/CohtmlPlugin.CohtmlBaseComponent'",PinType.PinSubCategoryMemberReference=(),PinType.PinValueType=(),PinType.ContainerType=None,PinType.bIsReference=False,PinType.bIsConst=False,PinType.bIsWeakPointer=False,PinType.bIsUObjectWrapper=False,PinType.bSerializeAsSinglePrecisionFloat=False,LinkedTo=(K2Node_VariableGet_1 D6CF5E764474C873FA2A5DBEB0202864,),PersistentGuid=00000000000000000000000000000000,bHidden=False,bNotConnectable=False,bDefaultValueIsReadOnly=False,bDefaultValueIsIgnored=False,bAdvancedView=False,bOrphanedPin=False,)
   CustomProperties Pin (PinId=CB93B7924C7F3EAEEE40F79D7951ADA0,PinName="Delegate",PinFriendlyName=NSLOCTEXT("K2Node", "PinFriendlyDelegatetName", "Event"),PinType.PinCategory="delegate",PinType.PinSubCategory="",PinType.PinSubCategoryObject=None,PinType.PinSubCategoryMemberReference=(MemberParent="/Script/CoreUObject.Package'/Script/CohtmlPlugin'",MemberName="CohtmlReadyForBindings__DelegateSignature"),PinType.PinValueType=(),PinType.ContainerType=None,PinType.bIsReference=True,PinType.bIsConst=True,PinType.bIsWeakPointer=False,PinType.bIsUObjectWrapper=False,PinType.bSerializeAsSinglePrecisionFloat=False,LinkedTo=(K2Node_CustomEvent_2 4F16979C4AB46052ED5FFA958978AA15,),PersistentGuid=00000000000000000000000000000000,bHidden=False,bNotConnectable=False,bDefaultValueIsReadOnly=False,bDefaultValueIsIgnored=False,bAdvancedView=False,bOrphanedPin=False,)
End Object
Begin Object Class=/Script/BlueprintGraph.K2Node_VariableGet Name="K2Node_VariableGet_1" ExportPath="/Script/BlueprintGraph.K2Node_VariableGet'/Game/Weapon.Weapon:EventGraph.K2Node_VariableGet_1'"
   VariableReference=(MemberParent="/Script/CoreUObject.Class'/Script/CohtmlPlugin.CohtmlGameHUD'",MemberName="CohtmlHUD")
   SelfContextInfo=NotSelfContext
   NodePosX=1552
   NodePosY=64
   NodeGuid=8743D64B4A32210EF158E3B61EB16BDA
   CustomProperties Pin (PinId=D6CF5E764474C873FA2A5DBEB0202864,PinName="CohtmlHUD",PinFriendlyName=NSLOCTEXT("", "9AACF014402A85B4D22F448C3E2211C8", "Gameface HUD"),Direction="EGPD_Output",PinType.PinCategory="object",PinType.PinSubCategory="",PinType.PinSubCategoryObject="/Script/CoreUObject.Class'/Script/CohtmlPlugin.CohtmlHUD'",PinType.PinSubCategoryMemberReference=(),PinType.PinValueType=(),PinType.ContainerType=None,PinType.bIsReference=False,PinType.bIsConst=False,PinType.bIsWeakPointer=False,PinType.bIsUObjectWrapper=False,PinType.bSerializeAsSinglePrecisionFloat=False,LinkedTo=(K2Node_AssignDelegate_1 98B5F5C945A226E535BED6BED0CFED92,K2Node_CallFunction_4 AA673F02470D337A1CD44F8054FBF608,K2Node_CallFunction_5 A1CDE0AA42F31CBB1954DD94CCA22FFF,),PersistentGuid=00000000000000000000000000000000,bHidden=False,bNotConnectable=False,bDefaultValueIsReadOnly=False,bDefaultValueIsIgnored=False,bAdvancedView=False,bOrphanedPin=False,)
   CustomProperties Pin (PinId=827482DD44648B588F3B0B9C124E49C4,PinName="self",PinFriendlyName=NSLOCTEXT("K2Node", "Target", "Target"),PinType.PinCategory="object",PinType.PinSubCategory="",PinType.PinSubCategoryObject="/Script/CoreUObject.Class'/Script/CohtmlPlugin.CohtmlGameHUD'",PinType.PinSubCategoryMemberReference=(),PinType.PinValueType=(),PinType.ContainerType=None,PinType.bIsReference=False,PinType.bIsConst=False,PinType.bIsWeakPointer=False,PinType.bIsUObjectWrapper=False,PinType.bSerializeAsSinglePrecisionFloat=False,LinkedTo=(K2Node_DynamicCast_0 C90E80264407C7300095CC960EDD63B7,),PersistentGuid=00000000000000000000000000000000,bHidden=False,bNotConnectable=False,bDefaultValueIsReadOnly=False,bDefaultValueIsIgnored=False,bAdvancedView=False,bOrphanedPin=False,)
End Object
And then from the new event, we’ll do Register for Event for each of the events.
   Begin Object Class=/Script/BlueprintGraph.K2Node_CustomEvent Name="K2Node_CustomEvent_2" ExportPath="/Script/BlueprintGraph.K2Node_CustomEvent'/Game/Weapon.Weapon:EventGraph.K2Node_CustomEvent_2'"
   CustomFunctionName="ReadyForBindings_Event"
   NodePosX=2000
   NodePosY=-64
   NodeGuid=95EA719543BEB7F80CD9D4B8DBAE82D9
   CustomProperties Pin (PinId=4F16979C4AB46052ED5FFA958978AA15,PinName="OutputDelegate",Direction="EGPD_Output",PinType.PinCategory="delegate",PinType.PinSubCategory="",PinType.PinSubCategoryObject=None,PinType.PinSubCategoryMemberReference=(MemberParent="/Script/Engine.BlueprintGeneratedClass'/Game/Weapon.Weapon_C'",MemberName="ReadyForBindings_Event",MemberGuid=95EA719543BEB7F80CD9D4B8DBAE82D9),PinType.PinValueType=(),PinType.ContainerType=None,PinType.bIsReference=False,PinType.bIsConst=False,PinType.bIsWeakPointer=False,PinType.bIsUObjectWrapper=False,PinType.bSerializeAsSinglePrecisionFloat=False,LinkedTo=(K2Node_AssignDelegate_1 CB93B7924C7F3EAEEE40F79D7951ADA0,),PersistentGuid=00000000000000000000000000000000,bHidden=False,bNotConnectable=False,bDefaultValueIsReadOnly=False,bDefaultValueIsIgnored=False,bAdvancedView=False,bOrphanedPin=False,)
   CustomProperties Pin (PinId=7D3E23F74351592A70CF4583D47293E9,PinName="then",Direction="EGPD_Output",PinType.PinCategory="exec",PinType.PinSubCategory="",PinType.PinSubCategoryObject=None,PinType.PinSubCategoryMemberReference=(),PinType.PinValueType=(),PinType.ContainerType=None,PinType.bIsReference=False,PinType.bIsConst=False,PinType.bIsWeakPointer=False,PinType.bIsUObjectWrapper=False,PinType.bSerializeAsSinglePrecisionFloat=False,LinkedTo=(K2Node_CallFunction_4 73D112C043A553883FA599A50A179592,),PersistentGuid=00000000000000000000000000000000,bHidden=False,bNotConnectable=False,bDefaultValueIsReadOnly=False,bDefaultValueIsIgnored=False,bAdvancedView=False,bOrphanedPin=False,)
End Object
Begin Object Class=/Script/BlueprintGraph.K2Node_CallFunction Name="K2Node_CallFunction_4" ExportPath="/Script/BlueprintGraph.K2Node_CallFunction'/Game/Weapon.Weapon:EventGraph.K2Node_CallFunction_4'"
   FunctionReference=(MemberParent="/Script/CoreUObject.Class'/Script/CohtmlPlugin.CohtmlBaseComponent'",MemberName="RegisterForEvent")
   NodePosX=2320
   NodePosY=-32
   NodeGuid=8B98972941394DADF6BC899B0B9A2F9D
   CustomProperties Pin (PinId=73D112C043A553883FA599A50A179592,PinName="execute",PinType.PinCategory="exec",PinType.PinSubCategory="",PinType.PinSubCategoryObject=None,PinType.PinSubCategoryMemberReference=(),PinType.PinValueType=(),PinType.ContainerType=None,PinType.bIsReference=False,PinType.bIsConst=False,PinType.bIsWeakPointer=False,PinType.bIsUObjectWrapper=False,PinType.bSerializeAsSinglePrecisionFloat=False,LinkedTo=(K2Node_CustomEvent_2 7D3E23F74351592A70CF4583D47293E9,),PersistentGuid=00000000000000000000000000000000,bHidden=False,bNotConnectable=False,bDefaultValueIsReadOnly=False,bDefaultValueIsIgnored=False,bAdvancedView=False,bOrphanedPin=False,)
   CustomProperties Pin (PinId=2594D8434A3E01AE3672CEBB306B3BB4,PinName="then",Direction="EGPD_Output",PinType.PinCategory="exec",PinType.PinSubCategory="",PinType.PinSubCategoryObject=None,PinType.PinSubCategoryMemberReference=(),PinType.PinValueType=(),PinType.ContainerType=None,PinType.bIsReference=False,PinType.bIsConst=False,PinType.bIsWeakPointer=False,PinType.bIsUObjectWrapper=False,PinType.bSerializeAsSinglePrecisionFloat=False,LinkedTo=(K2Node_CallFunction_5 5A1C77664D51D1F9D1827D91568C4B25,),PersistentGuid=00000000000000000000000000000000,bHidden=False,bNotConnectable=False,bDefaultValueIsReadOnly=False,bDefaultValueIsIgnored=False,bAdvancedView=False,bOrphanedPin=False,)
   CustomProperties Pin (PinId=AA673F02470D337A1CD44F8054FBF608,PinName="self",PinFriendlyName=NSLOCTEXT("K2Node", "Target", "Target"),PinType.PinCategory="object",PinType.PinSubCategory="",PinType.PinSubCategoryObject="/Script/CoreUObject.Class'/Script/CohtmlPlugin.CohtmlBaseComponent'",PinType.PinSubCategoryMemberReference=(),PinType.PinValueType=(),PinType.ContainerType=None,PinType.bIsReference=False,PinType.bIsConst=False,PinType.bIsWeakPointer=False,PinType.bIsUObjectWrapper=False,PinType.bSerializeAsSinglePrecisionFloat=False,LinkedTo=(K2Node_VariableGet_1 D6CF5E764474C873FA2A5DBEB0202864,),PersistentGuid=00000000000000000000000000000000,bHidden=False,bNotConnectable=False,bDefaultValueIsReadOnly=False,bDefaultValueIsIgnored=False,bAdvancedView=False,bOrphanedPin=False,)
   CustomProperties Pin (PinId=3F65821C402C7D608CE5C3901FFD7CFA,PinName="JSEventName",PinFriendlyName=NSLOCTEXT("", "6CA520B14A1D5EF2D61420A50F1B9525", "JavaScript Event Name"),PinType.PinCategory="string",PinType.PinSubCategory="",PinType.PinSubCategoryObject=None,PinType.PinSubCategoryMemberReference=(),PinType.PinValueType=(),PinType.ContainerType=None,PinType.bIsReference=False,PinType.bIsConst=False,PinType.bIsWeakPointer=False,PinType.bIsUObjectWrapper=False,PinType.bSerializeAsSinglePrecisionFloat=False,DefaultValue="rotateCameraLeft",PersistentGuid=00000000000000000000000000000000,bHidden=False,bNotConnectable=False,bDefaultValueIsReadOnly=False,bDefaultValueIsIgnored=False,bAdvancedView=False,bOrphanedPin=False,)
   CustomProperties Pin (PinId=93760E9C4A2EB4FC489ACEB012AAED6A,PinName="Delegate",PinFriendlyName=NSLOCTEXT("", "D18C16984BC9DA9739A770B56D5DC6A8", "Event"),PinType.PinCategory="delegate",PinType.PinSubCategory="",PinType.PinSubCategoryObject=None,PinType.PinSubCategoryMemberReference=(MemberParent="/Script/CoreUObject.Package'/Script/CohtmlPlugin'",MemberName="CohtmlJSEventBPCallback__DelegateSignature"),PinType.PinValueType=(),PinType.ContainerType=None,PinType.bIsReference=False,PinType.bIsConst=False,PinType.bIsWeakPointer=False,PinType.bIsUObjectWrapper=False,PinType.bSerializeAsSinglePrecisionFloat=False,LinkedTo=(K2Node_CustomEvent_4 379011AD44FE616C93790EAD48EDD302,),PersistentGuid=00000000000000000000000000000000,bHidden=False,bNotConnectable=False,bDefaultValueIsReadOnly=False,bDefaultValueIsIgnored=False,bAdvancedView=False,bOrphanedPin=False,)
End Object
Begin Object Class=/Script/BlueprintGraph.K2Node_CallFunction Name="K2Node_CallFunction_5" ExportPath="/Script/BlueprintGraph.K2Node_CallFunction'/Game/Weapon.Weapon:EventGraph.K2Node_CallFunction_5'"
   FunctionReference=(MemberParent="/Script/CoreUObject.Class'/Script/CohtmlPlugin.CohtmlBaseComponent'",MemberName="RegisterForEvent")
   NodePosX=2784
   NodePosY=-32
   NodeGuid=0618FCBC40FE88B035ACE8A6267CFD98
   CustomProperties Pin (PinId=5A1C77664D51D1F9D1827D91568C4B25,PinName="execute",PinType.PinCategory="exec",PinType.PinSubCategory="",PinType.PinSubCategoryObject=None,PinType.PinSubCategoryMemberReference=(),PinType.PinValueType=(),PinType.ContainerType=None,PinType.bIsReference=False,PinType.bIsConst=False,PinType.bIsWeakPointer=False,PinType.bIsUObjectWrapper=False,PinType.bSerializeAsSinglePrecisionFloat=False,LinkedTo=(K2Node_CallFunction_4 2594D8434A3E01AE3672CEBB306B3BB4,),PersistentGuid=00000000000000000000000000000000,bHidden=False,bNotConnectable=False,bDefaultValueIsReadOnly=False,bDefaultValueIsIgnored=False,bAdvancedView=False,bOrphanedPin=False,)
   CustomProperties Pin (PinId=90E599A24A0F168CA6E1129156F5C284,PinName="then",Direction="EGPD_Output",PinType.PinCategory="exec",PinType.PinSubCategory="",PinType.PinSubCategoryObject=None,PinType.PinSubCategoryMemberReference=(),PinType.PinValueType=(),PinType.ContainerType=None,PinType.bIsReference=False,PinType.bIsConst=False,PinType.bIsWeakPointer=False,PinType.bIsUObjectWrapper=False,PinType.bSerializeAsSinglePrecisionFloat=False,PersistentGuid=00000000000000000000000000000000,bHidden=False,bNotConnectable=False,bDefaultValueIsReadOnly=False,bDefaultValueIsIgnored=False,bAdvancedView=False,bOrphanedPin=False,)
   CustomProperties Pin (PinId=A1CDE0AA42F31CBB1954DD94CCA22FFF,PinName="self",PinFriendlyName=NSLOCTEXT("K2Node", "Target", "Target"),PinType.PinCategory="object",PinType.PinSubCategory="",PinType.PinSubCategoryObject="/Script/CoreUObject.Class'/Script/CohtmlPlugin.CohtmlBaseComponent'",PinType.PinSubCategoryMemberReference=(),PinType.PinValueType=(),PinType.ContainerType=None,PinType.bIsReference=False,PinType.bIsConst=False,PinType.bIsWeakPointer=False,PinType.bIsUObjectWrapper=False,PinType.bSerializeAsSinglePrecisionFloat=False,LinkedTo=(K2Node_VariableGet_1 D6CF5E764474C873FA2A5DBEB0202864,),PersistentGuid=00000000000000000000000000000000,bHidden=False,bNotConnectable=False,bDefaultValueIsReadOnly=False,bDefaultValueIsIgnored=False,bAdvancedView=False,bOrphanedPin=False,)
   CustomProperties Pin (PinId=A0123BC049D87E1A61A3ACACDCDDA245,PinName="JSEventName",PinFriendlyName=NSLOCTEXT("", "29DBC89A45A3E13312D1EE86E296F722", "JavaScript Event Name"),PinType.PinCategory="string",PinType.PinSubCategory="",PinType.PinSubCategoryObject=None,PinType.PinSubCategoryMemberReference=(),PinType.PinValueType=(),PinType.ContainerType=None,PinType.bIsReference=False,PinType.bIsConst=False,PinType.bIsWeakPointer=False,PinType.bIsUObjectWrapper=False,PinType.bSerializeAsSinglePrecisionFloat=False,DefaultValue="rotateCameraRight",PersistentGuid=00000000000000000000000000000000,bHidden=False,bNotConnectable=False,bDefaultValueIsReadOnly=False,bDefaultValueIsIgnored=False,bAdvancedView=False,bOrphanedPin=False,)
   CustomProperties Pin (PinId=734BD1D14037F912EA3F83B8480D2275,PinName="Delegate",PinFriendlyName=NSLOCTEXT("", "797A950B4C381A259680DFBC1E837505", "Event"),PinType.PinCategory="delegate",PinType.PinSubCategory="",PinType.PinSubCategoryObject=None,PinType.PinSubCategoryMemberReference=(MemberParent="/Script/CoreUObject.Package'/Script/CohtmlPlugin'",MemberName="CohtmlJSEventBPCallback__DelegateSignature"),PinType.PinValueType=(),PinType.ContainerType=None,PinType.bIsReference=False,PinType.bIsConst=False,PinType.bIsWeakPointer=False,PinType.bIsUObjectWrapper=False,PinType.bSerializeAsSinglePrecisionFloat=False,LinkedTo=(K2Node_CustomEvent_5 2966EBF94E5977A912FE88A3AC1A2CA7,),PersistentGuid=00000000000000000000000000000000,bHidden=False,bNotConnectable=False,bDefaultValueIsReadOnly=False,bDefaultValueIsIgnored=False,bAdvancedView=False,bOrphanedPin=False,)
End Object
Begin Object Class=/Script/BlueprintGraph.K2Node_VariableGet Name="K2Node_VariableGet_1" ExportPath="/Script/BlueprintGraph.K2Node_VariableGet'/Game/Weapon.Weapon:EventGraph.K2Node_VariableGet_1'"
   VariableReference=(MemberParent="/Script/CoreUObject.Class'/Script/CohtmlPlugin.CohtmlGameHUD'",MemberName="CohtmlHUD")
   SelfContextInfo=NotSelfContext
   NodePosX=1920
   NodePosY=48
   NodeGuid=8743D64B4A32210EF158E3B61EB16BDA
   CustomProperties Pin (PinId=D6CF5E764474C873FA2A5DBEB0202864,PinName="CohtmlHUD",PinFriendlyName=NSLOCTEXT("", "9AACF014402A85B4D22F448C3E2211C8", "Gameface HUD"),Direction="EGPD_Output",PinType.PinCategory="object",PinType.PinSubCategory="",PinType.PinSubCategoryObject="/Script/CoreUObject.Class'/Script/CohtmlPlugin.CohtmlHUD'",PinType.PinSubCategoryMemberReference=(),PinType.PinValueType=(),PinType.ContainerType=None,PinType.bIsReference=False,PinType.bIsConst=False,PinType.bIsWeakPointer=False,PinType.bIsUObjectWrapper=False,PinType.bSerializeAsSinglePrecisionFloat=False,LinkedTo=(K2Node_AssignDelegate_1 98B5F5C945A226E535BED6BED0CFED92,K2Node_CallFunction_4 AA673F02470D337A1CD44F8054FBF608,K2Node_CallFunction_5 A1CDE0AA42F31CBB1954DD94CCA22FFF,),PersistentGuid=00000000000000000000000000000000,bHidden=False,bNotConnectable=False,bDefaultValueIsReadOnly=False,bDefaultValueIsIgnored=False,bAdvancedView=False,bOrphanedPin=False,)
   CustomProperties Pin (PinId=827482DD44648B588F3B0B9C124E49C4,PinName="self",PinFriendlyName=NSLOCTEXT("K2Node", "Target", "Target"),PinType.PinCategory="object",PinType.PinSubCategory="",PinType.PinSubCategoryObject="/Script/CoreUObject.Class'/Script/CohtmlPlugin.CohtmlGameHUD'",PinType.PinSubCategoryMemberReference=(),PinType.PinValueType=(),PinType.ContainerType=None,PinType.bIsReference=False,PinType.bIsConst=False,PinType.bIsWeakPointer=False,PinType.bIsUObjectWrapper=False,PinType.bSerializeAsSinglePrecisionFloat=False,LinkedTo=(K2Node_DynamicCast_0 C90E80264407C7300095CC960EDD63B7,),PersistentGuid=00000000000000000000000000000000,bHidden=False,bNotConnectable=False,bDefaultValueIsReadOnly=False,bDefaultValueIsIgnored=False,bAdvancedView=False,bOrphanedPin=False,)
End Object
We’ll create an angle variable, so that whenever we change the rotation, we’ll rotate from the current position and not the initial. Then using this angle variable, we’ll add 10 degrees to it and set in the Arrow component world rotation. For the rotateCameraRight we’ll just subtract 10.
   Begin Object Class=/Script/BlueprintGraph.K2Node_CustomEvent Name="K2Node_CustomEvent_4" ExportPath="/Script/BlueprintGraph.K2Node_CustomEvent'/Game/Weapon.Weapon:EventGraph.K2Node_CustomEvent_4'"
   CustomFunctionName="rotateLeft"
   NodePosX=1696
   NodePosY=512
   NodeGuid=5BBE452E478F12E7009955AD8DD0CB22
   CustomProperties Pin (PinId=379011AD44FE616C93790EAD48EDD302,PinName="OutputDelegate",Direction="EGPD_Output",PinType.PinCategory="delegate",PinType.PinSubCategory="",PinType.PinSubCategoryObject=None,PinType.PinSubCategoryMemberReference=(MemberParent="/Script/Engine.BlueprintGeneratedClass'/Game/Weapon.Weapon_C'",MemberName="rotateLeft",MemberGuid=5BBE452E478F12E7009955AD8DD0CB22),PinType.PinValueType=(),PinType.ContainerType=None,PinType.bIsReference=False,PinType.bIsConst=False,PinType.bIsWeakPointer=False,PinType.bIsUObjectWrapper=False,PinType.bSerializeAsSinglePrecisionFloat=False,LinkedTo=(K2Node_CallFunction_4 93760E9C4A2EB4FC489ACEB012AAED6A,),PersistentGuid=00000000000000000000000000000000,bHidden=False,bNotConnectable=False,bDefaultValueIsReadOnly=False,bDefaultValueIsIgnored=False,bAdvancedView=False,bOrphanedPin=False,)
   CustomProperties Pin (PinId=0F97B6C54C3B7792AAE710B16B26D028,PinName="then",Direction="EGPD_Output",PinType.PinCategory="exec",PinType.PinSubCategory="",PinType.PinSubCategoryObject=None,PinType.PinSubCategoryMemberReference=(),PinType.PinValueType=(),PinType.ContainerType=None,PinType.bIsReference=False,PinType.bIsConst=False,PinType.bIsWeakPointer=False,PinType.bIsUObjectWrapper=False,PinType.bSerializeAsSinglePrecisionFloat=False,LinkedTo=(K2Node_CallFunction_11 186BCA544F636BB784EBA98D95ADB6ED,),PersistentGuid=00000000000000000000000000000000,bHidden=False,bNotConnectable=False,bDefaultValueIsReadOnly=False,bDefaultValueIsIgnored=False,bAdvancedView=False,bOrphanedPin=False,)
End Object
Begin Object Class=/Script/BlueprintGraph.K2Node_CallFunction Name="K2Node_CallFunction_11" ExportPath="/Script/BlueprintGraph.K2Node_CallFunction'/Game/Weapon.Weapon:EventGraph.K2Node_CallFunction_11'"
   FunctionReference=(MemberParent="/Script/CoreUObject.Class'/Script/Engine.SceneComponent'",MemberName="K2_SetWorldRotation")
   NodePosX=2304
   NodePosY=528
   AdvancedPinDisplay=Hidden
   NodeGuid=DF58687D4C5ACC12CEFF1DBF97BCD779
   CustomProperties Pin (PinId=186BCA544F636BB784EBA98D95ADB6ED,PinName="execute",PinType.PinCategory="exec",PinType.PinSubCategory="",PinType.PinSubCategoryObject=None,PinType.PinSubCategoryMemberReference=(),PinType.PinValueType=(),PinType.ContainerType=None,PinType.bIsReference=False,PinType.bIsConst=False,PinType.bIsWeakPointer=False,PinType.bIsUObjectWrapper=False,PinType.bSerializeAsSinglePrecisionFloat=False,LinkedTo=(K2Node_CustomEvent_4 0F97B6C54C3B7792AAE710B16B26D028,),PersistentGuid=00000000000000000000000000000000,bHidden=False,bNotConnectable=False,bDefaultValueIsReadOnly=False,bDefaultValueIsIgnored=False,bAdvancedView=False,bOrphanedPin=False,)
   CustomProperties Pin (PinId=CF943D3E4AD1007BB1E76FB16AF6F1A2,PinName="then",Direction="EGPD_Output",PinType.PinCategory="exec",PinType.PinSubCategory="",PinType.PinSubCategoryObject=None,PinType.PinSubCategoryMemberReference=(),PinType.PinValueType=(),PinType.ContainerType=None,PinType.bIsReference=False,PinType.bIsConst=False,PinType.bIsWeakPointer=False,PinType.bIsUObjectWrapper=False,PinType.bSerializeAsSinglePrecisionFloat=False,LinkedTo=(K2Node_VariableSet_3 0FFDD34245E7370A765515985F872B42,),PersistentGuid=00000000000000000000000000000000,bHidden=False,bNotConnectable=False,bDefaultValueIsReadOnly=False,bDefaultValueIsIgnored=False,bAdvancedView=False,bOrphanedPin=False,)
   CustomProperties Pin (PinId=3F4B7D8847A4CC2CF82974AF2C5B0E78,PinName="self",PinFriendlyName=NSLOCTEXT("K2Node", "Target", "Target"),PinType.PinCategory="object",PinType.PinSubCategory="",PinType.PinSubCategoryObject="/Script/CoreUObject.Class'/Script/Engine.SceneComponent'",PinType.PinSubCategoryMemberReference=(),PinType.PinValueType=(),PinType.ContainerType=None,PinType.bIsReference=False,PinType.bIsConst=False,PinType.bIsWeakPointer=False,PinType.bIsUObjectWrapper=False,PinType.bSerializeAsSinglePrecisionFloat=False,LinkedTo=(K2Node_VariableGet_3 5F240F3047AC421314E46F8DD8A4C8EF,),PersistentGuid=00000000000000000000000000000000,bHidden=False,bNotConnectable=False,bDefaultValueIsReadOnly=False,bDefaultValueIsIgnored=False,bAdvancedView=False,bOrphanedPin=False,)
   CustomProperties Pin (PinId=2FFDDC4E4E9325D1154E239D49BC7937,PinName="NewRotation",PinType.PinCategory="struct",PinType.PinSubCategory="",PinType.PinSubCategoryObject="/Script/CoreUObject.ScriptStruct'/Script/CoreUObject.Rotator'",PinType.PinSubCategoryMemberReference=(),PinType.PinValueType=(),PinType.ContainerType=None,PinType.bIsReference=False,PinType.bIsConst=False,PinType.bIsWeakPointer=False,PinType.bIsUObjectWrapper=False,PinType.bSerializeAsSinglePrecisionFloat=False,DefaultValue="0, 0, 0",AutogeneratedDefaultValue="0, 0, 0",SubPins=(K2Node_CallFunction_11 40A2E2D94034CF22E29824BB075B4232,K2Node_CallFunction_11 01A9E8104BAAA118B1B079931B9E7C73,K2Node_CallFunction_11 5A777C014ECEDD50E28D0298553C7569,),PersistentGuid=00000000000000000000000000000000,bHidden=True,bNotConnectable=False,bDefaultValueIsReadOnly=False,bDefaultValueIsIgnored=False,bAdvancedView=False,bOrphanedPin=False,)
   CustomProperties Pin (PinId=40A2E2D94034CF22E29824BB075B4232,PinName="NewRotation_Roll",PinFriendlyName=LOCGEN_FORMAT_NAMED(NSLOCTEXT("KismetSchema", "SplitPinFriendlyNameFormat", "{PinDisplayName} {ProtoPinDisplayName}"), "PinDisplayName", NSLOCTEXT("", "63D6BB9A4F0B02BE42522885188970E7", "New Rotation"), "ProtoPinDisplayName", NSLOCTEXT("", "DB56C4B04A724B535FB80EAFC5484DEE", "X (Roll)")),PinType.PinCategory="real",PinType.PinSubCategory="float",PinType.PinSubCategoryObject=None,PinType.PinSubCategoryMemberReference=(),PinType.PinValueType=(),PinType.ContainerType=None,PinType.bIsReference=False,PinType.bIsConst=False,PinType.bIsWeakPointer=False,PinType.bIsUObjectWrapper=False,PinType.bSerializeAsSinglePrecisionFloat=False,DefaultValue="0.0",AutogeneratedDefaultValue="0.0",ParentPin=K2Node_CallFunction_11 2FFDDC4E4E9325D1154E239D49BC7937,PersistentGuid=00000000000000000000000000000000,bHidden=False,bNotConnectable=False,bDefaultValueIsReadOnly=False,bDefaultValueIsIgnored=False,bAdvancedView=False,bOrphanedPin=False,)
   CustomProperties Pin (PinId=01A9E8104BAAA118B1B079931B9E7C73,PinName="NewRotation_Pitch",PinFriendlyName=LOCGEN_FORMAT_NAMED(NSLOCTEXT("KismetSchema", "SplitPinFriendlyNameFormat", "{PinDisplayName} {ProtoPinDisplayName}"), "PinDisplayName", NSLOCTEXT("", "F0F2A4D34914D80A5676EDA5988EC748", "New Rotation"), "ProtoPinDisplayName", NSLOCTEXT("", "104101CC4B0358D293B1628ECAF5E254", "Y (Pitch)")),PinType.PinCategory="real",PinType.PinSubCategory="float",PinType.PinSubCategoryObject=None,PinType.PinSubCategoryMemberReference=(),PinType.PinValueType=(),PinType.ContainerType=None,PinType.bIsReference=False,PinType.bIsConst=False,PinType.bIsWeakPointer=False,PinType.bIsUObjectWrapper=False,PinType.bSerializeAsSinglePrecisionFloat=False,DefaultValue="0.0",AutogeneratedDefaultValue="0.0",ParentPin=K2Node_CallFunction_11 2FFDDC4E4E9325D1154E239D49BC7937,PersistentGuid=00000000000000000000000000000000,bHidden=False,bNotConnectable=False,bDefaultValueIsReadOnly=False,bDefaultValueIsIgnored=False,bAdvancedView=False,bOrphanedPin=False,)
   CustomProperties Pin (PinId=5A777C014ECEDD50E28D0298553C7569,PinName="NewRotation_Yaw",PinFriendlyName=LOCGEN_FORMAT_NAMED(NSLOCTEXT("KismetSchema", "SplitPinFriendlyNameFormat", "{PinDisplayName} {ProtoPinDisplayName}"), "PinDisplayName", NSLOCTEXT("", "EC444AF24FC440018C5927838C1C6B47", "New Rotation"), "ProtoPinDisplayName", NSLOCTEXT("", "006AF3FE4997A9FAB37D0484D1B72C5A", "Z (Yaw)")),PinType.PinCategory="real",PinType.PinSubCategory="float",PinType.PinSubCategoryObject=None,PinType.PinSubCategoryMemberReference=(),PinType.PinValueType=(),PinType.ContainerType=None,PinType.bIsReference=False,PinType.bIsConst=False,PinType.bIsWeakPointer=False,PinType.bIsUObjectWrapper=False,PinType.bSerializeAsSinglePrecisionFloat=False,DefaultValue="0.0",AutogeneratedDefaultValue="0.0",LinkedTo=(K2Node_PromotableOperator_0 914300654E95D50F57E6D3998725ED19,),ParentPin=K2Node_CallFunction_11 2FFDDC4E4E9325D1154E239D49BC7937,PersistentGuid=00000000000000000000000000000000,bHidden=False,bNotConnectable=False,bDefaultValueIsReadOnly=False,bDefaultValueIsIgnored=False,bAdvancedView=False,bOrphanedPin=False,)
   CustomProperties Pin (PinId=26BBA0FB403743D5436A37B5ADBBED9D,PinName="bSweep",PinType.PinCategory="bool",PinType.PinSubCategory="",PinType.PinSubCategoryObject=None,PinType.PinSubCategoryMemberReference=(),PinType.PinValueType=(),PinType.ContainerType=None,PinType.bIsReference=False,PinType.bIsConst=False,PinType.bIsWeakPointer=False,PinType.bIsUObjectWrapper=False,PinType.bSerializeAsSinglePrecisionFloat=False,DefaultValue="false",AutogeneratedDefaultValue="false",PersistentGuid=00000000000000000000000000000000,bHidden=False,bNotConnectable=False,bDefaultValueIsReadOnly=False,bDefaultValueIsIgnored=False,bAdvancedView=True,bOrphanedPin=False,)
   CustomProperties Pin (PinId=4213851B44D1229289F9FDBB6629B9B0,PinName="SweepHitResult",Direction="EGPD_Output",PinType.PinCategory="struct",PinType.PinSubCategory="",PinType.PinSubCategoryObject="/Script/CoreUObject.ScriptStruct'/Script/Engine.HitResult'",PinType.PinSubCategoryMemberReference=(),PinType.PinValueType=(),PinType.ContainerType=None,PinType.bIsReference=False,PinType.bIsConst=False,PinType.bIsWeakPointer=False,PinType.bIsUObjectWrapper=False,PinType.bSerializeAsSinglePrecisionFloat=False,PersistentGuid=00000000000000000000000000000000,bHidden=False,bNotConnectable=False,bDefaultValueIsReadOnly=False,bDefaultValueIsIgnored=False,bAdvancedView=True,bOrphanedPin=False,)
   CustomProperties Pin (PinId=3ACE721C47660ECFAF96E3BCAFA531ED,PinName="bTeleport",PinType.PinCategory="bool",PinType.PinSubCategory="",PinType.PinSubCategoryObject=None,PinType.PinSubCategoryMemberReference=(),PinType.PinValueType=(),PinType.ContainerType=None,PinType.bIsReference=False,PinType.bIsConst=False,PinType.bIsWeakPointer=False,PinType.bIsUObjectWrapper=False,PinType.bSerializeAsSinglePrecisionFloat=False,DefaultValue="false",AutogeneratedDefaultValue="false",PersistentGuid=00000000000000000000000000000000,bHidden=False,bNotConnectable=False,bDefaultValueIsReadOnly=False,bDefaultValueIsIgnored=False,bAdvancedView=True,bOrphanedPin=False,)
End Object
Begin Object Class=/Script/BlueprintGraph.K2Node_VariableGet Name="K2Node_VariableGet_10" ExportPath="/Script/BlueprintGraph.K2Node_VariableGet'/Game/Weapon.Weapon:EventGraph.K2Node_VariableGet_10'"
   VariableReference=(MemberName="angle",MemberGuid=4584CEA84B44519A132DE2A3D9702672,bSelfContext=True)
   NodePosX=1856
   NodePosY=704
   NodeGuid=458BE740414917738C5F3F957A5D961D
   CustomProperties Pin (PinId=E30D550749C1C92EEAB5F2BD887E8FB6,PinName="angle",Direction="EGPD_Output",PinType.PinCategory="real",PinType.PinSubCategory="double",PinType.PinSubCategoryObject=None,PinType.PinSubCategoryMemberReference=(),PinType.PinValueType=(),PinType.ContainerType=None,PinType.bIsReference=False,PinType.bIsConst=False,PinType.bIsWeakPointer=False,PinType.bIsUObjectWrapper=False,PinType.bSerializeAsSinglePrecisionFloat=False,DefaultValue="0.0",AutogeneratedDefaultValue="0.0",LinkedTo=(K2Node_PromotableOperator_0 7AF9682341969643F1BFB48757276B30,),PersistentGuid=00000000000000000000000000000000,bHidden=False,bNotConnectable=False,bDefaultValueIsReadOnly=False,bDefaultValueIsIgnored=False,bAdvancedView=False,bOrphanedPin=False,)
   CustomProperties Pin (PinId=B5B7F84641339D917E3AA49B823BACD6,PinName="self",PinFriendlyName=NSLOCTEXT("K2Node", "Target", "Target"),PinType.PinCategory="object",PinType.PinSubCategory="",PinType.PinSubCategoryObject="/Script/Engine.BlueprintGeneratedClass'/Game/Weapon.Weapon_C'",PinType.PinSubCategoryMemberReference=(),PinType.PinValueType=(),PinType.ContainerType=None,PinType.bIsReference=False,PinType.bIsConst=False,PinType.bIsWeakPointer=False,PinType.bIsUObjectWrapper=False,PinType.bSerializeAsSinglePrecisionFloat=False,PersistentGuid=00000000000000000000000000000000,bHidden=True,bNotConnectable=False,bDefaultValueIsReadOnly=False,bDefaultValueIsIgnored=False,bAdvancedView=False,bOrphanedPin=False,)
End Object
Begin Object Class=/Script/BlueprintGraph.K2Node_VariableSet Name="K2Node_VariableSet_3" ExportPath="/Script/BlueprintGraph.K2Node_VariableSet'/Game/Weapon.Weapon:EventGraph.K2Node_VariableSet_3'"
   VariableReference=(MemberName="angle",MemberGuid=4584CEA84B44519A132DE2A3D9702672,bSelfContext=True)
   NodePosX=2640
   NodePosY=560
   NodeGuid=9C0472FA411AEB4236DA2BA08AB64832
   CustomProperties Pin (PinId=0FFDD34245E7370A765515985F872B42,PinName="execute",PinType.PinCategory="exec",PinType.PinSubCategory="",PinType.PinSubCategoryObject=None,PinType.PinSubCategoryMemberReference=(),PinType.PinValueType=(),PinType.ContainerType=None,PinType.bIsReference=False,PinType.bIsConst=False,PinType.bIsWeakPointer=False,PinType.bIsUObjectWrapper=False,PinType.bSerializeAsSinglePrecisionFloat=False,LinkedTo=(K2Node_CallFunction_11 CF943D3E4AD1007BB1E76FB16AF6F1A2,),PersistentGuid=00000000000000000000000000000000,bHidden=False,bNotConnectable=False,bDefaultValueIsReadOnly=False,bDefaultValueIsIgnored=False,bAdvancedView=False,bOrphanedPin=False,)
   CustomProperties Pin (PinId=677D179D4C00A86165F9B88F14E40B76,PinName="then",Direction="EGPD_Output",PinType.PinCategory="exec",PinType.PinSubCategory="",PinType.PinSubCategoryObject=None,PinType.PinSubCategoryMemberReference=(),PinType.PinValueType=(),PinType.ContainerType=None,PinType.bIsReference=False,PinType.bIsConst=False,PinType.bIsWeakPointer=False,PinType.bIsUObjectWrapper=False,PinType.bSerializeAsSinglePrecisionFloat=False,PersistentGuid=00000000000000000000000000000000,bHidden=False,bNotConnectable=False,bDefaultValueIsReadOnly=False,bDefaultValueIsIgnored=False,bAdvancedView=False,bOrphanedPin=False,)
   CustomProperties Pin (PinId=5567215A4C3DB3C73212AC90B28E5B47,PinName="angle",PinType.PinCategory="real",PinType.PinSubCategory="double",PinType.PinSubCategoryObject=None,PinType.PinSubCategoryMemberReference=(),PinType.PinValueType=(),PinType.ContainerType=None,PinType.bIsReference=False,PinType.bIsConst=False,PinType.bIsWeakPointer=False,PinType.bIsUObjectWrapper=False,PinType.bSerializeAsSinglePrecisionFloat=False,DefaultValue="0.0",AutogeneratedDefaultValue="0.0",LinkedTo=(K2Node_PromotableOperator_0 914300654E95D50F57E6D3998725ED19,),PersistentGuid=00000000000000000000000000000000,bHidden=False,bNotConnectable=False,bDefaultValueIsReadOnly=False,bDefaultValueIsIgnored=False,bAdvancedView=False,bOrphanedPin=False,)
   CustomProperties Pin (PinId=6931B139420321ADB056F8A9018225E0,PinName="Output_Get",PinToolTip="Retrieves the value of the variable, can use instead of a separate Get node",Direction="EGPD_Output",PinType.PinCategory="real",PinType.PinSubCategory="double",PinType.PinSubCategoryObject=None,PinType.PinSubCategoryMemberReference=(),PinType.PinValueType=(),PinType.ContainerType=None,PinType.bIsReference=False,PinType.bIsConst=False,PinType.bIsWeakPointer=False,PinType.bIsUObjectWrapper=False,PinType.bSerializeAsSinglePrecisionFloat=False,DefaultValue="0.0",AutogeneratedDefaultValue="0.0",PersistentGuid=00000000000000000000000000000000,bHidden=False,bNotConnectable=False,bDefaultValueIsReadOnly=False,bDefaultValueIsIgnored=False,bAdvancedView=False,bOrphanedPin=False,)
   CustomProperties Pin (PinId=CAA319DE4C473FDFEE0E25BF7A9E9509,PinName="self",PinFriendlyName=NSLOCTEXT("K2Node", "Target", "Target"),PinType.PinCategory="object",PinType.PinSubCategory="",PinType.PinSubCategoryObject="/Script/Engine.BlueprintGeneratedClass'/Game/Weapon.Weapon_C'",PinType.PinSubCategoryMemberReference=(),PinType.PinValueType=(),PinType.ContainerType=None,PinType.bIsReference=False,PinType.bIsConst=False,PinType.bIsWeakPointer=False,PinType.bIsUObjectWrapper=False,PinType.bSerializeAsSinglePrecisionFloat=False,PersistentGuid=00000000000000000000000000000000,bHidden=True,bNotConnectable=False,bDefaultValueIsReadOnly=False,bDefaultValueIsIgnored=False,bAdvancedView=False,bOrphanedPin=False,)
End Object
Begin Object Class=/Script/BlueprintGraph.K2Node_PromotableOperator Name="K2Node_PromotableOperator_0" ExportPath="/Script/BlueprintGraph.K2Node_PromotableOperator'/Game/Weapon.Weapon:EventGraph.K2Node_PromotableOperator_0'"
   bIsPureFunc=True
   FunctionReference=(MemberParent="/Script/CoreUObject.Class'/Script/Engine.KismetMathLibrary'",MemberName="Add_DoubleDouble")
   NodePosX=2064
   NodePosY=784
   NodeGuid=9B473B3A4A2B33EE23EE76BEA78ECBB5
   CustomProperties Pin (PinId=7AF9682341969643F1BFB48757276B30,PinName="A",PinType.PinCategory="real",PinType.PinSubCategory="double",PinType.PinSubCategoryObject=None,PinType.PinSubCategoryMemberReference=(),PinType.PinValueType=(),PinType.ContainerType=None,PinType.bIsReference=False,PinType.bIsConst=False,PinType.bIsWeakPointer=False,PinType.bIsUObjectWrapper=False,PinType.bSerializeAsSinglePrecisionFloat=False,LinkedTo=(K2Node_VariableGet_10 E30D550749C1C92EEAB5F2BD887E8FB6,),PersistentGuid=00000000000000000000000000000000,bHidden=False,bNotConnectable=False,bDefaultValueIsReadOnly=False,bDefaultValueIsIgnored=False,bAdvancedView=False,bOrphanedPin=False,)
   CustomProperties Pin (PinId=1D238FB34AF56BD71EC2E3A0ADD932F2,PinName="B",PinType.PinCategory="real",PinType.PinSubCategory="double",PinType.PinSubCategoryObject=None,PinType.PinSubCategoryMemberReference=(),PinType.PinValueType=(),PinType.ContainerType=None,PinType.bIsReference=False,PinType.bIsConst=False,PinType.bIsWeakPointer=False,PinType.bIsUObjectWrapper=False,PinType.bSerializeAsSinglePrecisionFloat=False,DefaultValue="10.000000",PersistentGuid=00000000000000000000000000000000,bHidden=False,bNotConnectable=False,bDefaultValueIsReadOnly=False,bDefaultValueIsIgnored=False,bAdvancedView=False,bOrphanedPin=False,)
   CustomProperties Pin (PinId=914300654E95D50F57E6D3998725ED19,PinName="ReturnValue",Direction="EGPD_Output",PinType.PinCategory="real",PinType.PinSubCategory="double",PinType.PinSubCategoryObject=None,PinType.PinSubCategoryMemberReference=(),PinType.PinValueType=(),PinType.ContainerType=None,PinType.bIsReference=False,PinType.bIsConst=False,PinType.bIsWeakPointer=False,PinType.bIsUObjectWrapper=False,PinType.bSerializeAsSinglePrecisionFloat=False,LinkedTo=(K2Node_CallFunction_11 5A777C014ECEDD50E28D0298553C7569,K2Node_VariableSet_3 5567215A4C3DB3C73212AC90B28E5B47,),PersistentGuid=00000000000000000000000000000000,bHidden=False,bNotConnectable=False,bDefaultValueIsReadOnly=False,bDefaultValueIsIgnored=False,bAdvancedView=False,bOrphanedPin=False,)
End Object
Begin Object Class=/Script/BlueprintGraph.K2Node_VariableGet Name="K2Node_VariableGet_3" ExportPath="/Script/BlueprintGraph.K2Node_VariableGet'/Game/Weapon.Weapon:EventGraph.K2Node_VariableGet_3'"
   VariableReference=(MemberName="Arrow",bSelfContext=True)
   NodePosX=2144
   NodePosY=416
   NodeGuid=64D5FCE84AC9691825FA499FAFCCABC7
   CustomProperties Pin (PinId=5F240F3047AC421314E46F8DD8A4C8EF,PinName="Arrow",Direction="EGPD_Output",PinType.PinCategory="object",PinType.PinSubCategory="",PinType.PinSubCategoryObject="/Script/CoreUObject.Class'/Script/Engine.ArrowComponent'",PinType.PinSubCategoryMemberReference=(),PinType.PinValueType=(),PinType.ContainerType=None,PinType.bIsReference=False,PinType.bIsConst=False,PinType.bIsWeakPointer=False,PinType.bIsUObjectWrapper=False,PinType.bSerializeAsSinglePrecisionFloat=False,LinkedTo=(K2Node_CallFunction_11 3F4B7D8847A4CC2CF82974AF2C5B0E78,),PersistentGuid=00000000000000000000000000000000,bHidden=False,bNotConnectable=False,bDefaultValueIsReadOnly=False,bDefaultValueIsIgnored=False,bAdvancedView=False,bOrphanedPin=False,)
   CustomProperties Pin (PinId=9AEA043D42E01344F70382880AEC6F88,PinName="self",PinFriendlyName=NSLOCTEXT("K2Node", "Target", "Target"),PinType.PinCategory="object",PinType.PinSubCategory="",PinType.PinSubCategoryObject="/Script/Engine.BlueprintGeneratedClass'/Game/Weapon.Weapon_C'",PinType.PinSubCategoryMemberReference=(),PinType.PinValueType=(),PinType.ContainerType=None,PinType.bIsReference=False,PinType.bIsConst=False,PinType.bIsWeakPointer=False,PinType.bIsUObjectWrapper=False,PinType.bSerializeAsSinglePrecisionFloat=False,PersistentGuid=00000000000000000000000000000000,bHidden=True,bNotConnectable=False,bDefaultValueIsReadOnly=False,bDefaultValueIsIgnored=False,bAdvancedView=False,bOrphanedPin=False,)
End Object
   Begin Object Class=/Script/BlueprintGraph.K2Node_CustomEvent Name="K2Node_CustomEvent_5" ExportPath="/Script/BlueprintGraph.K2Node_CustomEvent'/Game/Weapon.Weapon:EventGraph.K2Node_CustomEvent_5'"
   CustomFunctionName="rotateRight"
   NodePosX=2832
   NodePosY=336
   NodeGuid=415ED4E140E648943C606EA40E45419C
   CustomProperties Pin (PinId=2966EBF94E5977A912FE88A3AC1A2CA7,PinName="OutputDelegate",Direction="EGPD_Output",PinType.PinCategory="delegate",PinType.PinSubCategory="",PinType.PinSubCategoryObject=None,PinType.PinSubCategoryMemberReference=(MemberParent="/Script/Engine.BlueprintGeneratedClass'/Game/Weapon.Weapon_C'",MemberName="rotateRight",MemberGuid=415ED4E140E648943C606EA40E45419C),PinType.PinValueType=(),PinType.ContainerType=None,PinType.bIsReference=False,PinType.bIsConst=False,PinType.bIsWeakPointer=False,PinType.bIsUObjectWrapper=False,PinType.bSerializeAsSinglePrecisionFloat=False,LinkedTo=(K2Node_CallFunction_5 734BD1D14037F912EA3F83B8480D2275,),PersistentGuid=00000000000000000000000000000000,bHidden=False,bNotConnectable=False,bDefaultValueIsReadOnly=False,bDefaultValueIsIgnored=False,bAdvancedView=False,bOrphanedPin=False,)
   CustomProperties Pin (PinId=07B5826049EF5191D9DBCB9C9922BE3E,PinName="then",Direction="EGPD_Output",PinType.PinCategory="exec",PinType.PinSubCategory="",PinType.PinSubCategoryObject=None,PinType.PinSubCategoryMemberReference=(),PinType.PinValueType=(),PinType.ContainerType=None,PinType.bIsReference=False,PinType.bIsConst=False,PinType.bIsWeakPointer=False,PinType.bIsUObjectWrapper=False,PinType.bSerializeAsSinglePrecisionFloat=False,LinkedTo=(K2Node_CallFunction_9 186BCA544F636BB784EBA98D95ADB6ED,),PersistentGuid=00000000000000000000000000000000,bHidden=False,bNotConnectable=False,bDefaultValueIsReadOnly=False,bDefaultValueIsIgnored=False,bAdvancedView=False,bOrphanedPin=False,)
End Object
Begin Object Class=/Script/BlueprintGraph.K2Node_CallFunction Name="K2Node_CallFunction_9" ExportPath="/Script/BlueprintGraph.K2Node_CallFunction'/Game/Weapon.Weapon:EventGraph.K2Node_CallFunction_9'"
   FunctionReference=(MemberParent="/Script/CoreUObject.Class'/Script/Engine.SceneComponent'",MemberName="K2_SetWorldRotation")
   NodePosX=3312
   NodePosY=336
   AdvancedPinDisplay=Hidden
   NodeGuid=ABC7767747EA0C98B2D98EB46AE55894
   CustomProperties Pin (PinId=186BCA544F636BB784EBA98D95ADB6ED,PinName="execute",PinToolTip="
Exec",PinType.PinCategory="exec",PinType.PinSubCategory="",PinType.PinSubCategoryObject=None,PinType.PinSubCategoryMemberReference=(),PinType.PinValueType=(),PinType.ContainerType=None,PinType.bIsReference=False,PinType.bIsConst=False,PinType.bIsWeakPointer=False,PinType.bIsUObjectWrapper=False,PinType.bSerializeAsSinglePrecisionFloat=False,LinkedTo=(K2Node_CustomEvent_5 07B5826049EF5191D9DBCB9C9922BE3E,),PersistentGuid=00000000000000000000000000000000,bHidden=False,bNotConnectable=False,bDefaultValueIsReadOnly=False,bDefaultValueIsIgnored=False,bAdvancedView=False,bOrphanedPin=False,)
   CustomProperties Pin (PinId=CF943D3E4AD1007BB1E76FB16AF6F1A2,PinName="then",PinToolTip="
Exec",Direction="EGPD_Output",PinType.PinCategory="exec",PinType.PinSubCategory="",PinType.PinSubCategoryObject=None,PinType.PinSubCategoryMemberReference=(),PinType.PinValueType=(),PinType.ContainerType=None,PinType.bIsReference=False,PinType.bIsConst=False,PinType.bIsWeakPointer=False,PinType.bIsUObjectWrapper=False,PinType.bSerializeAsSinglePrecisionFloat=False,LinkedTo=(K2Node_VariableSet_2 0FFDD34245E7370A765515985F872B42,),PersistentGuid=00000000000000000000000000000000,bHidden=False,bNotConnectable=False,bDefaultValueIsReadOnly=False,bDefaultValueIsIgnored=False,bAdvancedView=False,bOrphanedPin=False,)
   CustomProperties Pin (PinId=3F4B7D8847A4CC2CF82974AF2C5B0E78,PinName="self",PinFriendlyName=NSLOCTEXT("K2Node", "Target", "Target"),PinToolTip="Target
Scene Component Object Reference",PinType.PinCategory="object",PinType.PinSubCategory="",PinType.PinSubCategoryObject="/Script/CoreUObject.Class'/Script/Engine.SceneComponent'",PinType.PinSubCategoryMemberReference=(),PinType.PinValueType=(),PinType.ContainerType=None,PinType.bIsReference=False,PinType.bIsConst=False,PinType.bIsWeakPointer=False,PinType.bIsUObjectWrapper=False,PinType.bSerializeAsSinglePrecisionFloat=False,LinkedTo=(K2Node_VariableGet_0 E464856A4CA22455494CAA9F1ABBD8EB,),PersistentGuid=00000000000000000000000000000000,bHidden=False,bNotConnectable=False,bDefaultValueIsReadOnly=False,bDefaultValueIsIgnored=False,bAdvancedView=False,bOrphanedPin=False,)
   CustomProperties Pin (PinId=2FFDDC4E4E9325D1154E239D49BC7937,PinName="NewRotation",PinToolTip="New Rotation
Rotator

New rotation in world space for the component. *",PinType.PinCategory="struct",PinType.PinSubCategory="",PinType.PinSubCategoryObject="/Script/CoreUObject.ScriptStruct'/Script/CoreUObject.Rotator'",PinType.PinSubCategoryMemberReference=(),PinType.PinValueType=(),PinType.ContainerType=None,PinType.bIsReference=False,PinType.bIsConst=False,PinType.bIsWeakPointer=False,PinType.bIsUObjectWrapper=False,PinType.bSerializeAsSinglePrecisionFloat=False,DefaultValue="0, 0, 0",AutogeneratedDefaultValue="0, 0, 0",SubPins=(K2Node_CallFunction_9 40A2E2D94034CF22E29824BB075B4232,K2Node_CallFunction_9 01A9E8104BAAA118B1B079931B9E7C73,K2Node_CallFunction_9 5A777C014ECEDD50E28D0298553C7569,),PersistentGuid=00000000000000000000000000000000,bHidden=True,bNotConnectable=False,bDefaultValueIsReadOnly=False,bDefaultValueIsIgnored=False,bAdvancedView=False,bOrphanedPin=False,)
   CustomProperties Pin (PinId=40A2E2D94034CF22E29824BB075B4232,PinName="NewRotation_Roll",PinFriendlyName=LOCGEN_FORMAT_NAMED(NSLOCTEXT("KismetSchema", "SplitPinFriendlyNameFormat", "{PinDisplayName} {ProtoPinDisplayName}"), "PinDisplayName", NSLOCTEXT("", "236E841448E89B9359C1769FEF0B2F0D", "New Rotation"), "ProtoPinDisplayName", NSLOCTEXT("", "206E672B4A7721284048A9AD8D62C5A5", "X (Roll)")),PinToolTip="New Rotation X (Roll)
Float (single-precision)",PinType.PinCategory="real",PinType.PinSubCategory="float",PinType.PinSubCategoryObject=None,PinType.PinSubCategoryMemberReference=(),PinType.PinValueType=(),PinType.ContainerType=None,PinType.bIsReference=False,PinType.bIsConst=False,PinType.bIsWeakPointer=False,PinType.bIsUObjectWrapper=False,PinType.bSerializeAsSinglePrecisionFloat=False,DefaultValue="0.0",AutogeneratedDefaultValue="0.0",ParentPin=K2Node_CallFunction_9 2FFDDC4E4E9325D1154E239D49BC7937,PersistentGuid=00000000000000000000000000000000,bHidden=False,bNotConnectable=False,bDefaultValueIsReadOnly=False,bDefaultValueIsIgnored=False,bAdvancedView=False,bOrphanedPin=False,)
   CustomProperties Pin (PinId=01A9E8104BAAA118B1B079931B9E7C73,PinName="NewRotation_Pitch",PinFriendlyName=LOCGEN_FORMAT_NAMED(NSLOCTEXT("KismetSchema", "SplitPinFriendlyNameFormat", "{PinDisplayName} {ProtoPinDisplayName}"), "PinDisplayName", NSLOCTEXT("", "0ED708AD4F990F618DCBDA88D14C9C85", "New Rotation"), "ProtoPinDisplayName", NSLOCTEXT("", "BE32597C4104642282DF4EB3D982D8D7", "Y (Pitch)")),PinToolTip="New Rotation Y (Pitch)
Float (single-precision)",PinType.PinCategory="real",PinType.PinSubCategory="float",PinType.PinSubCategoryObject=None,PinType.PinSubCategoryMemberReference=(),PinType.PinValueType=(),PinType.ContainerType=None,PinType.bIsReference=False,PinType.bIsConst=False,PinType.bIsWeakPointer=False,PinType.bIsUObjectWrapper=False,PinType.bSerializeAsSinglePrecisionFloat=False,DefaultValue="0.0",AutogeneratedDefaultValue="0.0",ParentPin=K2Node_CallFunction_9 2FFDDC4E4E9325D1154E239D49BC7937,PersistentGuid=00000000000000000000000000000000,bHidden=False,bNotConnectable=False,bDefaultValueIsReadOnly=False,bDefaultValueIsIgnored=False,bAdvancedView=False,bOrphanedPin=False,)
   CustomProperties Pin (PinId=5A777C014ECEDD50E28D0298553C7569,PinName="NewRotation_Yaw",PinFriendlyName=LOCGEN_FORMAT_NAMED(NSLOCTEXT("KismetSchema", "SplitPinFriendlyNameFormat", "{PinDisplayName} {ProtoPinDisplayName}"), "PinDisplayName", NSLOCTEXT("", "D871ED594118FD9F29851FB963C01166", "New Rotation"), "ProtoPinDisplayName", NSLOCTEXT("", "C16B5BB24088C765BAC0A09D26A4C8EA", "Z (Yaw)")),PinToolTip="New Rotation Z (Yaw)
Float (single-precision)",PinType.PinCategory="real",PinType.PinSubCategory="float",PinType.PinSubCategoryObject=None,PinType.PinSubCategoryMemberReference=(),PinType.PinValueType=(),PinType.ContainerType=None,PinType.bIsReference=False,PinType.bIsConst=False,PinType.bIsWeakPointer=False,PinType.bIsUObjectWrapper=False,PinType.bSerializeAsSinglePrecisionFloat=False,DefaultValue="0.0",AutogeneratedDefaultValue="0.0",LinkedTo=(K2Node_PromotableOperator_5 120E8C0040A91A1DF7E38BAD93A9A0BF,),ParentPin=K2Node_CallFunction_9 2FFDDC4E4E9325D1154E239D49BC7937,PersistentGuid=00000000000000000000000000000000,bHidden=False,bNotConnectable=False,bDefaultValueIsReadOnly=False,bDefaultValueIsIgnored=False,bAdvancedView=False,bOrphanedPin=False,)
   CustomProperties Pin (PinId=26BBA0FB403743D5436A37B5ADBBED9D,PinName="bSweep",PinToolTip="Sweep
Boolean

Whether we sweep to the destination (currently not supported for rotation). *",PinType.PinCategory="bool",PinType.PinSubCategory="",PinType.PinSubCategoryObject=None,PinType.PinSubCategoryMemberReference=(),PinType.PinValueType=(),PinType.ContainerType=None,PinType.bIsReference=False,PinType.bIsConst=False,PinType.bIsWeakPointer=False,PinType.bIsUObjectWrapper=False,PinType.bSerializeAsSinglePrecisionFloat=False,DefaultValue="false",AutogeneratedDefaultValue="false",PersistentGuid=00000000000000000000000000000000,bHidden=False,bNotConnectable=False,bDefaultValueIsReadOnly=False,bDefaultValueIsIgnored=False,bAdvancedView=True,bOrphanedPin=False,)
   CustomProperties Pin (PinId=4213851B44D1229289F9FDBB6629B9B0,PinName="SweepHitResult",PinToolTip="Sweep Hit Result
Hit Result Structure

Hit result from any impact if sweep is true. *",Direction="EGPD_Output",PinType.PinCategory="struct",PinType.PinSubCategory="",PinType.PinSubCategoryObject="/Script/CoreUObject.ScriptStruct'/Script/Engine.HitResult'",PinType.PinSubCategoryMemberReference=(),PinType.PinValueType=(),PinType.ContainerType=None,PinType.bIsReference=False,PinType.bIsConst=False,PinType.bIsWeakPointer=False,PinType.bIsUObjectWrapper=False,PinType.bSerializeAsSinglePrecisionFloat=False,PersistentGuid=00000000000000000000000000000000,bHidden=False,bNotConnectable=False,bDefaultValueIsReadOnly=False,bDefaultValueIsIgnored=False,bAdvancedView=True,bOrphanedPin=False,)
   CustomProperties Pin (PinId=3ACE721C47660ECFAF96E3BCAFA531ED,PinName="bTeleport",PinToolTip="Teleport
Boolean

Whether we teleport the physics state (if physics collision is enabled for this object). *                                                      If true, physics velocity for this object is unchanged (so ragdoll parts are not affected by change in location). *                                                      If false, physics velocity is updated based on the change in position (affecting ragdoll parts). *                                                      If CCD is on and not teleporting, this will affect objects along the entire sweep volume.",PinType.PinCategory="bool",PinType.PinSubCategory="",PinType.PinSubCategoryObject=None,PinType.PinSubCategoryMemberReference=(),PinType.PinValueType=(),PinType.ContainerType=None,PinType.bIsReference=False,PinType.bIsConst=False,PinType.bIsWeakPointer=False,PinType.bIsUObjectWrapper=False,PinType.bSerializeAsSinglePrecisionFloat=False,DefaultValue="false",AutogeneratedDefaultValue="false",PersistentGuid=00000000000000000000000000000000,bHidden=False,bNotConnectable=False,bDefaultValueIsReadOnly=False,bDefaultValueIsIgnored=False,bAdvancedView=True,bOrphanedPin=False,)
End Object
Begin Object Class=/Script/BlueprintGraph.K2Node_VariableGet Name="K2Node_VariableGet_9" ExportPath="/Script/BlueprintGraph.K2Node_VariableGet'/Game/Weapon.Weapon:EventGraph.K2Node_VariableGet_9'"
   VariableReference=(MemberName="angle",MemberGuid=4584CEA84B44519A132DE2A3D9702672,bSelfContext=True)
   NodePosX=2944
   NodePosY=480
   NodeGuid=0A136599472FAAB8AB18E194B5FD5AD4
   CustomProperties Pin (PinId=E30D550749C1C92EEAB5F2BD887E8FB6,PinName="angle",Direction="EGPD_Output",PinType.PinCategory="real",PinType.PinSubCategory="double",PinType.PinSubCategoryObject=None,PinType.PinSubCategoryMemberReference=(),PinType.PinValueType=(),PinType.ContainerType=None,PinType.bIsReference=False,PinType.bIsConst=False,PinType.bIsWeakPointer=False,PinType.bIsUObjectWrapper=False,PinType.bSerializeAsSinglePrecisionFloat=False,DefaultValue="0.0",AutogeneratedDefaultValue="0.0",LinkedTo=(K2Node_PromotableOperator_5 42BF7E414671FA11348F388213CBAEEA,),PersistentGuid=00000000000000000000000000000000,bHidden=False,bNotConnectable=False,bDefaultValueIsReadOnly=False,bDefaultValueIsIgnored=False,bAdvancedView=False,bOrphanedPin=False,)
   CustomProperties Pin (PinId=446790F74EEA2A72518A11B3E0C70D9E,PinName="self",PinFriendlyName=NSLOCTEXT("K2Node", "Target", "Target"),PinType.PinCategory="object",PinType.PinSubCategory="",PinType.PinSubCategoryObject="/Script/Engine.BlueprintGeneratedClass'/Game/Weapon.Weapon_C'",PinType.PinSubCategoryMemberReference=(),PinType.PinValueType=(),PinType.ContainerType=None,PinType.bIsReference=False,PinType.bIsConst=False,PinType.bIsWeakPointer=False,PinType.bIsUObjectWrapper=False,PinType.bSerializeAsSinglePrecisionFloat=False,PersistentGuid=00000000000000000000000000000000,bHidden=True,bNotConnectable=False,bDefaultValueIsReadOnly=False,bDefaultValueIsIgnored=False,bAdvancedView=False,bOrphanedPin=False,)
End Object
Begin Object Class=/Script/BlueprintGraph.K2Node_VariableSet Name="K2Node_VariableSet_2" ExportPath="/Script/BlueprintGraph.K2Node_VariableSet'/Game/Weapon.Weapon:EventGraph.K2Node_VariableSet_2'"
   VariableReference=(MemberName="angle",MemberGuid=4584CEA84B44519A132DE2A3D9702672,bSelfContext=True)
   NodePosX=3712
   NodePosY=368
   NodeGuid=2E7FE60F40CDE2D839FD959D9BCB5958
   CustomProperties Pin (PinId=0FFDD34245E7370A765515985F872B42,PinName="execute",PinType.PinCategory="exec",PinType.PinSubCategory="",PinType.PinSubCategoryObject=None,PinType.PinSubCategoryMemberReference=(),PinType.PinValueType=(),PinType.ContainerType=None,PinType.bIsReference=False,PinType.bIsConst=False,PinType.bIsWeakPointer=False,PinType.bIsUObjectWrapper=False,PinType.bSerializeAsSinglePrecisionFloat=False,LinkedTo=(K2Node_CallFunction_9 CF943D3E4AD1007BB1E76FB16AF6F1A2,),PersistentGuid=00000000000000000000000000000000,bHidden=False,bNotConnectable=False,bDefaultValueIsReadOnly=False,bDefaultValueIsIgnored=False,bAdvancedView=False,bOrphanedPin=False,)
   CustomProperties Pin (PinId=677D179D4C00A86165F9B88F14E40B76,PinName="then",Direction="EGPD_Output",PinType.PinCategory="exec",PinType.PinSubCategory="",PinType.PinSubCategoryObject=None,PinType.PinSubCategoryMemberReference=(),PinType.PinValueType=(),PinType.ContainerType=None,PinType.bIsReference=False,PinType.bIsConst=False,PinType.bIsWeakPointer=False,PinType.bIsUObjectWrapper=False,PinType.bSerializeAsSinglePrecisionFloat=False,PersistentGuid=00000000000000000000000000000000,bHidden=False,bNotConnectable=False,bDefaultValueIsReadOnly=False,bDefaultValueIsIgnored=False,bAdvancedView=False,bOrphanedPin=False,)
   CustomProperties Pin (PinId=5567215A4C3DB3C73212AC90B28E5B47,PinName="angle",PinType.PinCategory="real",PinType.PinSubCategory="double",PinType.PinSubCategoryObject=None,PinType.PinSubCategoryMemberReference=(),PinType.PinValueType=(),PinType.ContainerType=None,PinType.bIsReference=False,PinType.bIsConst=False,PinType.bIsWeakPointer=False,PinType.bIsUObjectWrapper=False,PinType.bSerializeAsSinglePrecisionFloat=False,DefaultValue="0.0",AutogeneratedDefaultValue="0.0",LinkedTo=(K2Node_PromotableOperator_5 120E8C0040A91A1DF7E38BAD93A9A0BF,),PersistentGuid=00000000000000000000000000000000,bHidden=False,bNotConnectable=False,bDefaultValueIsReadOnly=False,bDefaultValueIsIgnored=False,bAdvancedView=False,bOrphanedPin=False,)
   CustomProperties Pin (PinId=6931B139420321ADB056F8A9018225E0,PinName="Output_Get",PinToolTip="Retrieves the value of the variable, can use instead of a separate Get node",Direction="EGPD_Output",PinType.PinCategory="real",PinType.PinSubCategory="double",PinType.PinSubCategoryObject=None,PinType.PinSubCategoryMemberReference=(),PinType.PinValueType=(),PinType.ContainerType=None,PinType.bIsReference=False,PinType.bIsConst=False,PinType.bIsWeakPointer=False,PinType.bIsUObjectWrapper=False,PinType.bSerializeAsSinglePrecisionFloat=False,DefaultValue="0.0",AutogeneratedDefaultValue="0.0",PersistentGuid=00000000000000000000000000000000,bHidden=False,bNotConnectable=False,bDefaultValueIsReadOnly=False,bDefaultValueIsIgnored=False,bAdvancedView=False,bOrphanedPin=False,)
   CustomProperties Pin (PinId=B4C383FA43816D40831FCFBD67518196,PinName="self",PinFriendlyName=NSLOCTEXT("K2Node", "Target", "Target"),PinType.PinCategory="object",PinType.PinSubCategory="",PinType.PinSubCategoryObject="/Script/Engine.BlueprintGeneratedClass'/Game/Weapon.Weapon_C'",PinType.PinSubCategoryMemberReference=(),PinType.PinValueType=(),PinType.ContainerType=None,PinType.bIsReference=False,PinType.bIsConst=False,PinType.bIsWeakPointer=False,PinType.bIsUObjectWrapper=False,PinType.bSerializeAsSinglePrecisionFloat=False,PersistentGuid=00000000000000000000000000000000,bHidden=True,bNotConnectable=False,bDefaultValueIsReadOnly=False,bDefaultValueIsIgnored=False,bAdvancedView=False,bOrphanedPin=False,)
End Object
Begin Object Class=/Script/BlueprintGraph.K2Node_PromotableOperator Name="K2Node_PromotableOperator_5" ExportPath="/Script/BlueprintGraph.K2Node_PromotableOperator'/Game/Weapon.Weapon:EventGraph.K2Node_PromotableOperator_5'"
   bIsPureFunc=True
   FunctionReference=(MemberParent="/Script/CoreUObject.Class'/Script/Engine.KismetMathLibrary'",MemberName="Subtract_DoubleDouble")
   NodePosX=3104
   NodePosY=544
   NodeGuid=F1B3F21F4D82E2F359E748BA694CBC60
   CustomProperties Pin (PinId=42BF7E414671FA11348F388213CBAEEA,PinName="A",PinType.PinCategory="real",PinType.PinSubCategory="double",PinType.PinSubCategoryObject=None,PinType.PinSubCategoryMemberReference=(),PinType.PinValueType=(),PinType.ContainerType=None,PinType.bIsReference=False,PinType.bIsConst=False,PinType.bIsWeakPointer=False,PinType.bIsUObjectWrapper=False,PinType.bSerializeAsSinglePrecisionFloat=False,LinkedTo=(K2Node_VariableGet_9 E30D550749C1C92EEAB5F2BD887E8FB6,),PersistentGuid=00000000000000000000000000000000,bHidden=False,bNotConnectable=False,bDefaultValueIsReadOnly=False,bDefaultValueIsIgnored=False,bAdvancedView=False,bOrphanedPin=False,)
   CustomProperties Pin (PinId=1DC4A38A4487BBF942A9ECAE568249E1,PinName="B",PinType.PinCategory="real",PinType.PinSubCategory="double",PinType.PinSubCategoryObject=None,PinType.PinSubCategoryMemberReference=(),PinType.PinValueType=(),PinType.ContainerType=None,PinType.bIsReference=False,PinType.bIsConst=False,PinType.bIsWeakPointer=False,PinType.bIsUObjectWrapper=False,PinType.bSerializeAsSinglePrecisionFloat=False,DefaultValue="10.000000",PersistentGuid=00000000000000000000000000000000,bHidden=False,bNotConnectable=False,bDefaultValueIsReadOnly=False,bDefaultValueIsIgnored=False,bAdvancedView=False,bOrphanedPin=False,)
   CustomProperties Pin (PinId=120E8C0040A91A1DF7E38BAD93A9A0BF,PinName="ReturnValue",Direction="EGPD_Output",PinType.PinCategory="real",PinType.PinSubCategory="double",PinType.PinSubCategoryObject=None,PinType.PinSubCategoryMemberReference=(),PinType.PinValueType=(),PinType.ContainerType=None,PinType.bIsReference=False,PinType.bIsConst=False,PinType.bIsWeakPointer=False,PinType.bIsUObjectWrapper=False,PinType.bSerializeAsSinglePrecisionFloat=False,LinkedTo=(K2Node_CallFunction_9 5A777C014ECEDD50E28D0298553C7569,K2Node_VariableSet_2 5567215A4C3DB3C73212AC90B28E5B47,),PersistentGuid=00000000000000000000000000000000,bHidden=False,bNotConnectable=False,bDefaultValueIsReadOnly=False,bDefaultValueIsIgnored=False,bAdvancedView=False,bOrphanedPin=False,)
End Object
Begin Object Class=/Script/BlueprintGraph.K2Node_VariableGet Name="K2Node_VariableGet_0" ExportPath="/Script/BlueprintGraph.K2Node_VariableGet'/Game/Weapon.Weapon:EventGraph.K2Node_VariableGet_0'"
   VariableReference=(MemberName="Arrow",bSelfContext=True)
   NodePosX=3120
   NodePosY=208
   NodeGuid=2AB6B31F438CBDBC816C969E69C5C272
   CustomProperties Pin (PinId=E464856A4CA22455494CAA9F1ABBD8EB,PinName="Arrow",Direction="EGPD_Output",PinType.PinCategory="object",PinType.PinSubCategory="",PinType.PinSubCategoryObject="/Script/CoreUObject.Class'/Script/Engine.ArrowComponent'",PinType.PinSubCategoryMemberReference=(),PinType.PinValueType=(),PinType.ContainerType=None,PinType.bIsReference=False,PinType.bIsConst=False,PinType.bIsWeakPointer=False,PinType.bIsUObjectWrapper=False,PinType.bSerializeAsSinglePrecisionFloat=False,LinkedTo=(K2Node_CallFunction_9 3F4B7D8847A4CC2CF82974AF2C5B0E78,),PersistentGuid=00000000000000000000000000000000,bHidden=False,bNotConnectable=False,bDefaultValueIsReadOnly=False,bDefaultValueIsIgnored=False,bAdvancedView=False,bOrphanedPin=False,)
   CustomProperties Pin (PinId=D3C8F9334B279EDF4E6307B324F5A9B1,PinName="self",PinFriendlyName=NSLOCTEXT("K2Node", "Target", "Target"),PinType.PinCategory="object",PinType.PinSubCategory="",PinType.PinSubCategoryObject="/Script/Engine.BlueprintGeneratedClass'/Game/Weapon.Weapon_C'",PinType.PinSubCategoryMemberReference=(),PinType.PinValueType=(),PinType.ContainerType=None,PinType.bIsReference=False,PinType.bIsConst=False,PinType.bIsWeakPointer=False,PinType.bIsUObjectWrapper=False,PinType.bSerializeAsSinglePrecisionFloat=False,PersistentGuid=00000000000000000000000000000000,bHidden=True,bNotConnectable=False,bDefaultValueIsReadOnly=False,bDefaultValueIsIgnored=False,bAdvancedView=False,bOrphanedPin=False,)
End Object
Hiding and Showing the items
First thing we need to do is to uncheck the visible setting for all of the items. This way we don’t have to hide everything on load and then show the correct item.

Then in the blueprints of the Weapon actor we can add a function, that will hide or show a weapon, we can call it toggleWeapon and we can pass the name of the weapon, if it’s shown or not. This function will loop through all of the weapons and hides or shows the correct weapon.
   Begin Object Class=/Script/BlueprintGraph.K2Node_FunctionEntry Name="K2Node_FunctionEntry_0" ExportPath="/Script/BlueprintGraph.K2Node_FunctionEntry'/Game/Weapon.Weapon:toggleWeapon.K2Node_FunctionEntry_0'"
   ExtraFlags=201457664
   FunctionReference=(MemberName="toggleWeapon")
   bIsEditable=True
   NodePosX=-192
   NodeGuid=FF550BCD4B9B57E253A155A4F808A62F
   CustomProperties Pin (PinId=0DE6F112473A071833F665BB2089F5A7,PinName="then",Direction="EGPD_Output",PinType.PinCategory="exec",PinType.PinSubCategory="",PinType.PinSubCategoryObject=None,PinType.PinSubCategoryMemberReference=(),PinType.PinValueType=(),PinType.ContainerType=None,PinType.bIsReference=False,PinType.bIsConst=False,PinType.bIsWeakPointer=False,PinType.bIsUObjectWrapper=False,PinType.bSerializeAsSinglePrecisionFloat=False,LinkedTo=(K2Node_MacroInstance_0 175FE6D84859CFF0C7FD41AE8A5421A7,),PersistentGuid=00000000000000000000000000000000,bHidden=False,bNotConnectable=False,bDefaultValueIsReadOnly=False,bDefaultValueIsIgnored=False,bAdvancedView=False,bOrphanedPin=False,)
   CustomProperties Pin (PinId=FD7625CA44AF5CF12DA59FA7712738ED,PinName="weapon",Direction="EGPD_Output",PinType.PinCategory="string",PinType.PinSubCategory="",PinType.PinSubCategoryObject=None,PinType.PinSubCategoryMemberReference=(),PinType.PinValueType=(),PinType.ContainerType=None,PinType.bIsReference=False,PinType.bIsConst=False,PinType.bIsWeakPointer=False,PinType.bIsUObjectWrapper=False,PinType.bSerializeAsSinglePrecisionFloat=False,LinkedTo=(K2Node_CallFunction_4 CFBEC159472C4519A1225981185901D9,),PersistentGuid=00000000000000000000000000000000,bHidden=False,bNotConnectable=False,bDefaultValueIsReadOnly=False,bDefaultValueIsIgnored=False,bAdvancedView=False,bOrphanedPin=False,)
   CustomProperties Pin (PinId=7D7CD4E94CB6D87642D9FA9CCA0A58D3,PinName="visible",Direction="EGPD_Output",PinType.PinCategory="bool",PinType.PinSubCategory="",PinType.PinSubCategoryObject=None,PinType.PinSubCategoryMemberReference=(),PinType.PinValueType=(),PinType.ContainerType=None,PinType.bIsReference=False,PinType.bIsConst=False,PinType.bIsWeakPointer=False,PinType.bIsUObjectWrapper=False,PinType.bSerializeAsSinglePrecisionFloat=False,LinkedTo=(K2Node_CallFunction_5 83BE2F6746A48AB671E5B88B29F05B42,K2Node_IfThenElse_0 8B96751C4008C65EA5FA9B90228063F5,),PersistentGuid=00000000000000000000000000000000,bHidden=False,bNotConnectable=False,bDefaultValueIsReadOnly=False,bDefaultValueIsIgnored=False,bAdvancedView=False,bOrphanedPin=False,)
   CustomProperties UserDefinedPin (PinName="weapon",PinType=(PinCategory="string"),DesiredPinDirection=EGPD_Output)
   CustomProperties UserDefinedPin (PinName="visible",PinType=(PinCategory="bool"),DesiredPinDirection=EGPD_Output)
End Object
Begin Object Class=/Script/BlueprintGraph.K2Node_CallFunction Name="K2Node_CallFunction_4" ExportPath="/Script/BlueprintGraph.K2Node_CallFunction'/Game/Weapon.Weapon:toggleWeapon.K2Node_CallFunction_4'"
   bIsPureFunc=True
   FunctionReference=(MemberParent="/Script/CoreUObject.Class'/Script/Engine.KismetStringLibrary'",MemberName="EqualEqual_StrStr")
   NodePosX=1216
   NodePosY=112
   NodeGuid=5DC248B94130343B00FFEA96635A4813
   CustomProperties Pin (PinId=C11D9C854120BC009FD21BB1A3D2F884,PinName="self",PinFriendlyName=NSLOCTEXT("K2Node", "Target", "Target"),PinType.PinCategory="object",PinType.PinSubCategory="",PinType.PinSubCategoryObject="/Script/CoreUObject.Class'/Script/Engine.KismetStringLibrary'",PinType.PinSubCategoryMemberReference=(),PinType.PinValueType=(),PinType.ContainerType=None,PinType.bIsReference=False,PinType.bIsConst=False,PinType.bIsWeakPointer=False,PinType.bIsUObjectWrapper=False,PinType.bSerializeAsSinglePrecisionFloat=False,DefaultObject="/Script/Engine.Default__KismetStringLibrary",PersistentGuid=00000000000000000000000000000000,bHidden=True,bNotConnectable=False,bDefaultValueIsReadOnly=False,bDefaultValueIsIgnored=False,bAdvancedView=False,bOrphanedPin=False,)
   CustomProperties Pin (PinId=69323AF94F08FAB4811AD899C3A5196B,PinName="A",PinType.PinCategory="string",PinType.PinSubCategory="",PinType.PinSubCategoryObject=None,PinType.PinSubCategoryMemberReference=(),PinType.PinValueType=(),PinType.ContainerType=None,PinType.bIsReference=False,PinType.bIsConst=False,PinType.bIsWeakPointer=False,PinType.bIsUObjectWrapper=False,PinType.bSerializeAsSinglePrecisionFloat=False,LinkedTo=(K2Node_CallFunction_6 93F0DB2147A92F26E26B92BB8600409F,),PersistentGuid=00000000000000000000000000000000,bHidden=False,bNotConnectable=False,bDefaultValueIsReadOnly=False,bDefaultValueIsIgnored=False,bAdvancedView=False,bOrphanedPin=False,)
   CustomProperties Pin (PinId=CFBEC159472C4519A1225981185901D9,PinName="B",PinType.PinCategory="string",PinType.PinSubCategory="",PinType.PinSubCategoryObject=None,PinType.PinSubCategoryMemberReference=(),PinType.PinValueType=(),PinType.ContainerType=None,PinType.bIsReference=False,PinType.bIsConst=False,PinType.bIsWeakPointer=False,PinType.bIsUObjectWrapper=False,PinType.bSerializeAsSinglePrecisionFloat=False,LinkedTo=(K2Node_FunctionEntry_0 FD7625CA44AF5CF12DA59FA7712738ED,),PersistentGuid=00000000000000000000000000000000,bHidden=False,bNotConnectable=False,bDefaultValueIsReadOnly=False,bDefaultValueIsIgnored=False,bAdvancedView=False,bOrphanedPin=False,)
   CustomProperties Pin (PinId=D74C591F45B5F629996A34B6931DC459,PinName="ReturnValue",Direction="EGPD_Output",PinType.PinCategory="bool",PinType.PinSubCategory="",PinType.PinSubCategoryObject=None,PinType.PinSubCategoryMemberReference=(),PinType.PinValueType=(),PinType.ContainerType=None,PinType.bIsReference=False,PinType.bIsConst=False,PinType.bIsWeakPointer=False,PinType.bIsUObjectWrapper=False,PinType.bSerializeAsSinglePrecisionFloat=False,DefaultValue="false",AutogeneratedDefaultValue="false",LinkedTo=(K2Node_IfThenElse_2 EBDA8A344E7CD94184878980D978B71D,),PersistentGuid=00000000000000000000000000000000,bHidden=False,bNotConnectable=False,bDefaultValueIsReadOnly=False,bDefaultValueIsIgnored=False,bAdvancedView=False,bOrphanedPin=False,)
End Object
Begin Object Class=/Script/BlueprintGraph.K2Node_IfThenElse Name="K2Node_IfThenElse_2" ExportPath="/Script/BlueprintGraph.K2Node_IfThenElse'/Game/Weapon.Weapon:toggleWeapon.K2Node_IfThenElse_2'"
   NodePosX=1488
   NodePosY=-112
   NodeGuid=3BC53374492B4E7099FCE0BBD0EF0C37
   CustomProperties Pin (PinId=9E8015934CA7CA541B4CA18794B22742,PinName="execute",PinType.PinCategory="exec",PinType.PinSubCategory="",PinType.PinSubCategoryObject=None,PinType.PinSubCategoryMemberReference=(),PinType.PinValueType=(),PinType.ContainerType=None,PinType.bIsReference=False,PinType.bIsConst=False,PinType.bIsWeakPointer=False,PinType.bIsUObjectWrapper=False,PinType.bSerializeAsSinglePrecisionFloat=False,LinkedTo=(K2Node_MacroInstance_0 09A1B00B4B256A32182B5C80479A34AA,),PersistentGuid=00000000000000000000000000000000,bHidden=False,bNotConnectable=False,bDefaultValueIsReadOnly=False,bDefaultValueIsIgnored=False,bAdvancedView=False,bOrphanedPin=False,)
   CustomProperties Pin (PinId=EBDA8A344E7CD94184878980D978B71D,PinName="Condition",PinType.PinCategory="bool",PinType.PinSubCategory="",PinType.PinSubCategoryObject=None,PinType.PinSubCategoryMemberReference=(),PinType.PinValueType=(),PinType.ContainerType=None,PinType.bIsReference=False,PinType.bIsConst=False,PinType.bIsWeakPointer=False,PinType.bIsUObjectWrapper=False,PinType.bSerializeAsSinglePrecisionFloat=False,DefaultValue="true",AutogeneratedDefaultValue="true",LinkedTo=(K2Node_CallFunction_4 D74C591F45B5F629996A34B6931DC459,),PersistentGuid=00000000000000000000000000000000,bHidden=False,bNotConnectable=False,bDefaultValueIsReadOnly=False,bDefaultValueIsIgnored=False,bAdvancedView=False,bOrphanedPin=False,)
   CustomProperties Pin (PinId=DB5215DF46E1ED447AA152909E1B3D2D,PinName="then",PinFriendlyName=NSLOCTEXT("K2Node", "true", "true"),Direction="EGPD_Output",PinType.PinCategory="exec",PinType.PinSubCategory="",PinType.PinSubCategoryObject=None,PinType.PinSubCategoryMemberReference=(),PinType.PinValueType=(),PinType.ContainerType=None,PinType.bIsReference=False,PinType.bIsConst=False,PinType.bIsWeakPointer=False,PinType.bIsUObjectWrapper=False,PinType.bSerializeAsSinglePrecisionFloat=False,LinkedTo=(K2Node_CallFunction_5 0F1C8588438737BD6199B49E432B1775,),PersistentGuid=00000000000000000000000000000000,bHidden=False,bNotConnectable=False,bDefaultValueIsReadOnly=False,bDefaultValueIsIgnored=False,bAdvancedView=False,bOrphanedPin=False,)
   CustomProperties Pin (PinId=E093ACDA43C853FF212CDAA9445946DC,PinName="else",PinFriendlyName=NSLOCTEXT("K2Node", "false", "false"),Direction="EGPD_Output",PinType.PinCategory="exec",PinType.PinSubCategory="",PinType.PinSubCategoryObject=None,PinType.PinSubCategoryMemberReference=(),PinType.PinValueType=(),PinType.ContainerType=None,PinType.bIsReference=False,PinType.bIsConst=False,PinType.bIsWeakPointer=False,PinType.bIsUObjectWrapper=False,PinType.bSerializeAsSinglePrecisionFloat=False,PersistentGuid=00000000000000000000000000000000,bHidden=False,bNotConnectable=False,bDefaultValueIsReadOnly=False,bDefaultValueIsIgnored=False,bAdvancedView=False,bOrphanedPin=False,)
End Object
Begin Object Class=/Script/BlueprintGraph.K2Node_CallFunction Name="K2Node_CallFunction_5" ExportPath="/Script/BlueprintGraph.K2Node_CallFunction'/Game/Weapon.Weapon:toggleWeapon.K2Node_CallFunction_5'"
   FunctionReference=(MemberParent="/Script/CoreUObject.Class'/Script/Engine.SceneComponent'",MemberName="SetVisibility")
   NodePosX=1872
   NodeGuid=FC6967534C2503CB631AA8860067C697
   CustomProperties Pin (PinId=0F1C8588438737BD6199B49E432B1775,PinName="execute",PinToolTip="
Exec",PinType.PinCategory="exec",PinType.PinSubCategory="",PinType.PinSubCategoryObject=None,PinType.PinSubCategoryMemberReference=(),PinType.PinValueType=(),PinType.ContainerType=None,PinType.bIsReference=False,PinType.bIsConst=False,PinType.bIsWeakPointer=False,PinType.bIsUObjectWrapper=False,PinType.bSerializeAsSinglePrecisionFloat=False,LinkedTo=(K2Node_IfThenElse_2 DB5215DF46E1ED447AA152909E1B3D2D,),PersistentGuid=00000000000000000000000000000000,bHidden=False,bNotConnectable=False,bDefaultValueIsReadOnly=False,bDefaultValueIsIgnored=False,bAdvancedView=False,bOrphanedPin=False,)
   CustomProperties Pin (PinId=951A353E40F9E0DE126A5DB4C72D234F,PinName="then",PinToolTip="
Exec",Direction="EGPD_Output",PinType.PinCategory="exec",PinType.PinSubCategory="",PinType.PinSubCategoryObject=None,PinType.PinSubCategoryMemberReference=(),PinType.PinValueType=(),PinType.ContainerType=None,PinType.bIsReference=False,PinType.bIsConst=False,PinType.bIsWeakPointer=False,PinType.bIsUObjectWrapper=False,PinType.bSerializeAsSinglePrecisionFloat=False,LinkedTo=(K2Node_IfThenElse_0 70C6477A45069ADF53358298FF3ED971,),PersistentGuid=00000000000000000000000000000000,bHidden=False,bNotConnectable=False,bDefaultValueIsReadOnly=False,bDefaultValueIsIgnored=False,bAdvancedView=False,bOrphanedPin=False,)
   CustomProperties Pin (PinId=EC835FFB483A4AAC5B883E8BA972F2BF,PinName="self",PinFriendlyName=NSLOCTEXT("K2Node", "Target", "Target"),PinToolTip="Target
Scene Component Object Reference",PinType.PinCategory="object",PinType.PinSubCategory="",PinType.PinSubCategoryObject="/Script/CoreUObject.Class'/Script/Engine.SceneComponent'",PinType.PinSubCategoryMemberReference=(),PinType.PinValueType=(),PinType.ContainerType=None,PinType.bIsReference=False,PinType.bIsConst=False,PinType.bIsWeakPointer=False,PinType.bIsUObjectWrapper=False,PinType.bSerializeAsSinglePrecisionFloat=False,LinkedTo=(K2Node_MacroInstance_0 A3B5978E4EC4FB977A8CAEB512EA071C,),PersistentGuid=00000000000000000000000000000000,bHidden=False,bNotConnectable=False,bDefaultValueIsReadOnly=False,bDefaultValueIsIgnored=False,bAdvancedView=False,bOrphanedPin=False,)
   CustomProperties Pin (PinId=83BE2F6746A48AB671E5B88B29F05B42,PinName="bNewVisibility",PinToolTip="New Visibility
Boolean",PinType.PinCategory="bool",PinType.PinSubCategory="",PinType.PinSubCategoryObject=None,PinType.PinSubCategoryMemberReference=(),PinType.PinValueType=(),PinType.ContainerType=None,PinType.bIsReference=False,PinType.bIsConst=False,PinType.bIsWeakPointer=False,PinType.bIsUObjectWrapper=False,PinType.bSerializeAsSinglePrecisionFloat=False,DefaultValue="false",AutogeneratedDefaultValue="false",LinkedTo=(K2Node_FunctionEntry_0 7D7CD4E94CB6D87642D9FA9CCA0A58D3,),PersistentGuid=00000000000000000000000000000000,bHidden=False,bNotConnectable=False,bDefaultValueIsReadOnly=False,bDefaultValueIsIgnored=False,bAdvancedView=False,bOrphanedPin=False,)
   CustomProperties Pin (PinId=C9B7638C46E58B3164AB63B9745395FF,PinName="bPropagateToChildren",PinToolTip="Propagate to Children
Boolean",PinType.PinCategory="bool",PinType.PinSubCategory="",PinType.PinSubCategoryObject=None,PinType.PinSubCategoryMemberReference=(),PinType.PinValueType=(),PinType.ContainerType=None,PinType.bIsReference=False,PinType.bIsConst=False,PinType.bIsWeakPointer=False,PinType.bIsUObjectWrapper=False,PinType.bSerializeAsSinglePrecisionFloat=False,DefaultValue="false",AutogeneratedDefaultValue="false",PersistentGuid=00000000000000000000000000000000,bHidden=False,bNotConnectable=False,bDefaultValueIsReadOnly=False,bDefaultValueIsIgnored=False,bAdvancedView=False,bOrphanedPin=False,)
End Object
Begin Object Class=/Script/BlueprintGraph.K2Node_VariableGet Name="K2Node_VariableGet_0" ExportPath="/Script/BlueprintGraph.K2Node_VariableGet'/Game/Weapon.Weapon:toggleWeapon.K2Node_VariableGet_0'"
   VariableReference=(MemberName="Arrow",bSelfContext=True)
   NodePosX=80
   NodePosY=-128
   NodeGuid=5BE6EC504127390C04D97AAADE99FCF7
   CustomProperties Pin (PinId=9E28B08F43D2CA7620D84FBEC6399762,PinName="Arrow",Direction="EGPD_Output",PinType.PinCategory="object",PinType.PinSubCategory="",PinType.PinSubCategoryObject="/Script/CoreUObject.Class'/Script/Engine.ArrowComponent'",PinType.PinSubCategoryMemberReference=(),PinType.PinValueType=(),PinType.ContainerType=None,PinType.bIsReference=False,PinType.bIsConst=False,PinType.bIsWeakPointer=False,PinType.bIsUObjectWrapper=False,PinType.bSerializeAsSinglePrecisionFloat=False,LinkedTo=(K2Node_CallFunction_1 ABB6AE594981CA751C6A9181D19A216F,),PersistentGuid=00000000000000000000000000000000,bHidden=False,bNotConnectable=False,bDefaultValueIsReadOnly=False,bDefaultValueIsIgnored=False,bAdvancedView=False,bOrphanedPin=False,)
   CustomProperties Pin (PinId=6760691F4DE9DA160E07258514DC1ED3,PinName="self",PinFriendlyName=NSLOCTEXT("K2Node", "Target", "Target"),PinType.PinCategory="object",PinType.PinSubCategory="",PinType.PinSubCategoryObject="/Script/Engine.BlueprintGeneratedClass'/Game/Weapon.Weapon_C'",PinType.PinSubCategoryMemberReference=(),PinType.PinValueType=(),PinType.ContainerType=None,PinType.bIsReference=False,PinType.bIsConst=False,PinType.bIsWeakPointer=False,PinType.bIsUObjectWrapper=False,PinType.bSerializeAsSinglePrecisionFloat=False,PersistentGuid=00000000000000000000000000000000,bHidden=True,bNotConnectable=False,bDefaultValueIsReadOnly=False,bDefaultValueIsIgnored=False,bAdvancedView=False,bOrphanedPin=False,)
End Object
Begin Object Class=/Script/BlueprintGraph.K2Node_CallFunction Name="K2Node_CallFunction_1" ExportPath="/Script/BlueprintGraph.K2Node_CallFunction'/Game/Weapon.Weapon:toggleWeapon.K2Node_CallFunction_1'"
   bIsPureFunc=True
   bIsConstFunc=True
   FunctionReference=(MemberParent="/Script/CoreUObject.Class'/Script/Engine.SceneComponent'",MemberName="GetChildrenComponents")
   NodePosX=288
   NodePosY=-192
   NodeGuid=D20AF0554A56E607A38BDB85376E56BD
   CustomProperties Pin (PinId=ABB6AE594981CA751C6A9181D19A216F,PinName="self",PinFriendlyName=NSLOCTEXT("K2Node", "Target", "Target"),PinToolTip="Target
Scene Component Object Reference",PinType.PinCategory="object",PinType.PinSubCategory="",PinType.PinSubCategoryObject="/Script/CoreUObject.Class'/Script/Engine.SceneComponent'",PinType.PinSubCategoryMemberReference=(),PinType.PinValueType=(),PinType.ContainerType=None,PinType.bIsReference=False,PinType.bIsConst=False,PinType.bIsWeakPointer=False,PinType.bIsUObjectWrapper=False,PinType.bSerializeAsSinglePrecisionFloat=False,LinkedTo=(K2Node_VariableGet_0 9E28B08F43D2CA7620D84FBEC6399762,),PersistentGuid=00000000000000000000000000000000,bHidden=False,bNotConnectable=False,bDefaultValueIsReadOnly=False,bDefaultValueIsIgnored=False,bAdvancedView=False,bOrphanedPin=False,)
   CustomProperties Pin (PinId=484B35E643D253FE0097B897D4E23F02,PinName="bIncludeAllDescendants",PinToolTip="Include All Descendants
Boolean

Whether to include all descendants in the list of children (i.e. grandchildren, great grandchildren, etc.)",PinType.PinCategory="bool",PinType.PinSubCategory="",PinType.PinSubCategoryObject=None,PinType.PinSubCategoryMemberReference=(),PinType.PinValueType=(),PinType.ContainerType=None,PinType.bIsReference=False,PinType.bIsConst=False,PinType.bIsWeakPointer=False,PinType.bIsUObjectWrapper=False,PinType.bSerializeAsSinglePrecisionFloat=False,DefaultValue="false",AutogeneratedDefaultValue="false",PersistentGuid=00000000000000000000000000000000,bHidden=False,bNotConnectable=False,bDefaultValueIsReadOnly=False,bDefaultValueIsIgnored=False,bAdvancedView=False,bOrphanedPin=False,)
   CustomProperties Pin (PinId=200FD50543476E8A01FFBAB70A5AD419,PinName="Children",PinToolTip="Children
Array of Scene Component Object References

The list of attached child components",Direction="EGPD_Output",PinType.PinCategory="object",PinType.PinSubCategory="",PinType.PinSubCategoryObject="/Script/CoreUObject.Class'/Script/Engine.SceneComponent'",PinType.PinSubCategoryMemberReference=(),PinType.PinValueType=(),PinType.ContainerType=Array,PinType.bIsReference=False,PinType.bIsConst=False,PinType.bIsWeakPointer=False,PinType.bIsUObjectWrapper=False,PinType.bSerializeAsSinglePrecisionFloat=False,LinkedTo=(K2Node_MacroInstance_0 3D597D8946C446F2BAAD7A96A11AB1F6,),PersistentGuid=00000000000000000000000000000000,bHidden=False,bNotConnectable=False,bDefaultValueIsReadOnly=False,bDefaultValueIsIgnored=False,bAdvancedView=False,bOrphanedPin=False,)
End Object
Begin Object Class=/Script/BlueprintGraph.K2Node_MacroInstance Name="K2Node_MacroInstance_0" ExportPath="/Script/BlueprintGraph.K2Node_MacroInstance'/Game/Weapon.Weapon:toggleWeapon.K2Node_MacroInstance_0'"
   MacroGraphReference=(MacroGraph="/Script/Engine.EdGraph'/Engine/EditorBlueprintResources/StandardMacros.StandardMacros:ForEachLoop'",GraphBlueprint="/Script/Engine.Blueprint'/Engine/EditorBlueprintResources/StandardMacros.StandardMacros'",GraphGuid=99DBFD5540A796041F72A5A9DA655026)
   ResolvedWildcardType=(PinCategory="object",PinSubCategoryObject="/Script/CoreUObject.Class'/Script/Engine.SceneComponent'",ContainerType=Array)
   NodePosX=688
   NodePosY=-64
   NodeGuid=69BB467D400D2D507C34A391EFD384B6
   CustomProperties Pin (PinId=175FE6D84859CFF0C7FD41AE8A5421A7,PinName="Exec",PinType.PinCategory="exec",PinType.PinSubCategory="",PinType.PinSubCategoryObject=None,PinType.PinSubCategoryMemberReference=(),PinType.PinValueType=(),PinType.ContainerType=None,PinType.bIsReference=False,PinType.bIsConst=False,PinType.bIsWeakPointer=False,PinType.bIsUObjectWrapper=False,PinType.bSerializeAsSinglePrecisionFloat=False,LinkedTo=(K2Node_FunctionEntry_0 0DE6F112473A071833F665BB2089F5A7,),PersistentGuid=00000000000000000000000000000000,bHidden=False,bNotConnectable=False,bDefaultValueIsReadOnly=False,bDefaultValueIsIgnored=False,bAdvancedView=False,bOrphanedPin=False,)
   CustomProperties Pin (PinId=3D597D8946C446F2BAAD7A96A11AB1F6,PinName="Array",PinType.PinCategory="object",PinType.PinSubCategory="",PinType.PinSubCategoryObject="/Script/CoreUObject.Class'/Script/Engine.SceneComponent'",PinType.PinSubCategoryMemberReference=(),PinType.PinValueType=(),PinType.ContainerType=Array,PinType.bIsReference=False,PinType.bIsConst=False,PinType.bIsWeakPointer=False,PinType.bIsUObjectWrapper=False,PinType.bSerializeAsSinglePrecisionFloat=False,LinkedTo=(K2Node_CallFunction_1 200FD50543476E8A01FFBAB70A5AD419,),PersistentGuid=00000000000000000000000000000000,bHidden=False,bNotConnectable=False,bDefaultValueIsReadOnly=False,bDefaultValueIsIgnored=False,bAdvancedView=False,bOrphanedPin=False,)
   CustomProperties Pin (PinId=09A1B00B4B256A32182B5C80479A34AA,PinName="LoopBody",Direction="EGPD_Output",PinType.PinCategory="exec",PinType.PinSubCategory="",PinType.PinSubCategoryObject=None,PinType.PinSubCategoryMemberReference=(),PinType.PinValueType=(),PinType.ContainerType=None,PinType.bIsReference=False,PinType.bIsConst=False,PinType.bIsWeakPointer=False,PinType.bIsUObjectWrapper=False,PinType.bSerializeAsSinglePrecisionFloat=False,LinkedTo=(K2Node_IfThenElse_2 9E8015934CA7CA541B4CA18794B22742,),PersistentGuid=00000000000000000000000000000000,bHidden=False,bNotConnectable=False,bDefaultValueIsReadOnly=False,bDefaultValueIsIgnored=False,bAdvancedView=False,bOrphanedPin=False,)
   CustomProperties Pin (PinId=A3B5978E4EC4FB977A8CAEB512EA071C,PinName="Array Element",Direction="EGPD_Output",PinType.PinCategory="object",PinType.PinSubCategory="",PinType.PinSubCategoryObject="/Script/CoreUObject.Class'/Script/Engine.SceneComponent'",PinType.PinSubCategoryMemberReference=(),PinType.PinValueType=(),PinType.ContainerType=None,PinType.bIsReference=False,PinType.bIsConst=False,PinType.bIsWeakPointer=False,PinType.bIsUObjectWrapper=False,PinType.bSerializeAsSinglePrecisionFloat=False,LinkedTo=(K2Node_CallFunction_6 ABB1102346021349A55FB6A975D4F8FF,K2Node_CallFunction_5 EC835FFB483A4AAC5B883E8BA972F2BF,),PersistentGuid=00000000000000000000000000000000,bHidden=False,bNotConnectable=False,bDefaultValueIsReadOnly=False,bDefaultValueIsIgnored=False,bAdvancedView=False,bOrphanedPin=False,)
   CustomProperties Pin (PinId=9ADBBEC84A4FDD4A63068D8092DB8F0D,PinName="Array Index",Direction="EGPD_Output",PinType.PinCategory="int",PinType.PinSubCategory="",PinType.PinSubCategoryObject=None,PinType.PinSubCategoryMemberReference=(),PinType.PinValueType=(),PinType.ContainerType=None,PinType.bIsReference=False,PinType.bIsConst=False,PinType.bIsWeakPointer=False,PinType.bIsUObjectWrapper=False,PinType.bSerializeAsSinglePrecisionFloat=False,LinkedTo=(K2Node_GetArrayItem_0 17A4FA2A4FA7E01A7E6FC79DDAC221FA,),PersistentGuid=00000000000000000000000000000000,bHidden=False,bNotConnectable=False,bDefaultValueIsReadOnly=False,bDefaultValueIsIgnored=False,bAdvancedView=False,bOrphanedPin=False,)
   CustomProperties Pin (PinId=67316961412FBDFAAFA825BF730916DD,PinName="Completed",Direction="EGPD_Output",PinType.PinCategory="exec",PinType.PinSubCategory="",PinType.PinSubCategoryObject=None,PinType.PinSubCategoryMemberReference=(),PinType.PinValueType=(),PinType.ContainerType=None,PinType.bIsReference=False,PinType.bIsConst=False,PinType.bIsWeakPointer=False,PinType.bIsUObjectWrapper=False,PinType.bSerializeAsSinglePrecisionFloat=False,PersistentGuid=00000000000000000000000000000000,bHidden=False,bNotConnectable=False,bDefaultValueIsReadOnly=False,bDefaultValueIsIgnored=False,bAdvancedView=False,bOrphanedPin=False,)
End Object
Begin Object Class=/Script/BlueprintGraph.K2Node_CallFunction Name="K2Node_CallFunction_6" ExportPath="/Script/BlueprintGraph.K2Node_CallFunction'/Game/Weapon.Weapon:toggleWeapon.K2Node_CallFunction_6'"
   bIsPureFunc=True
   FunctionReference=(MemberParent="/Script/CoreUObject.Class'/Script/Engine.KismetSystemLibrary'",MemberName="GetObjectName")
   NodePosX=1024
   NodeGuid=4F83946D434323CEBEC04BA2FDA724E8
   CustomProperties Pin (PinId=0215F47746062E693DD43B90B4EB189C,PinName="self",PinFriendlyName=NSLOCTEXT("K2Node", "Target", "Target"),PinType.PinCategory="object",PinType.PinSubCategory="",PinType.PinSubCategoryObject="/Script/CoreUObject.Class'/Script/Engine.KismetSystemLibrary'",PinType.PinSubCategoryMemberReference=(),PinType.PinValueType=(),PinType.ContainerType=None,PinType.bIsReference=False,PinType.bIsConst=False,PinType.bIsWeakPointer=False,PinType.bIsUObjectWrapper=False,PinType.bSerializeAsSinglePrecisionFloat=False,DefaultObject="/Script/Engine.Default__KismetSystemLibrary",PersistentGuid=00000000000000000000000000000000,bHidden=True,bNotConnectable=False,bDefaultValueIsReadOnly=False,bDefaultValueIsIgnored=False,bAdvancedView=False,bOrphanedPin=False,)
   CustomProperties Pin (PinId=ABB1102346021349A55FB6A975D4F8FF,PinName="Object",PinType.PinCategory="object",PinType.PinSubCategory="",PinType.PinSubCategoryObject="/Script/CoreUObject.Class'/Script/CoreUObject.Object'",PinType.PinSubCategoryMemberReference=(),PinType.PinValueType=(),PinType.ContainerType=None,PinType.bIsReference=False,PinType.bIsConst=True,PinType.bIsWeakPointer=False,PinType.bIsUObjectWrapper=False,PinType.bSerializeAsSinglePrecisionFloat=False,LinkedTo=(K2Node_MacroInstance_0 A3B5978E4EC4FB977A8CAEB512EA071C,),PersistentGuid=00000000000000000000000000000000,bHidden=False,bNotConnectable=False,bDefaultValueIsReadOnly=False,bDefaultValueIsIgnored=False,bAdvancedView=False,bOrphanedPin=False,)
   CustomProperties Pin (PinId=93F0DB2147A92F26E26B92BB8600409F,PinName="ReturnValue",Direction="EGPD_Output",PinType.PinCategory="string",PinType.PinSubCategory="",PinType.PinSubCategoryObject=None,PinType.PinSubCategoryMemberReference=(),PinType.PinValueType=(),PinType.ContainerType=None,PinType.bIsReference=False,PinType.bIsConst=False,PinType.bIsWeakPointer=False,PinType.bIsUObjectWrapper=False,PinType.bSerializeAsSinglePrecisionFloat=False,LinkedTo=(K2Node_CallFunction_4 69323AF94F08FAB4811AD899C3A5196B,),PersistentGuid=00000000000000000000000000000000,bHidden=False,bNotConnectable=False,bDefaultValueIsReadOnly=False,bDefaultValueIsIgnored=False,bAdvancedView=False,bOrphanedPin=False,)
End Object
Begin Object Class=/Script/BlueprintGraph.K2Node_IfThenElse Name="K2Node_IfThenElse_0" ExportPath="/Script/BlueprintGraph.K2Node_IfThenElse'/Game/Weapon.Weapon:toggleWeapon.K2Node_IfThenElse_0'"
   NodePosX=2256
   NodePosY=-64
   NodeGuid=19BBD56142A2A24478261AB28D7B49BF
   CustomProperties Pin (PinId=70C6477A45069ADF53358298FF3ED971,PinName="execute",PinType.PinCategory="exec",PinType.PinSubCategory="",PinType.PinSubCategoryObject=None,PinType.PinSubCategoryMemberReference=(),PinType.PinValueType=(),PinType.ContainerType=None,PinType.bIsReference=False,PinType.bIsConst=False,PinType.bIsWeakPointer=False,PinType.bIsUObjectWrapper=False,PinType.bSerializeAsSinglePrecisionFloat=False,LinkedTo=(K2Node_CallFunction_5 951A353E40F9E0DE126A5DB4C72D234F,),PersistentGuid=00000000000000000000000000000000,bHidden=False,bNotConnectable=False,bDefaultValueIsReadOnly=False,bDefaultValueIsIgnored=False,bAdvancedView=False,bOrphanedPin=False,)
   CustomProperties Pin (PinId=8B96751C4008C65EA5FA9B90228063F5,PinName="Condition",PinType.PinCategory="bool",PinType.PinSubCategory="",PinType.PinSubCategoryObject=None,PinType.PinSubCategoryMemberReference=(),PinType.PinValueType=(),PinType.ContainerType=None,PinType.bIsReference=False,PinType.bIsConst=False,PinType.bIsWeakPointer=False,PinType.bIsUObjectWrapper=False,PinType.bSerializeAsSinglePrecisionFloat=False,DefaultValue="true",AutogeneratedDefaultValue="true",LinkedTo=(K2Node_FunctionEntry_0 7D7CD4E94CB6D87642D9FA9CCA0A58D3,),PersistentGuid=00000000000000000000000000000000,bHidden=False,bNotConnectable=False,bDefaultValueIsReadOnly=False,bDefaultValueIsIgnored=False,bAdvancedView=False,bOrphanedPin=False,)
   CustomProperties Pin (PinId=32C9EF0146AE0E217E0B6DB5B51F3CEF,PinName="then",PinFriendlyName=NSLOCTEXT("K2Node", "true", "true"),Direction="EGPD_Output",PinType.PinCategory="exec",PinType.PinSubCategory="",PinType.PinSubCategoryObject=None,PinType.PinSubCategoryMemberReference=(),PinType.PinValueType=(),PinType.ContainerType=None,PinType.bIsReference=False,PinType.bIsConst=False,PinType.bIsWeakPointer=False,PinType.bIsUObjectWrapper=False,PinType.bSerializeAsSinglePrecisionFloat=False,LinkedTo=(K2Node_VariableSet_0 B9CAAB584EBF167AE357BB876C5088BF,),PersistentGuid=00000000000000000000000000000000,bHidden=False,bNotConnectable=False,bDefaultValueIsReadOnly=False,bDefaultValueIsIgnored=False,bAdvancedView=False,bOrphanedPin=False,)
   CustomProperties Pin (PinId=A68BA5BF46C0CE10CB56F6BA8667C73A,PinName="else",PinFriendlyName=NSLOCTEXT("K2Node", "false", "false"),Direction="EGPD_Output",PinType.PinCategory="exec",PinType.PinSubCategory="",PinType.PinSubCategoryObject=None,PinType.PinSubCategoryMemberReference=(),PinType.PinValueType=(),PinType.ContainerType=None,PinType.bIsReference=False,PinType.bIsConst=False,PinType.bIsWeakPointer=False,PinType.bIsUObjectWrapper=False,PinType.bSerializeAsSinglePrecisionFloat=False,PersistentGuid=00000000000000000000000000000000,bHidden=False,bNotConnectable=False,bDefaultValueIsReadOnly=False,bDefaultValueIsIgnored=False,bAdvancedView=False,bOrphanedPin=False,)
End Object
Begin Object Class=/Script/BlueprintGraph.K2Node_VariableGet Name="K2Node_VariableGet_3" ExportPath="/Script/BlueprintGraph.K2Node_VariableGet'/Game/Weapon.Weapon:toggleWeapon.K2Node_VariableGet_3'"
   VariableReference=(MemberName="weaponsArray",MemberGuid=E585F024471860BEA125DBB3A043677F,bSelfContext=True)
   NodePosX=1968
   NodePosY=288
   NodeGuid=2DFBF2684611361B629BAAAD49F07788
   CustomProperties Pin (PinId=E86346ED47473142790AD3A73415E44D,PinName="weaponsArray",Direction="EGPD_Output",PinType.PinCategory="struct",PinType.PinSubCategory="",PinType.PinSubCategoryObject="/Script/Engine.UserDefinedStruct'/Game/WeaponStruct.WeaponStruct'",PinType.PinSubCategoryMemberReference=(),PinType.PinValueType=(),PinType.ContainerType=Array,PinType.bIsReference=False,PinType.bIsConst=False,PinType.bIsWeakPointer=False,PinType.bIsUObjectWrapper=False,PinType.bSerializeAsSinglePrecisionFloat=False,LinkedTo=(K2Node_GetArrayItem_0 208D8FD747C02CD5F77D76B9B704480A,),PersistentGuid=00000000000000000000000000000000,bHidden=False,bNotConnectable=False,bDefaultValueIsReadOnly=False,bDefaultValueIsIgnored=False,bAdvancedView=False,bOrphanedPin=False,)
   CustomProperties Pin (PinId=F3D05F744CD65C32FC1B6BB18B7AA5EA,PinName="self",PinFriendlyName=NSLOCTEXT("K2Node", "Target", "Target"),PinType.PinCategory="object",PinType.PinSubCategory="",PinType.PinSubCategoryObject="/Script/Engine.BlueprintGeneratedClass'/Game/Weapon.Weapon_C'",PinType.PinSubCategoryMemberReference=(),PinType.PinValueType=(),PinType.ContainerType=None,PinType.bIsReference=False,PinType.bIsConst=False,PinType.bIsWeakPointer=False,PinType.bIsUObjectWrapper=False,PinType.bSerializeAsSinglePrecisionFloat=False,PersistentGuid=00000000000000000000000000000000,bHidden=True,bNotConnectable=False,bDefaultValueIsReadOnly=False,bDefaultValueIsIgnored=False,bAdvancedView=False,bOrphanedPin=False,)
End Object
Begin Object Class=/Script/BlueprintGraph.K2Node_GetArrayItem Name="K2Node_GetArrayItem_0" ExportPath="/Script/BlueprintGraph.K2Node_GetArrayItem'/Game/Weapon.Weapon:toggleWeapon.K2Node_GetArrayItem_0'"
   NodePosX=2128
   NodePosY=176
   NodeGuid=A2FAC423411D3F0FACFFD2998FB54B2C
   CustomProperties Pin (PinId=208D8FD747C02CD5F77D76B9B704480A,PinName="Array",PinType.PinCategory="struct",PinType.PinSubCategory="",PinType.PinSubCategoryObject="/Script/Engine.UserDefinedStruct'/Game/WeaponStruct.WeaponStruct'",PinType.PinSubCategoryMemberReference=(),PinType.PinValueType=(),PinType.ContainerType=Array,PinType.bIsReference=False,PinType.bIsConst=False,PinType.bIsWeakPointer=False,PinType.bIsUObjectWrapper=False,PinType.bSerializeAsSinglePrecisionFloat=False,LinkedTo=(K2Node_VariableGet_3 E86346ED47473142790AD3A73415E44D,),PersistentGuid=00000000000000000000000000000000,bHidden=False,bNotConnectable=False,bDefaultValueIsReadOnly=False,bDefaultValueIsIgnored=False,bAdvancedView=False,bOrphanedPin=False,)
   CustomProperties Pin (PinId=17A4FA2A4FA7E01A7E6FC79DDAC221FA,PinName="Dimension 1",PinType.PinCategory="int",PinType.PinSubCategory="",PinType.PinSubCategoryObject=None,PinType.PinSubCategoryMemberReference=(),PinType.PinValueType=(),PinType.ContainerType=None,PinType.bIsReference=False,PinType.bIsConst=False,PinType.bIsWeakPointer=False,PinType.bIsUObjectWrapper=False,PinType.bSerializeAsSinglePrecisionFloat=False,DefaultValue="0",AutogeneratedDefaultValue="0",LinkedTo=(K2Node_MacroInstance_0 9ADBBEC84A4FDD4A63068D8092DB8F0D,),PersistentGuid=00000000000000000000000000000000,bHidden=False,bNotConnectable=False,bDefaultValueIsReadOnly=False,bDefaultValueIsIgnored=False,bAdvancedView=False,bOrphanedPin=False,)
   CustomProperties Pin (PinId=2487973841FE55B891332C8EC29B2EC7,PinName="Output",Direction="EGPD_Output",PinType.PinCategory="struct",PinType.PinSubCategory="",PinType.PinSubCategoryObject="/Script/Engine.UserDefinedStruct'/Game/WeaponStruct.WeaponStruct'",PinType.PinSubCategoryMemberReference=(),PinType.PinValueType=(),PinType.ContainerType=None,PinType.bIsReference=True,PinType.bIsConst=False,PinType.bIsWeakPointer=False,PinType.bIsUObjectWrapper=False,PinType.bSerializeAsSinglePrecisionFloat=False,LinkedTo=(K2Node_VariableSet_0 4581DF4341B731D04FA741BACFFC0755,),PersistentGuid=00000000000000000000000000000000,bHidden=False,bNotConnectable=False,bDefaultValueIsReadOnly=False,bDefaultValueIsIgnored=False,bAdvancedView=False,bOrphanedPin=False,)
End Object
Begin Object Class=/Script/BlueprintGraph.K2Node_VariableSet Name="K2Node_VariableSet_0" ExportPath="/Script/BlueprintGraph.K2Node_VariableSet'/Game/Weapon.Weapon:toggleWeapon.K2Node_VariableSet_0'"
   VariableReference=(MemberName="selectedItem",MemberGuid=4AFD365F47AAB2357B2A46A63D1C8AC9,bSelfContext=True)
   NodePosX=2560
   NodePosY=-80
   NodeGuid=3D4E33FB484F6ADE16B059915AD122A5
   CustomProperties Pin (PinId=B9CAAB584EBF167AE357BB876C5088BF,PinName="execute",PinType.PinCategory="exec",PinType.PinSubCategory="",PinType.PinSubCategoryObject=None,PinType.PinSubCategoryMemberReference=(),PinType.PinValueType=(),PinType.ContainerType=None,PinType.bIsReference=False,PinType.bIsConst=False,PinType.bIsWeakPointer=False,PinType.bIsUObjectWrapper=False,PinType.bSerializeAsSinglePrecisionFloat=False,LinkedTo=(K2Node_IfThenElse_0 32C9EF0146AE0E217E0B6DB5B51F3CEF,),PersistentGuid=00000000000000000000000000000000,bHidden=False,bNotConnectable=False,bDefaultValueIsReadOnly=False,bDefaultValueIsIgnored=False,bAdvancedView=False,bOrphanedPin=False,)
   CustomProperties Pin (PinId=ED3158024A5565CA74888EAF1A8C1A3E,PinName="then",Direction="EGPD_Output",PinType.PinCategory="exec",PinType.PinSubCategory="",PinType.PinSubCategoryObject=None,PinType.PinSubCategoryMemberReference=(),PinType.PinValueType=(),PinType.ContainerType=None,PinType.bIsReference=False,PinType.bIsConst=False,PinType.bIsWeakPointer=False,PinType.bIsUObjectWrapper=False,PinType.bSerializeAsSinglePrecisionFloat=False,PersistentGuid=00000000000000000000000000000000,bHidden=False,bNotConnectable=False,bDefaultValueIsReadOnly=False,bDefaultValueIsIgnored=False,bAdvancedView=False,bOrphanedPin=False,)
   CustomProperties Pin (PinId=4581DF4341B731D04FA741BACFFC0755,PinName="selectedItem",PinType.PinCategory="struct",PinType.PinSubCategory="",PinType.PinSubCategoryObject="/Script/Engine.UserDefinedStruct'/Game/WeaponStruct.WeaponStruct'",PinType.PinSubCategoryMemberReference=(),PinType.PinValueType=(),PinType.ContainerType=None,PinType.bIsReference=False,PinType.bIsConst=False,PinType.bIsWeakPointer=False,PinType.bIsUObjectWrapper=False,PinType.bSerializeAsSinglePrecisionFloat=False,LinkedTo=(K2Node_GetArrayItem_0 2487973841FE55B891332C8EC29B2EC7,),PersistentGuid=00000000000000000000000000000000,bHidden=False,bNotConnectable=False,bDefaultValueIsReadOnly=False,bDefaultValueIsIgnored=False,bAdvancedView=False,bOrphanedPin=False,)
   CustomProperties Pin (PinId=FB6378A74E48B7A013129793C8C5A7EF,PinName="Output_Get",PinToolTip="Retrieves the value of the variable, can use instead of a separate Get node",Direction="EGPD_Output",PinType.PinCategory="struct",PinType.PinSubCategory="",PinType.PinSubCategoryObject="/Script/Engine.UserDefinedStruct'/Game/WeaponStruct.WeaponStruct'",PinType.PinSubCategoryMemberReference=(),PinType.PinValueType=(),PinType.ContainerType=None,PinType.bIsReference=False,PinType.bIsConst=False,PinType.bIsWeakPointer=False,PinType.bIsUObjectWrapper=False,PinType.bSerializeAsSinglePrecisionFloat=False,PersistentGuid=00000000000000000000000000000000,bHidden=False,bNotConnectable=False,bDefaultValueIsReadOnly=False,bDefaultValueIsIgnored=False,bAdvancedView=False,bOrphanedPin=False,)
   CustomProperties Pin (PinId=B270B7CC4B1B78F225CBFB9700149D8B,PinName="self",PinFriendlyName=NSLOCTEXT("K2Node", "Target", "Target"),PinType.PinCategory="object",PinType.PinSubCategory="",PinType.PinSubCategoryObject="/Script/Engine.BlueprintGeneratedClass'/Game/Weapon.Weapon_C'",PinType.PinSubCategoryMemberReference=(),PinType.PinValueType=(),PinType.ContainerType=None,PinType.bIsReference=False,PinType.bIsConst=False,PinType.bIsWeakPointer=False,PinType.bIsUObjectWrapper=False,PinType.bSerializeAsSinglePrecisionFloat=False,PersistentGuid=00000000000000000000000000000000,bHidden=True,bNotConnectable=False,bDefaultValueIsReadOnly=False,bDefaultValueIsIgnored=False,bAdvancedView=False,bOrphanedPin=False,)
End Object
Creating the model with our weapons
To tie everything together we need to create a struct that will hold our weapons. Then we can use this struct to make a Data Model that we can use to bind our UI to the game data.
We’ll start by creating two structs. One is for the weapon itself
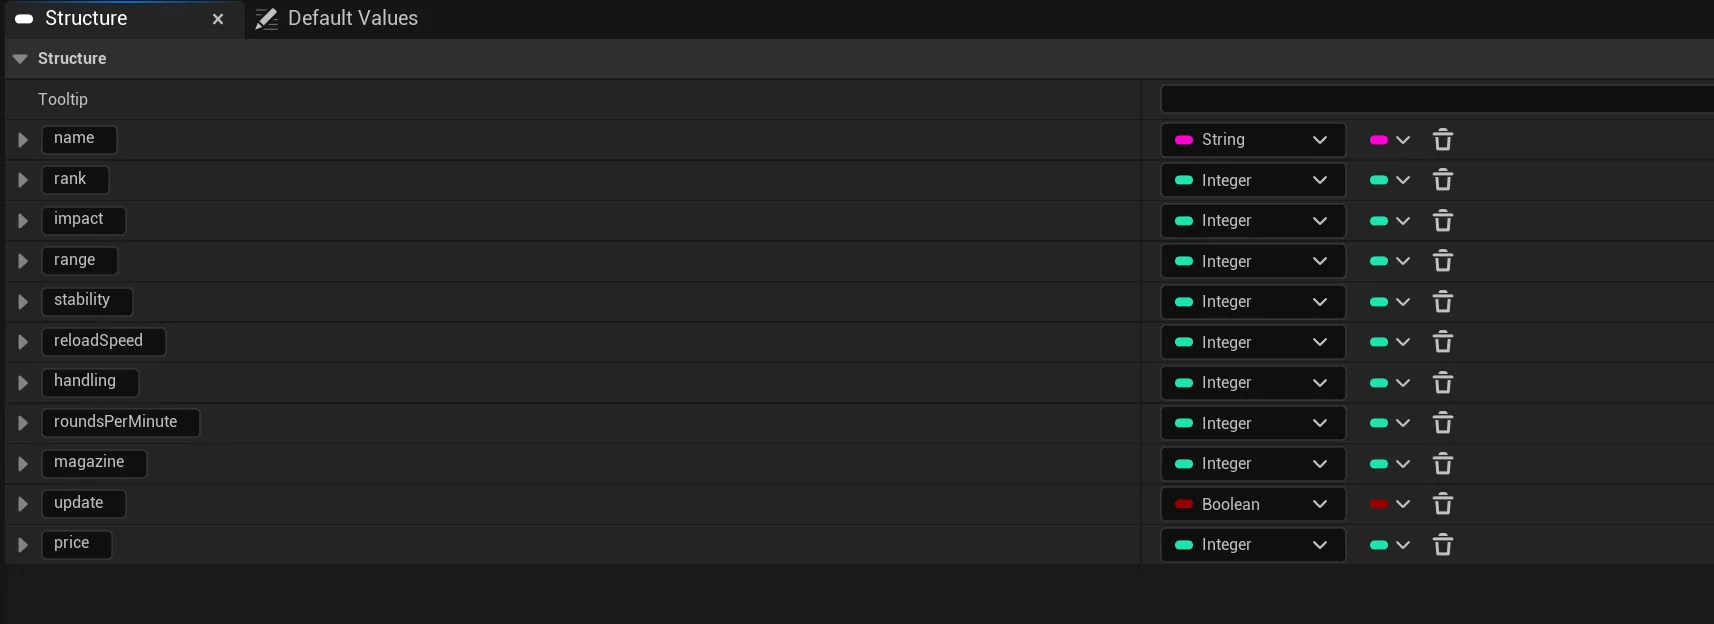
and the other is for the data model which will hold an array of the previous weapon struct

Once we have these set up, we need to go to our Weapon blueprint and add a variable called WeaponsArray which is just an array of the Weapon struct along with a single weapon that we’ll use to add new items to the array.
Then we can loop through all of arrow component’s children and for each one we will set the weapon struct we created before with random data and set the object name. After we’ve set the data we’ll add it to the WeaponsArray.
   Begin Object Class=/Script/BlueprintGraph.K2Node_VariableGet Name="K2Node_VariableGet_13" ExportPath="/Script/BlueprintGraph.K2Node_VariableGet'/Game/Weapon.Weapon:EventGraph.K2Node_VariableGet_13'"
   VariableReference=(MemberName="weapon",MemberGuid=83F83A8A47ACA810F396788512F32743,bSelfContext=True)
   NodePosX=2816
   NodePosY=-784
   NodeGuid=46B8FD8E44327B6674A4A7A38D566346
   CustomProperties Pin (PinId=19508B9C44463BCE5518EF87164CA4B8,PinName="weapon",Direction="EGPD_Output",PinType.PinCategory="struct",PinType.PinSubCategory="",PinType.PinSubCategoryObject="/Script/Engine.UserDefinedStruct'/Game/WeaponStruct.WeaponStruct'",PinType.PinSubCategoryMemberReference=(),PinType.PinValueType=(),PinType.ContainerType=None,PinType.bIsReference=False,PinType.bIsConst=False,PinType.bIsWeakPointer=False,PinType.bIsUObjectWrapper=False,PinType.bSerializeAsSinglePrecisionFloat=False,LinkedTo=(K2Node_SetFieldsInStruct_2 C6731D13430AFCEED17282A3D3C67564,),PersistentGuid=00000000000000000000000000000000,bHidden=False,bNotConnectable=False,bDefaultValueIsReadOnly=False,bDefaultValueIsIgnored=False,bAdvancedView=False,bOrphanedPin=False,)
   CustomProperties Pin (PinId=445F148443924E525C0C0FBDBF103E90,PinName="self",PinFriendlyName=NSLOCTEXT("K2Node", "Target", "Target"),PinType.PinCategory="object",PinType.PinSubCategory="",PinType.PinSubCategoryObject="/Script/Engine.BlueprintGeneratedClass'/Game/Weapon.Weapon_C'",PinType.PinSubCategoryMemberReference=(),PinType.PinValueType=(),PinType.ContainerType=None,PinType.bIsReference=False,PinType.bIsConst=False,PinType.bIsWeakPointer=False,PinType.bIsUObjectWrapper=False,PinType.bSerializeAsSinglePrecisionFloat=False,PersistentGuid=00000000000000000000000000000000,bHidden=True,bNotConnectable=False,bDefaultValueIsReadOnly=False,bDefaultValueIsIgnored=False,bAdvancedView=False,bOrphanedPin=False,)
End Object
Begin Object Class=/Script/BlueprintGraph.K2Node_SetFieldsInStruct Name="K2Node_SetFieldsInStruct_2" ExportPath="/Script/BlueprintGraph.K2Node_SetFieldsInStruct'/Game/Weapon.Weapon:EventGraph.K2Node_SetFieldsInStruct_2'"
   bMadeAfterOverridePinRemoval=True
   ShowPinForProperties(0)=(PropertyName="name_2_4EFD82EE4A41C49B2B82F8A545887E09",PropertyFriendlyName="name",bShowPin=True,bCanToggleVisibility=True)
   ShowPinForProperties(1)=(PropertyName="rank_5_1191FC9F43F46534C95BBE9EDC4FB074",PropertyFriendlyName="rank",bShowPin=True,bCanToggleVisibility=True)
   ShowPinForProperties(2)=(PropertyName="impact_9_1EF8F4944152A2BABCC2018BF55E9933",PropertyFriendlyName="impact",bShowPin=True,bCanToggleVisibility=True)
   ShowPinForProperties(3)=(PropertyName="range_11_1ECB70A94C043F5AEF660AA860D3EB96",PropertyFriendlyName="range",bShowPin=True,bCanToggleVisibility=True)
   ShowPinForProperties(4)=(PropertyName="stability_13_1D3B3EB9402E567C875FAFBD71F05A93",PropertyFriendlyName="stability",bShowPin=True,bCanToggleVisibility=True)
   ShowPinForProperties(5)=(PropertyName="reloadSpeed_15_D4AFF36343F7BD2B972142B8D12C8724",PropertyFriendlyName="reloadSpeed",bShowPin=True,bCanToggleVisibility=True)
   ShowPinForProperties(6)=(PropertyName="handling_17_4FC34D8E4EA287B8CAC9B5B432468B1A",PropertyFriendlyName="handling",bShowPin=True,bCanToggleVisibility=True)
   ShowPinForProperties(7)=(PropertyName="roundsPerMinute_19_A02D81E74CF7FE0DA44BBBAC5E4C736E",PropertyFriendlyName="roundsPerMinute",bShowPin=True,bCanToggleVisibility=True)
   ShowPinForProperties(8)=(PropertyName="magazine_21_967200F246A0215590CE33A687DFD3AE",PropertyFriendlyName="magazine",bShowPin=True,bCanToggleVisibility=True)
   ShowPinForProperties(9)=(PropertyName="update_23_DDF8803C4D8748252B42079A75AE3E6A",PropertyFriendlyName="update",bCanToggleVisibility=True)
   ShowPinForProperties(10)=(PropertyName="price_26_7833B6FD41F52F2705EFC4A389DB4980",PropertyFriendlyName="price",bShowPin=True,bCanToggleVisibility=True)
   StructType="/Script/Engine.UserDefinedStruct'/Game/WeaponStruct.WeaponStruct'"
   NodePosX=3056
   NodePosY=-656
   NodeGuid=DEEC86774B4D22B93E5863B9FF47F151
   CustomProperties Pin (PinId=BC6D8AAC4B4BD9BB509F58916F0607A9,PinName="execute",PinType.PinCategory="exec",PinType.PinSubCategory="",PinType.PinSubCategoryObject=None,PinType.PinSubCategoryMemberReference=(),PinType.PinValueType=(),PinType.ContainerType=None,PinType.bIsReference=False,PinType.bIsConst=False,PinType.bIsWeakPointer=False,PinType.bIsUObjectWrapper=False,PinType.bSerializeAsSinglePrecisionFloat=False,LinkedTo=(K2Node_MacroInstance_2 5AC5134744403225523FBAB7D80206AC,),PersistentGuid=00000000000000000000000000000000,bHidden=False,bNotConnectable=False,bDefaultValueIsReadOnly=False,bDefaultValueIsIgnored=False,bAdvancedView=False,bOrphanedPin=False,)
   CustomProperties Pin (PinId=71E8900D48736954268BD1A6C36D3251,PinName="then",Direction="EGPD_Output",PinType.PinCategory="exec",PinType.PinSubCategory="",PinType.PinSubCategoryObject=None,PinType.PinSubCategoryMemberReference=(),PinType.PinValueType=(),PinType.ContainerType=None,PinType.bIsReference=False,PinType.bIsConst=False,PinType.bIsWeakPointer=False,PinType.bIsUObjectWrapper=False,PinType.bSerializeAsSinglePrecisionFloat=False,LinkedTo=(K2Node_CallArrayFunction_4 C8E4FF7744FB12ED062677897161C38B,),PersistentGuid=00000000000000000000000000000000,bHidden=False,bNotConnectable=False,bDefaultValueIsReadOnly=False,bDefaultValueIsIgnored=False,bAdvancedView=False,bOrphanedPin=False,)
   CustomProperties Pin (PinId=C6731D13430AFCEED17282A3D3C67564,PinName="StructRef",PinType.PinCategory="struct",PinType.PinSubCategory="",PinType.PinSubCategoryObject="/Script/Engine.UserDefinedStruct'/Game/WeaponStruct.WeaponStruct'",PinType.PinSubCategoryMemberReference=(),PinType.PinValueType=(),PinType.ContainerType=None,PinType.bIsReference=True,PinType.bIsConst=False,PinType.bIsWeakPointer=False,PinType.bIsUObjectWrapper=False,PinType.bSerializeAsSinglePrecisionFloat=False,LinkedTo=(K2Node_VariableGet_13 19508B9C44463BCE5518EF87164CA4B8,),ReferencePassThroughConnection=K2Node_SetFieldsInStruct_2 525F45F54A701971E1BA7DA6912A315A,PersistentGuid=00000000000000000000000000000000,bHidden=False,bNotConnectable=False,bDefaultValueIsReadOnly=False,bDefaultValueIsIgnored=False,bAdvancedView=False,bOrphanedPin=False,)
   CustomProperties Pin (PinId=525F45F54A701971E1BA7DA6912A315A,PinName="StructOut",PinToolTip="Reference to the input struct",Direction="EGPD_Output",PinType.PinCategory="struct",PinType.PinSubCategory="",PinType.PinSubCategoryObject="/Script/Engine.UserDefinedStruct'/Game/WeaponStruct.WeaponStruct'",PinType.PinSubCategoryMemberReference=(),PinType.PinValueType=(),PinType.ContainerType=None,PinType.bIsReference=True,PinType.bIsConst=False,PinType.bIsWeakPointer=False,PinType.bIsUObjectWrapper=False,PinType.bSerializeAsSinglePrecisionFloat=False,LinkedTo=(K2Node_CallArrayFunction_4 D36D31EF47F8A3DE4D433092584853F2,),ReferencePassThroughConnection=K2Node_SetFieldsInStruct_2 C6731D13430AFCEED17282A3D3C67564,PersistentGuid=00000000000000000000000000000000,bHidden=False,bNotConnectable=False,bDefaultValueIsReadOnly=False,bDefaultValueIsIgnored=False,bAdvancedView=False,bOrphanedPin=False,)
   CustomProperties Pin (PinId=3F459AAA4AD395595F9705B030ED1D60,PinName="name_2_4EFD82EE4A41C49B2B82F8A545887E09",PinFriendlyName=NSLOCTEXT("", "A2EF07CA46DFBD3C715DF0BB3BD349ED", "name"),PinToolTip="Name
String",PinType.PinCategory="string",PinType.PinSubCategory="",PinType.PinSubCategoryObject=None,PinType.PinSubCategoryMemberReference=(),PinType.PinValueType=(),PinType.ContainerType=None,PinType.bIsReference=False,PinType.bIsConst=False,PinType.bIsWeakPointer=False,PinType.bIsUObjectWrapper=False,PinType.bSerializeAsSinglePrecisionFloat=False,LinkedTo=(K2Node_CallFunction_21 11B09CC94B46AF7E2B29D68AF0268F33,),PersistentGuid=4EFD82EE4A41C49B2B82F8A545887E09,bHidden=False,bNotConnectable=False,bDefaultValueIsReadOnly=False,bDefaultValueIsIgnored=False,bAdvancedView=False,bOrphanedPin=False,)
   CustomProperties Pin (PinId=02F2594048E33F102A675FAD3B9BF0A7,PinName="rank_5_1191FC9F43F46534C95BBE9EDC4FB074",PinFriendlyName=NSLOCTEXT("", "0535402B49099CC30702F7A8D753D777", "rank"),PinToolTip="Rank
Integer",PinType.PinCategory="int",PinType.PinSubCategory="",PinType.PinSubCategoryObject=None,PinType.PinSubCategoryMemberReference=(),PinType.PinValueType=(),PinType.ContainerType=None,PinType.bIsReference=False,PinType.bIsConst=False,PinType.bIsWeakPointer=False,PinType.bIsUObjectWrapper=False,PinType.bSerializeAsSinglePrecisionFloat=False,DefaultValue="0",AutogeneratedDefaultValue="0",LinkedTo=(K2Node_CallFunction_18 03A117ED4FB2A8C745BA93B229FB3716,),PersistentGuid=1191FC9F43F46534C95BBE9EDC4FB074,bHidden=False,bNotConnectable=False,bDefaultValueIsReadOnly=False,bDefaultValueIsIgnored=False,bAdvancedView=False,bOrphanedPin=False,)
   CustomProperties Pin (PinId=7F7E4F6049450D02F5BE41BAB9C67FC0,PinName="impact_9_1EF8F4944152A2BABCC2018BF55E9933",PinFriendlyName=NSLOCTEXT("", "9E78C8D24D1FCB64F69412A15DA206D9", "impact"),PinToolTip="Impact
Integer",PinType.PinCategory="int",PinType.PinSubCategory="",PinType.PinSubCategoryObject=None,PinType.PinSubCategoryMemberReference=(),PinType.PinValueType=(),PinType.ContainerType=None,PinType.bIsReference=False,PinType.bIsConst=False,PinType.bIsWeakPointer=False,PinType.bIsUObjectWrapper=False,PinType.bSerializeAsSinglePrecisionFloat=False,DefaultValue="0",AutogeneratedDefaultValue="0",LinkedTo=(K2Node_CallFunction_7 590B28484F19505833C2019760C9EE9B,),PersistentGuid=1EF8F4944152A2BABCC2018BF55E9933,bHidden=False,bNotConnectable=False,bDefaultValueIsReadOnly=False,bDefaultValueIsIgnored=False,bAdvancedView=False,bOrphanedPin=False,)
   CustomProperties Pin (PinId=92C2B7984E733384FAAFB09EC572C06C,PinName="range_11_1ECB70A94C043F5AEF660AA860D3EB96",PinFriendlyName=NSLOCTEXT("", "1B1E948A4D164E2743E819A00D795362", "range"),PinToolTip="Range
Integer",PinType.PinCategory="int",PinType.PinSubCategory="",PinType.PinSubCategoryObject=None,PinType.PinSubCategoryMemberReference=(),PinType.PinValueType=(),PinType.ContainerType=None,PinType.bIsReference=False,PinType.bIsConst=False,PinType.bIsWeakPointer=False,PinType.bIsUObjectWrapper=False,PinType.bSerializeAsSinglePrecisionFloat=False,DefaultValue="0",AutogeneratedDefaultValue="0",LinkedTo=(K2Node_CallFunction_8 590B28484F19505833C2019760C9EE9B,),PersistentGuid=1ECB70A94C043F5AEF660AA860D3EB96,bHidden=False,bNotConnectable=False,bDefaultValueIsReadOnly=False,bDefaultValueIsIgnored=False,bAdvancedView=False,bOrphanedPin=False,)
   CustomProperties Pin (PinId=23E1DBF14F1C5AFF1755D696B7B031FF,PinName="stability_13_1D3B3EB9402E567C875FAFBD71F05A93",PinFriendlyName=NSLOCTEXT("", "39FE397242C8C0B0DD7CD5819DEF2E4D", "stability"),PinToolTip="Stability
Integer",PinType.PinCategory="int",PinType.PinSubCategory="",PinType.PinSubCategoryObject=None,PinType.PinSubCategoryMemberReference=(),PinType.PinValueType=(),PinType.ContainerType=None,PinType.bIsReference=False,PinType.bIsConst=False,PinType.bIsWeakPointer=False,PinType.bIsUObjectWrapper=False,PinType.bSerializeAsSinglePrecisionFloat=False,DefaultValue="0",AutogeneratedDefaultValue="0",LinkedTo=(K2Node_CallFunction_13 590B28484F19505833C2019760C9EE9B,),PersistentGuid=1D3B3EB9402E567C875FAFBD71F05A93,bHidden=False,bNotConnectable=False,bDefaultValueIsReadOnly=False,bDefaultValueIsIgnored=False,bAdvancedView=False,bOrphanedPin=False,)
   CustomProperties Pin (PinId=E7720C8B448FF691230CF9B7BB158A2B,PinName="reloadSpeed_15_D4AFF36343F7BD2B972142B8D12C8724",PinFriendlyName=NSLOCTEXT("", "0249A13A42B44533216264835393E35C", "reloadSpeed"),PinToolTip="Reload Speed
Integer",PinType.PinCategory="int",PinType.PinSubCategory="",PinType.PinSubCategoryObject=None,PinType.PinSubCategoryMemberReference=(),PinType.PinValueType=(),PinType.ContainerType=None,PinType.bIsReference=False,PinType.bIsConst=False,PinType.bIsWeakPointer=False,PinType.bIsUObjectWrapper=False,PinType.bSerializeAsSinglePrecisionFloat=False,DefaultValue="0",AutogeneratedDefaultValue="0",PersistentGuid=D4AFF36343F7BD2B972142B8D12C8724,bHidden=False,bNotConnectable=False,bDefaultValueIsReadOnly=False,bDefaultValueIsIgnored=False,bAdvancedView=False,bOrphanedPin=False,)
   CustomProperties Pin (PinId=124B097844D810205499549871B6136B,PinName="handling_17_4FC34D8E4EA287B8CAC9B5B432468B1A",PinFriendlyName=NSLOCTEXT("", "1059E7804360DCCD3444179AACC25B2B", "handling"),PinToolTip="Handling
Integer",PinType.PinCategory="int",PinType.PinSubCategory="",PinType.PinSubCategoryObject=None,PinType.PinSubCategoryMemberReference=(),PinType.PinValueType=(),PinType.ContainerType=None,PinType.bIsReference=False,PinType.bIsConst=False,PinType.bIsWeakPointer=False,PinType.bIsUObjectWrapper=False,PinType.bSerializeAsSinglePrecisionFloat=False,DefaultValue="0",AutogeneratedDefaultValue="0",LinkedTo=(K2Node_CallFunction_15 590B28484F19505833C2019760C9EE9B,),PersistentGuid=4FC34D8E4EA287B8CAC9B5B432468B1A,bHidden=False,bNotConnectable=False,bDefaultValueIsReadOnly=False,bDefaultValueIsIgnored=False,bAdvancedView=False,bOrphanedPin=False,)
   CustomProperties Pin (PinId=16741A81440B91673D9439A9EFFB9307,PinName="roundsPerMinute_19_A02D81E74CF7FE0DA44BBBAC5E4C736E",PinFriendlyName=NSLOCTEXT("", "6A321B194652BB48634E898748EF087D", "roundsPerMinute"),PinToolTip="Rounds Per Minute
Integer",PinType.PinCategory="int",PinType.PinSubCategory="",PinType.PinSubCategoryObject=None,PinType.PinSubCategoryMemberReference=(),PinType.PinValueType=(),PinType.ContainerType=None,PinType.bIsReference=False,PinType.bIsConst=False,PinType.bIsWeakPointer=False,PinType.bIsUObjectWrapper=False,PinType.bSerializeAsSinglePrecisionFloat=False,DefaultValue="0",AutogeneratedDefaultValue="0",PersistentGuid=A02D81E74CF7FE0DA44BBBAC5E4C736E,bHidden=False,bNotConnectable=False,bDefaultValueIsReadOnly=False,bDefaultValueIsIgnored=False,bAdvancedView=False,bOrphanedPin=False,)
   CustomProperties Pin (PinId=C033F0A64033F19313C45F97FEFA8AE3,PinName="magazine_21_967200F246A0215590CE33A687DFD3AE",PinFriendlyName=NSLOCTEXT("", "4AB1B11B4724D83BC0EA67B53F519837", "magazine"),PinToolTip="Magazine
Integer",PinType.PinCategory="int",PinType.PinSubCategory="",PinType.PinSubCategoryObject=None,PinType.PinSubCategoryMemberReference=(),PinType.PinValueType=(),PinType.ContainerType=None,PinType.bIsReference=False,PinType.bIsConst=False,PinType.bIsWeakPointer=False,PinType.bIsUObjectWrapper=False,PinType.bSerializeAsSinglePrecisionFloat=False,DefaultValue="0",AutogeneratedDefaultValue="0",PersistentGuid=967200F246A0215590CE33A687DFD3AE,bHidden=False,bNotConnectable=False,bDefaultValueIsReadOnly=False,bDefaultValueIsIgnored=False,bAdvancedView=False,bOrphanedPin=False,)
   CustomProperties Pin (PinId=0C9B992B4F68A4778AF06D9D152F9471,PinName="price_26_7833B6FD41F52F2705EFC4A389DB4980",PinFriendlyName=NSLOCTEXT("", "7E4A6D3C476B3CE71724D2869935F6F2", "price"),PinToolTip="Price
Integer",PinType.PinCategory="int",PinType.PinSubCategory="",PinType.PinSubCategoryObject=None,PinType.PinSubCategoryMemberReference=(),PinType.PinValueType=(),PinType.ContainerType=None,PinType.bIsReference=False,PinType.bIsConst=False,PinType.bIsWeakPointer=False,PinType.bIsUObjectWrapper=False,PinType.bSerializeAsSinglePrecisionFloat=False,DefaultValue="0",AutogeneratedDefaultValue="0",LinkedTo=(K2Node_CallFunction_17 03A117ED4FB2A8C745BA93B229FB3716,),PersistentGuid=7833B6FD41F52F2705EFC4A389DB4980,bHidden=False,bNotConnectable=False,bDefaultValueIsReadOnly=False,bDefaultValueIsIgnored=False,bAdvancedView=False,bOrphanedPin=False,)
End Object
Begin Object Class=/Script/BlueprintGraph.K2Node_CallArrayFunction Name="K2Node_CallArrayFunction_4" ExportPath="/Script/BlueprintGraph.K2Node_CallArrayFunction'/Game/Weapon.Weapon:EventGraph.K2Node_CallArrayFunction_4'"
   FunctionReference=(MemberParent="/Script/CoreUObject.Class'/Script/Engine.KismetArrayLibrary'",MemberName="Array_Add")
   NodePosX=3472
   NodePosY=-640
   NodeGuid=BDF52A4D4949AA82AE3CE2B9966691B0
   CustomProperties Pin (PinId=C8E4FF7744FB12ED062677897161C38B,PinName="execute",PinType.PinCategory="exec",PinType.PinSubCategory="",PinType.PinSubCategoryObject=None,PinType.PinSubCategoryMemberReference=(),PinType.PinValueType=(),PinType.ContainerType=None,PinType.bIsReference=False,PinType.bIsConst=False,PinType.bIsWeakPointer=False,PinType.bIsUObjectWrapper=False,PinType.bSerializeAsSinglePrecisionFloat=False,LinkedTo=(K2Node_SetFieldsInStruct_2 71E8900D48736954268BD1A6C36D3251,),PersistentGuid=00000000000000000000000000000000,bHidden=False,bNotConnectable=False,bDefaultValueIsReadOnly=False,bDefaultValueIsIgnored=False,bAdvancedView=False,bOrphanedPin=False,)
   CustomProperties Pin (PinId=AE618C074346BDA05ACEF5B844C6DEE9,PinName="then",Direction="EGPD_Output",PinType.PinCategory="exec",PinType.PinSubCategory="",PinType.PinSubCategoryObject=None,PinType.PinSubCategoryMemberReference=(),PinType.PinValueType=(),PinType.ContainerType=None,PinType.bIsReference=False,PinType.bIsConst=False,PinType.bIsWeakPointer=False,PinType.bIsUObjectWrapper=False,PinType.bSerializeAsSinglePrecisionFloat=False,PersistentGuid=00000000000000000000000000000000,bHidden=False,bNotConnectable=False,bDefaultValueIsReadOnly=False,bDefaultValueIsIgnored=False,bAdvancedView=False,bOrphanedPin=False,)
   CustomProperties Pin (PinId=2E776FB542F0BE6FA65B629F34E54D7D,PinName="self",PinFriendlyName=NSLOCTEXT("K2Node", "Target", "Target"),PinType.PinCategory="object",PinType.PinSubCategory="",PinType.PinSubCategoryObject="/Script/CoreUObject.Class'/Script/Engine.KismetArrayLibrary'",PinType.PinSubCategoryMemberReference=(),PinType.PinValueType=(),PinType.ContainerType=None,PinType.bIsReference=False,PinType.bIsConst=False,PinType.bIsWeakPointer=False,PinType.bIsUObjectWrapper=False,PinType.bSerializeAsSinglePrecisionFloat=False,DefaultObject="/Script/Engine.Default__KismetArrayLibrary",PersistentGuid=00000000000000000000000000000000,bHidden=True,bNotConnectable=False,bDefaultValueIsReadOnly=False,bDefaultValueIsIgnored=False,bAdvancedView=False,bOrphanedPin=False,)
   CustomProperties Pin (PinId=3EF9316A4EC14DD03926B2BB76C9571C,PinName="TargetArray",PinType.PinCategory="struct",PinType.PinSubCategory="",PinType.PinSubCategoryObject="/Script/Engine.UserDefinedStruct'/Game/WeaponStruct.WeaponStruct'",PinType.PinSubCategoryMemberReference=(),PinType.PinValueType=(),PinType.ContainerType=Array,PinType.bIsReference=True,PinType.bIsConst=True,PinType.bIsWeakPointer=False,PinType.bIsUObjectWrapper=False,PinType.bSerializeAsSinglePrecisionFloat=False,LinkedTo=(K2Node_VariableGet_14 C4D627EC4EEACAFC540D7785BDDE547C,),PersistentGuid=00000000000000000000000000000000,bHidden=False,bNotConnectable=False,bDefaultValueIsReadOnly=False,bDefaultValueIsIgnored=True,bAdvancedView=False,bOrphanedPin=False,)
   CustomProperties Pin (PinId=D36D31EF47F8A3DE4D433092584853F2,PinName="NewItem",PinType.PinCategory="struct",PinType.PinSubCategory="",PinType.PinSubCategoryObject="/Script/Engine.UserDefinedStruct'/Game/WeaponStruct.WeaponStruct'",PinType.PinSubCategoryMemberReference=(),PinType.PinValueType=(),PinType.ContainerType=None,PinType.bIsReference=True,PinType.bIsConst=True,PinType.bIsWeakPointer=False,PinType.bIsUObjectWrapper=False,PinType.bSerializeAsSinglePrecisionFloat=False,LinkedTo=(K2Node_SetFieldsInStruct_2 525F45F54A701971E1BA7DA6912A315A,),PersistentGuid=00000000000000000000000000000000,bHidden=False,bNotConnectable=False,bDefaultValueIsReadOnly=False,bDefaultValueIsIgnored=False,bAdvancedView=False,bOrphanedPin=False,)
   CustomProperties Pin (PinId=5C50FB6342D80A54CC48DB957377A426,PinName="ReturnValue",Direction="EGPD_Output",PinType.PinCategory="int",PinType.PinSubCategory="",PinType.PinSubCategoryObject=None,PinType.PinSubCategoryMemberReference=(),PinType.PinValueType=(),PinType.ContainerType=None,PinType.bIsReference=False,PinType.bIsConst=False,PinType.bIsWeakPointer=False,PinType.bIsUObjectWrapper=False,PinType.bSerializeAsSinglePrecisionFloat=False,DefaultValue="0",AutogeneratedDefaultValue="0",PersistentGuid=00000000000000000000000000000000,bHidden=False,bNotConnectable=False,bDefaultValueIsReadOnly=False,bDefaultValueIsIgnored=False,bAdvancedView=False,bOrphanedPin=False,)
End Object
Begin Object Class=/Script/BlueprintGraph.K2Node_VariableGet Name="K2Node_VariableGet_14" ExportPath="/Script/BlueprintGraph.K2Node_VariableGet'/Game/Weapon.Weapon:EventGraph.K2Node_VariableGet_14'"
   VariableReference=(MemberName="weaponsArray",MemberGuid=E585F024471860BEA125DBB3A043677F,bSelfContext=True)
   NodePosX=3344
   NodePosY=-784
   NodeGuid=0BA856CB4496B163C09EA2BCA54B2C13
   CustomProperties Pin (PinId=C4D627EC4EEACAFC540D7785BDDE547C,PinName="weaponsArray",Direction="EGPD_Output",PinType.PinCategory="struct",PinType.PinSubCategory="",PinType.PinSubCategoryObject="/Script/Engine.UserDefinedStruct'/Game/WeaponStruct.WeaponStruct'",PinType.PinSubCategoryMemberReference=(),PinType.PinValueType=(),PinType.ContainerType=Array,PinType.bIsReference=False,PinType.bIsConst=False,PinType.bIsWeakPointer=False,PinType.bIsUObjectWrapper=False,PinType.bSerializeAsSinglePrecisionFloat=False,LinkedTo=(K2Node_CallArrayFunction_4 3EF9316A4EC14DD03926B2BB76C9571C,),PersistentGuid=00000000000000000000000000000000,bHidden=False,bNotConnectable=False,bDefaultValueIsReadOnly=False,bDefaultValueIsIgnored=False,bAdvancedView=False,bOrphanedPin=False,)
   CustomProperties Pin (PinId=C237400942440C9CE74AAC9CF6FD2EBE,PinName="self",PinFriendlyName=NSLOCTEXT("K2Node", "Target", "Target"),PinType.PinCategory="object",PinType.PinSubCategory="",PinType.PinSubCategoryObject="/Script/Engine.BlueprintGeneratedClass'/Game/Weapon.Weapon_C'",PinType.PinSubCategoryMemberReference=(),PinType.PinValueType=(),PinType.ContainerType=None,PinType.bIsReference=False,PinType.bIsConst=False,PinType.bIsWeakPointer=False,PinType.bIsUObjectWrapper=False,PinType.bSerializeAsSinglePrecisionFloat=False,PersistentGuid=00000000000000000000000000000000,bHidden=True,bNotConnectable=False,bDefaultValueIsReadOnly=False,bDefaultValueIsIgnored=False,bAdvancedView=False,bOrphanedPin=False,)
End Object
Begin Object Class=/Script/BlueprintGraph.K2Node_VariableGet Name="K2Node_VariableGet_15" ExportPath="/Script/BlueprintGraph.K2Node_VariableGet'/Game/Weapon.Weapon:EventGraph.K2Node_VariableGet_15'"
   VariableReference=(MemberName="Arrow",bSelfContext=True)
   NodePosX=1792
   NodePosY=-576
   NodeGuid=AE871761493B8CDB678B1299A7D5832F
   CustomProperties Pin (PinId=417F5E5E4F19E0D14E9FA8808C4C0AD6,PinName="Arrow",Direction="EGPD_Output",PinType.PinCategory="object",PinType.PinSubCategory="",PinType.PinSubCategoryObject="/Script/CoreUObject.Class'/Script/Engine.ArrowComponent'",PinType.PinSubCategoryMemberReference=(),PinType.PinValueType=(),PinType.ContainerType=None,PinType.bIsReference=False,PinType.bIsConst=False,PinType.bIsWeakPointer=False,PinType.bIsUObjectWrapper=False,PinType.bSerializeAsSinglePrecisionFloat=False,LinkedTo=(K2Node_CallFunction_20 7DC8F2914BA11016B503DEAD80604AC6,),PersistentGuid=00000000000000000000000000000000,bHidden=False,bNotConnectable=False,bDefaultValueIsReadOnly=False,bDefaultValueIsIgnored=False,bAdvancedView=False,bOrphanedPin=False,)
   CustomProperties Pin (PinId=29B42C324A379BBBE16BB8815F30A82F,PinName="self",PinFriendlyName=NSLOCTEXT("K2Node", "Target", "Target"),PinType.PinCategory="object",PinType.PinSubCategory="",PinType.PinSubCategoryObject="/Script/Engine.BlueprintGeneratedClass'/Game/Weapon.Weapon_C'",PinType.PinSubCategoryMemberReference=(),PinType.PinValueType=(),PinType.ContainerType=None,PinType.bIsReference=False,PinType.bIsConst=False,PinType.bIsWeakPointer=False,PinType.bIsUObjectWrapper=False,PinType.bSerializeAsSinglePrecisionFloat=False,PersistentGuid=00000000000000000000000000000000,bHidden=True,bNotConnectable=False,bDefaultValueIsReadOnly=False,bDefaultValueIsIgnored=False,bAdvancedView=False,bOrphanedPin=False,)
End Object
Begin Object Class=/Script/BlueprintGraph.K2Node_CallFunction Name="K2Node_CallFunction_20" ExportPath="/Script/BlueprintGraph.K2Node_CallFunction'/Game/Weapon.Weapon:EventGraph.K2Node_CallFunction_20'"
   bIsPureFunc=True
   bIsConstFunc=True
   FunctionReference=(MemberParent="/Script/CoreUObject.Class'/Script/Engine.SceneComponent'",MemberName="GetChildrenComponents")
   NodePosX=2000
   NodePosY=-672
   NodeGuid=9A1446D140D6D02AF898D8AC2245B9DD
   CustomProperties Pin (PinId=7DC8F2914BA11016B503DEAD80604AC6,PinName="self",PinFriendlyName=NSLOCTEXT("K2Node", "Target", "Target"),PinToolTip="Target
Scene Component Object Reference",PinType.PinCategory="object",PinType.PinSubCategory="",PinType.PinSubCategoryObject="/Script/CoreUObject.Class'/Script/Engine.SceneComponent'",PinType.PinSubCategoryMemberReference=(),PinType.PinValueType=(),PinType.ContainerType=None,PinType.bIsReference=False,PinType.bIsConst=False,PinType.bIsWeakPointer=False,PinType.bIsUObjectWrapper=False,PinType.bSerializeAsSinglePrecisionFloat=False,LinkedTo=(K2Node_VariableGet_15 417F5E5E4F19E0D14E9FA8808C4C0AD6,),PersistentGuid=00000000000000000000000000000000,bHidden=False,bNotConnectable=False,bDefaultValueIsReadOnly=False,bDefaultValueIsIgnored=False,bAdvancedView=False,bOrphanedPin=False,)
   CustomProperties Pin (PinId=C9AD49AD454864CB0D598A88F8DA3E6D,PinName="bIncludeAllDescendants",PinToolTip="Include All Descendants
Boolean

Whether to include all descendants in the list of children (i.e. grandchildren, great grandchildren, etc.)",PinType.PinCategory="bool",PinType.PinSubCategory="",PinType.PinSubCategoryObject=None,PinType.PinSubCategoryMemberReference=(),PinType.PinValueType=(),PinType.ContainerType=None,PinType.bIsReference=False,PinType.bIsConst=False,PinType.bIsWeakPointer=False,PinType.bIsUObjectWrapper=False,PinType.bSerializeAsSinglePrecisionFloat=False,DefaultValue="false",AutogeneratedDefaultValue="false",PersistentGuid=00000000000000000000000000000000,bHidden=False,bNotConnectable=False,bDefaultValueIsReadOnly=False,bDefaultValueIsIgnored=False,bAdvancedView=False,bOrphanedPin=False,)
   CustomProperties Pin (PinId=39D38A874C3538E33C595C8B655C8F98,PinName="Children",PinToolTip="Children
Array of Scene Component Object References

The list of attached child components",Direction="EGPD_Output",PinType.PinCategory="object",PinType.PinSubCategory="",PinType.PinSubCategoryObject="/Script/CoreUObject.Class'/Script/Engine.SceneComponent'",PinType.PinSubCategoryMemberReference=(),PinType.PinValueType=(),PinType.ContainerType=Array,PinType.bIsReference=False,PinType.bIsConst=False,PinType.bIsWeakPointer=False,PinType.bIsUObjectWrapper=False,PinType.bSerializeAsSinglePrecisionFloat=False,LinkedTo=(K2Node_MacroInstance_2 72A452054E9AF1CD01F119AFAB3C4FCD,),PersistentGuid=00000000000000000000000000000000,bHidden=False,bNotConnectable=False,bDefaultValueIsReadOnly=False,bDefaultValueIsIgnored=False,bAdvancedView=False,bOrphanedPin=False,)
End Object
Begin Object Class=/Script/BlueprintGraph.K2Node_MacroInstance Name="K2Node_MacroInstance_2" ExportPath="/Script/BlueprintGraph.K2Node_MacroInstance'/Game/Weapon.Weapon:EventGraph.K2Node_MacroInstance_2'"
   MacroGraphReference=(MacroGraph="/Script/Engine.EdGraph'/Engine/EditorBlueprintResources/StandardMacros.StandardMacros:ForEachLoop'",GraphBlueprint="/Script/Engine.Blueprint'/Engine/EditorBlueprintResources/StandardMacros.StandardMacros'",GraphGuid=99DBFD5540A796041F72A5A9DA655026)
   ResolvedWildcardType=(PinCategory="object",PinSubCategoryObject="/Script/CoreUObject.Class'/Script/Engine.SceneComponent'",ContainerType=Array)
   NodePosX=2416
   NodePosY=-560
   NodeGuid=6EB73C1E4A2A3E188E67D794381DC767
   CustomProperties Pin (PinId=3C0A3DB149CAB436CF6620812EF520CB,PinName="Exec",PinType.PinCategory="exec",PinType.PinSubCategory="",PinType.PinSubCategoryObject=None,PinType.PinSubCategoryMemberReference=(),PinType.PinValueType=(),PinType.ContainerType=None,PinType.bIsReference=False,PinType.bIsConst=False,PinType.bIsWeakPointer=False,PinType.bIsUObjectWrapper=False,PinType.bSerializeAsSinglePrecisionFloat=False,LinkedTo=(K2Node_AssignDelegate_1 DFC74ED14D01F43A2881C8BA92DB093E,),PersistentGuid=00000000000000000000000000000000,bHidden=False,bNotConnectable=False,bDefaultValueIsReadOnly=False,bDefaultValueIsIgnored=False,bAdvancedView=False,bOrphanedPin=False,)
   CustomProperties Pin (PinId=72A452054E9AF1CD01F119AFAB3C4FCD,PinName="Array",PinType.PinCategory="object",PinType.PinSubCategory="",PinType.PinSubCategoryObject="/Script/CoreUObject.Class'/Script/Engine.SceneComponent'",PinType.PinSubCategoryMemberReference=(),PinType.PinValueType=(),PinType.ContainerType=Array,PinType.bIsReference=False,PinType.bIsConst=False,PinType.bIsWeakPointer=False,PinType.bIsUObjectWrapper=False,PinType.bSerializeAsSinglePrecisionFloat=False,LinkedTo=(K2Node_CallFunction_20 39D38A874C3538E33C595C8B655C8F98,),PersistentGuid=00000000000000000000000000000000,bHidden=False,bNotConnectable=False,bDefaultValueIsReadOnly=False,bDefaultValueIsIgnored=False,bAdvancedView=False,bOrphanedPin=False,)
   CustomProperties Pin (PinId=5AC5134744403225523FBAB7D80206AC,PinName="LoopBody",Direction="EGPD_Output",PinType.PinCategory="exec",PinType.PinSubCategory="",PinType.PinSubCategoryObject=None,PinType.PinSubCategoryMemberReference=(),PinType.PinValueType=(),PinType.ContainerType=None,PinType.bIsReference=False,PinType.bIsConst=False,PinType.bIsWeakPointer=False,PinType.bIsUObjectWrapper=False,PinType.bSerializeAsSinglePrecisionFloat=False,LinkedTo=(K2Node_SetFieldsInStruct_2 BC6D8AAC4B4BD9BB509F58916F0607A9,),PersistentGuid=00000000000000000000000000000000,bHidden=False,bNotConnectable=False,bDefaultValueIsReadOnly=False,bDefaultValueIsIgnored=False,bAdvancedView=False,bOrphanedPin=False,)
   CustomProperties Pin (PinId=E9E5767F44B09BA8699461A4B97F104C,PinName="Array Element",Direction="EGPD_Output",PinType.PinCategory="object",PinType.PinSubCategory="",PinType.PinSubCategoryObject="/Script/CoreUObject.Class'/Script/Engine.SceneComponent'",PinType.PinSubCategoryMemberReference=(),PinType.PinValueType=(),PinType.ContainerType=None,PinType.bIsReference=False,PinType.bIsConst=False,PinType.bIsWeakPointer=False,PinType.bIsUObjectWrapper=False,PinType.bSerializeAsSinglePrecisionFloat=False,LinkedTo=(K2Node_CallFunction_21 8FC8788F40532D86D2815AB1E22C0F77,),PersistentGuid=00000000000000000000000000000000,bHidden=False,bNotConnectable=False,bDefaultValueIsReadOnly=False,bDefaultValueIsIgnored=False,bAdvancedView=False,bOrphanedPin=False,)
   CustomProperties Pin (PinId=DE5A5C9645F51C1D041FA586212DBF52,PinName="Array Index",Direction="EGPD_Output",PinType.PinCategory="int",PinType.PinSubCategory="",PinType.PinSubCategoryObject=None,PinType.PinSubCategoryMemberReference=(),PinType.PinValueType=(),PinType.ContainerType=None,PinType.bIsReference=False,PinType.bIsConst=False,PinType.bIsWeakPointer=False,PinType.bIsUObjectWrapper=False,PinType.bSerializeAsSinglePrecisionFloat=False,PersistentGuid=00000000000000000000000000000000,bHidden=False,bNotConnectable=False,bDefaultValueIsReadOnly=False,bDefaultValueIsIgnored=False,bAdvancedView=False,bOrphanedPin=False,)
   CustomProperties Pin (PinId=2CAF86B942BCC276F59700BD38308C2D,PinName="Completed",Direction="EGPD_Output",PinType.PinCategory="exec",PinType.PinSubCategory="",PinType.PinSubCategoryObject=None,PinType.PinSubCategoryMemberReference=(),PinType.PinValueType=(),PinType.ContainerType=None,PinType.bIsReference=False,PinType.bIsConst=False,PinType.bIsWeakPointer=False,PinType.bIsUObjectWrapper=False,PinType.bSerializeAsSinglePrecisionFloat=False,PersistentGuid=00000000000000000000000000000000,bHidden=False,bNotConnectable=False,bDefaultValueIsReadOnly=False,bDefaultValueIsIgnored=False,bAdvancedView=False,bOrphanedPin=False,)
End Object
Begin Object Class=/Script/BlueprintGraph.K2Node_CallFunction Name="K2Node_CallFunction_21" ExportPath="/Script/BlueprintGraph.K2Node_CallFunction'/Game/Weapon.Weapon:EventGraph.K2Node_CallFunction_21'"
   bIsPureFunc=True
   FunctionReference=(MemberParent="/Script/CoreUObject.Class'/Script/Engine.KismetSystemLibrary'",MemberName="GetObjectName")
   NodePosX=2704
   NodePosY=-480
   NodeGuid=E0CE91F94156657F364579846629A391
   CustomProperties Pin (PinId=D767EFEE4D15772A259DD28756C258DC,PinName="self",PinFriendlyName=NSLOCTEXT("K2Node", "Target", "Target"),PinType.PinCategory="object",PinType.PinSubCategory="",PinType.PinSubCategoryObject="/Script/CoreUObject.Class'/Script/Engine.KismetSystemLibrary'",PinType.PinSubCategoryMemberReference=(),PinType.PinValueType=(),PinType.ContainerType=None,PinType.bIsReference=False,PinType.bIsConst=False,PinType.bIsWeakPointer=False,PinType.bIsUObjectWrapper=False,PinType.bSerializeAsSinglePrecisionFloat=False,DefaultObject="/Script/Engine.Default__KismetSystemLibrary",PersistentGuid=00000000000000000000000000000000,bHidden=True,bNotConnectable=False,bDefaultValueIsReadOnly=False,bDefaultValueIsIgnored=False,bAdvancedView=False,bOrphanedPin=False,)
   CustomProperties Pin (PinId=8FC8788F40532D86D2815AB1E22C0F77,PinName="Object",PinType.PinCategory="object",PinType.PinSubCategory="",PinType.PinSubCategoryObject="/Script/CoreUObject.Class'/Script/CoreUObject.Object'",PinType.PinSubCategoryMemberReference=(),PinType.PinValueType=(),PinType.ContainerType=None,PinType.bIsReference=False,PinType.bIsConst=True,PinType.bIsWeakPointer=False,PinType.bIsUObjectWrapper=False,PinType.bSerializeAsSinglePrecisionFloat=False,LinkedTo=(K2Node_MacroInstance_2 E9E5767F44B09BA8699461A4B97F104C,),PersistentGuid=00000000000000000000000000000000,bHidden=False,bNotConnectable=False,bDefaultValueIsReadOnly=False,bDefaultValueIsIgnored=False,bAdvancedView=False,bOrphanedPin=False,)
   CustomProperties Pin (PinId=11B09CC94B46AF7E2B29D68AF0268F33,PinName="ReturnValue",Direction="EGPD_Output",PinType.PinCategory="string",PinType.PinSubCategory="",PinType.PinSubCategoryObject=None,PinType.PinSubCategoryMemberReference=(),PinType.PinValueType=(),PinType.ContainerType=None,PinType.bIsReference=False,PinType.bIsConst=False,PinType.bIsWeakPointer=False,PinType.bIsUObjectWrapper=False,PinType.bSerializeAsSinglePrecisionFloat=False,LinkedTo=(K2Node_SetFieldsInStruct_2 3F459AAA4AD395595F9705B030ED1D60,),PersistentGuid=00000000000000000000000000000000,bHidden=False,bNotConnectable=False,bDefaultValueIsReadOnly=False,bDefaultValueIsIgnored=False,bAdvancedView=False,bOrphanedPin=False,)
End Object
Begin Object Class=/Script/BlueprintGraph.K2Node_CallFunction Name="K2Node_CallFunction_7" ExportPath="/Script/BlueprintGraph.K2Node_CallFunction'/Game/Weapon.Weapon:EventGraph.K2Node_CallFunction_7'"
   bIsPureFunc=True
   FunctionReference=(MemberParent="/Script/CoreUObject.Class'/Script/Engine.KismetMathLibrary'",MemberName="RandomInteger")
   NodePosX=2064
   NodePosY=-1200
   NodeGuid=40BD96AA4B595D96F2336891A83F6733
   CustomProperties Pin (PinId=008D6F7243A41EA7B923FF9F1EC3F408,PinName="self",PinFriendlyName=NSLOCTEXT("K2Node", "Target", "Target"),PinType.PinCategory="object",PinType.PinSubCategory="",PinType.PinSubCategoryObject="/Script/CoreUObject.Class'/Script/Engine.KismetMathLibrary'",PinType.PinSubCategoryMemberReference=(),PinType.PinValueType=(),PinType.ContainerType=None,PinType.bIsReference=False,PinType.bIsConst=False,PinType.bIsWeakPointer=False,PinType.bIsUObjectWrapper=False,PinType.bSerializeAsSinglePrecisionFloat=False,DefaultObject="/Script/Engine.Default__KismetMathLibrary",PersistentGuid=00000000000000000000000000000000,bHidden=True,bNotConnectable=False,bDefaultValueIsReadOnly=False,bDefaultValueIsIgnored=False,bAdvancedView=False,bOrphanedPin=False,)
   CustomProperties Pin (PinId=3BB1BD6841C3DB6320ACB298E074B35E,PinName="Max",PinType.PinCategory="int",PinType.PinSubCategory="",PinType.PinSubCategoryObject=None,PinType.PinSubCategoryMemberReference=(),PinType.PinValueType=(),PinType.ContainerType=None,PinType.bIsReference=False,PinType.bIsConst=False,PinType.bIsWeakPointer=False,PinType.bIsUObjectWrapper=False,PinType.bSerializeAsSinglePrecisionFloat=False,DefaultValue="100",AutogeneratedDefaultValue="0",PersistentGuid=00000000000000000000000000000000,bHidden=False,bNotConnectable=False,bDefaultValueIsReadOnly=False,bDefaultValueIsIgnored=False,bAdvancedView=False,bOrphanedPin=False,)
   CustomProperties Pin (PinId=590B28484F19505833C2019760C9EE9B,PinName="ReturnValue",Direction="EGPD_Output",PinType.PinCategory="int",PinType.PinSubCategory="",PinType.PinSubCategoryObject=None,PinType.PinSubCategoryMemberReference=(),PinType.PinValueType=(),PinType.ContainerType=None,PinType.bIsReference=False,PinType.bIsConst=False,PinType.bIsWeakPointer=False,PinType.bIsUObjectWrapper=False,PinType.bSerializeAsSinglePrecisionFloat=False,DefaultValue="0",AutogeneratedDefaultValue="0",LinkedTo=(K2Node_SetFieldsInStruct_2 7F7E4F6049450D02F5BE41BAB9C67FC0,),PersistentGuid=00000000000000000000000000000000,bHidden=False,bNotConnectable=False,bDefaultValueIsReadOnly=False,bDefaultValueIsIgnored=False,bAdvancedView=False,bOrphanedPin=False,)
End Object
Begin Object Class=/Script/BlueprintGraph.K2Node_CallFunction Name="K2Node_CallFunction_8" ExportPath="/Script/BlueprintGraph.K2Node_CallFunction'/Game/Weapon.Weapon:EventGraph.K2Node_CallFunction_8'"
   bIsPureFunc=True
   FunctionReference=(MemberParent="/Script/CoreUObject.Class'/Script/Engine.KismetMathLibrary'",MemberName="RandomInteger")
   NodePosX=2064
   NodePosY=-1104
   NodeGuid=79348D7648D657258A2BF78663043A37
   CustomProperties Pin (PinId=008D6F7243A41EA7B923FF9F1EC3F408,PinName="self",PinFriendlyName=NSLOCTEXT("K2Node", "Target", "Target"),PinType.PinCategory="object",PinType.PinSubCategory="",PinType.PinSubCategoryObject="/Script/CoreUObject.Class'/Script/Engine.KismetMathLibrary'",PinType.PinSubCategoryMemberReference=(),PinType.PinValueType=(),PinType.ContainerType=None,PinType.bIsReference=False,PinType.bIsConst=False,PinType.bIsWeakPointer=False,PinType.bIsUObjectWrapper=False,PinType.bSerializeAsSinglePrecisionFloat=False,DefaultObject="/Script/Engine.Default__KismetMathLibrary",PersistentGuid=00000000000000000000000000000000,bHidden=True,bNotConnectable=False,bDefaultValueIsReadOnly=False,bDefaultValueIsIgnored=False,bAdvancedView=False,bOrphanedPin=False,)
   CustomProperties Pin (PinId=3BB1BD6841C3DB6320ACB298E074B35E,PinName="Max",PinType.PinCategory="int",PinType.PinSubCategory="",PinType.PinSubCategoryObject=None,PinType.PinSubCategoryMemberReference=(),PinType.PinValueType=(),PinType.ContainerType=None,PinType.bIsReference=False,PinType.bIsConst=False,PinType.bIsWeakPointer=False,PinType.bIsUObjectWrapper=False,PinType.bSerializeAsSinglePrecisionFloat=False,DefaultValue="100",AutogeneratedDefaultValue="0",PersistentGuid=00000000000000000000000000000000,bHidden=False,bNotConnectable=False,bDefaultValueIsReadOnly=False,bDefaultValueIsIgnored=False,bAdvancedView=False,bOrphanedPin=False,)
   CustomProperties Pin (PinId=590B28484F19505833C2019760C9EE9B,PinName="ReturnValue",Direction="EGPD_Output",PinType.PinCategory="int",PinType.PinSubCategory="",PinType.PinSubCategoryObject=None,PinType.PinSubCategoryMemberReference=(),PinType.PinValueType=(),PinType.ContainerType=None,PinType.bIsReference=False,PinType.bIsConst=False,PinType.bIsWeakPointer=False,PinType.bIsUObjectWrapper=False,PinType.bSerializeAsSinglePrecisionFloat=False,DefaultValue="0",AutogeneratedDefaultValue="0",LinkedTo=(K2Node_SetFieldsInStruct_2 92C2B7984E733384FAAFB09EC572C06C,),PersistentGuid=00000000000000000000000000000000,bHidden=False,bNotConnectable=False,bDefaultValueIsReadOnly=False,bDefaultValueIsIgnored=False,bAdvancedView=False,bOrphanedPin=False,)
End Object
Begin Object Class=/Script/BlueprintGraph.K2Node_CallFunction Name="K2Node_CallFunction_13" ExportPath="/Script/BlueprintGraph.K2Node_CallFunction'/Game/Weapon.Weapon:EventGraph.K2Node_CallFunction_13'"
   bIsPureFunc=True
   FunctionReference=(MemberParent="/Script/CoreUObject.Class'/Script/Engine.KismetMathLibrary'",MemberName="RandomInteger")
   NodePosX=2064
   NodePosY=-1008
   NodeGuid=5216759E48D79C49A185CAA5968A18C0
   CustomProperties Pin (PinId=008D6F7243A41EA7B923FF9F1EC3F408,PinName="self",PinFriendlyName=NSLOCTEXT("K2Node", "Target", "Target"),PinType.PinCategory="object",PinType.PinSubCategory="",PinType.PinSubCategoryObject="/Script/CoreUObject.Class'/Script/Engine.KismetMathLibrary'",PinType.PinSubCategoryMemberReference=(),PinType.PinValueType=(),PinType.ContainerType=None,PinType.bIsReference=False,PinType.bIsConst=False,PinType.bIsWeakPointer=False,PinType.bIsUObjectWrapper=False,PinType.bSerializeAsSinglePrecisionFloat=False,DefaultObject="/Script/Engine.Default__KismetMathLibrary",PersistentGuid=00000000000000000000000000000000,bHidden=True,bNotConnectable=False,bDefaultValueIsReadOnly=False,bDefaultValueIsIgnored=False,bAdvancedView=False,bOrphanedPin=False,)
   CustomProperties Pin (PinId=3BB1BD6841C3DB6320ACB298E074B35E,PinName="Max",PinType.PinCategory="int",PinType.PinSubCategory="",PinType.PinSubCategoryObject=None,PinType.PinSubCategoryMemberReference=(),PinType.PinValueType=(),PinType.ContainerType=None,PinType.bIsReference=False,PinType.bIsConst=False,PinType.bIsWeakPointer=False,PinType.bIsUObjectWrapper=False,PinType.bSerializeAsSinglePrecisionFloat=False,DefaultValue="100",AutogeneratedDefaultValue="0",PersistentGuid=00000000000000000000000000000000,bHidden=False,bNotConnectable=False,bDefaultValueIsReadOnly=False,bDefaultValueIsIgnored=False,bAdvancedView=False,bOrphanedPin=False,)
   CustomProperties Pin (PinId=590B28484F19505833C2019760C9EE9B,PinName="ReturnValue",Direction="EGPD_Output",PinType.PinCategory="int",PinType.PinSubCategory="",PinType.PinSubCategoryObject=None,PinType.PinSubCategoryMemberReference=(),PinType.PinValueType=(),PinType.ContainerType=None,PinType.bIsReference=False,PinType.bIsConst=False,PinType.bIsWeakPointer=False,PinType.bIsUObjectWrapper=False,PinType.bSerializeAsSinglePrecisionFloat=False,DefaultValue="0",AutogeneratedDefaultValue="0",LinkedTo=(K2Node_SetFieldsInStruct_2 23E1DBF14F1C5AFF1755D696B7B031FF,),PersistentGuid=00000000000000000000000000000000,bHidden=False,bNotConnectable=False,bDefaultValueIsReadOnly=False,bDefaultValueIsIgnored=False,bAdvancedView=False,bOrphanedPin=False,)
End Object
Begin Object Class=/Script/BlueprintGraph.K2Node_CallFunction Name="K2Node_CallFunction_15" ExportPath="/Script/BlueprintGraph.K2Node_CallFunction'/Game/Weapon.Weapon:EventGraph.K2Node_CallFunction_15'"
   bIsPureFunc=True
   FunctionReference=(MemberParent="/Script/CoreUObject.Class'/Script/Engine.KismetMathLibrary'",MemberName="RandomInteger")
   NodePosX=2064
   NodePosY=-816
   NodeGuid=DF2CFAD243DB616A0CA3338A419635A4
   CustomProperties Pin (PinId=008D6F7243A41EA7B923FF9F1EC3F408,PinName="self",PinFriendlyName=NSLOCTEXT("K2Node", "Target", "Target"),PinToolTip="Target
Kismet Math Library Object Reference",PinType.PinCategory="object",PinType.PinSubCategory="",PinType.PinSubCategoryObject="/Script/CoreUObject.Class'/Script/Engine.KismetMathLibrary'",PinType.PinSubCategoryMemberReference=(),PinType.PinValueType=(),PinType.ContainerType=None,PinType.bIsReference=False,PinType.bIsConst=False,PinType.bIsWeakPointer=False,PinType.bIsUObjectWrapper=False,PinType.bSerializeAsSinglePrecisionFloat=False,DefaultObject="/Script/Engine.Default__KismetMathLibrary",PersistentGuid=00000000000000000000000000000000,bHidden=True,bNotConnectable=False,bDefaultValueIsReadOnly=False,bDefaultValueIsIgnored=False,bAdvancedView=False,bOrphanedPin=False,)
   CustomProperties Pin (PinId=3BB1BD6841C3DB6320ACB298E074B35E,PinName="Max",PinToolTip="Max
Integer",PinType.PinCategory="int",PinType.PinSubCategory="",PinType.PinSubCategoryObject=None,PinType.PinSubCategoryMemberReference=(),PinType.PinValueType=(),PinType.ContainerType=None,PinType.bIsReference=False,PinType.bIsConst=False,PinType.bIsWeakPointer=False,PinType.bIsUObjectWrapper=False,PinType.bSerializeAsSinglePrecisionFloat=False,DefaultValue="100",AutogeneratedDefaultValue="0",PersistentGuid=00000000000000000000000000000000,bHidden=False,bNotConnectable=False,bDefaultValueIsReadOnly=False,bDefaultValueIsIgnored=False,bAdvancedView=False,bOrphanedPin=False,)
   CustomProperties Pin (PinId=590B28484F19505833C2019760C9EE9B,PinName="ReturnValue",PinToolTip="Return Value
Integer

Returns a uniformly distributed random number between 0 and Max - 1",Direction="EGPD_Output",PinType.PinCategory="int",PinType.PinSubCategory="",PinType.PinSubCategoryObject=None,PinType.PinSubCategoryMemberReference=(),PinType.PinValueType=(),PinType.ContainerType=None,PinType.bIsReference=False,PinType.bIsConst=False,PinType.bIsWeakPointer=False,PinType.bIsUObjectWrapper=False,PinType.bSerializeAsSinglePrecisionFloat=False,DefaultValue="0",AutogeneratedDefaultValue="0",LinkedTo=(K2Node_SetFieldsInStruct_2 124B097844D810205499549871B6136B,),PersistentGuid=00000000000000000000000000000000,bHidden=False,bNotConnectable=False,bDefaultValueIsReadOnly=False,bDefaultValueIsIgnored=False,bAdvancedView=False,bOrphanedPin=False,)
End Object
Begin Object Class=/Script/BlueprintGraph.K2Node_CallFunction Name="K2Node_CallFunction_18" ExportPath="/Script/BlueprintGraph.K2Node_CallFunction'/Game/Weapon.Weapon:EventGraph.K2Node_CallFunction_18'"
   bIsPureFunc=True
   FunctionReference=(MemberParent="/Script/CoreUObject.Class'/Script/Engine.KismetMathLibrary'",MemberName="RandomIntegerInRange")
   NodePosX=2368
   NodePosY=-368
   NodeGuid=4C90B2344720F16BCF51A284181F7F37
   CustomProperties Pin (PinId=DF9B72B94869D6A0D2B78CB3E1E744E4,PinName="self",PinFriendlyName=NSLOCTEXT("K2Node", "Target", "Target"),PinType.PinCategory="object",PinType.PinSubCategory="",PinType.PinSubCategoryObject="/Script/CoreUObject.Class'/Script/Engine.KismetMathLibrary'",PinType.PinSubCategoryMemberReference=(),PinType.PinValueType=(),PinType.ContainerType=None,PinType.bIsReference=False,PinType.bIsConst=False,PinType.bIsWeakPointer=False,PinType.bIsUObjectWrapper=False,PinType.bSerializeAsSinglePrecisionFloat=False,DefaultObject="/Script/Engine.Default__KismetMathLibrary",PersistentGuid=00000000000000000000000000000000,bHidden=True,bNotConnectable=False,bDefaultValueIsReadOnly=False,bDefaultValueIsIgnored=False,bAdvancedView=False,bOrphanedPin=False,)
   CustomProperties Pin (PinId=E8C0D135468C3FB7EEAE51A74A782B24,PinName="Min",PinType.PinCategory="int",PinType.PinSubCategory="",PinType.PinSubCategoryObject=None,PinType.PinSubCategoryMemberReference=(),PinType.PinValueType=(),PinType.ContainerType=None,PinType.bIsReference=False,PinType.bIsConst=False,PinType.bIsWeakPointer=False,PinType.bIsUObjectWrapper=False,PinType.bSerializeAsSinglePrecisionFloat=False,DefaultValue="1",AutogeneratedDefaultValue="0",PersistentGuid=00000000000000000000000000000000,bHidden=False,bNotConnectable=False,bDefaultValueIsReadOnly=False,bDefaultValueIsIgnored=False,bAdvancedView=False,bOrphanedPin=False,)
   CustomProperties Pin (PinId=72C12BD841C052E236D724A870520008,PinName="Max",PinType.PinCategory="int",PinType.PinSubCategory="",PinType.PinSubCategoryObject=None,PinType.PinSubCategoryMemberReference=(),PinType.PinValueType=(),PinType.ContainerType=None,PinType.bIsReference=False,PinType.bIsConst=False,PinType.bIsWeakPointer=False,PinType.bIsUObjectWrapper=False,PinType.bSerializeAsSinglePrecisionFloat=False,DefaultValue="300",AutogeneratedDefaultValue="0",PersistentGuid=00000000000000000000000000000000,bHidden=False,bNotConnectable=False,bDefaultValueIsReadOnly=False,bDefaultValueIsIgnored=False,bAdvancedView=False,bOrphanedPin=False,)
   CustomProperties Pin (PinId=03A117ED4FB2A8C745BA93B229FB3716,PinName="ReturnValue",Direction="EGPD_Output",PinType.PinCategory="int",PinType.PinSubCategory="",PinType.PinSubCategoryObject=None,PinType.PinSubCategoryMemberReference=(),PinType.PinValueType=(),PinType.ContainerType=None,PinType.bIsReference=False,PinType.bIsConst=False,PinType.bIsWeakPointer=False,PinType.bIsUObjectWrapper=False,PinType.bSerializeAsSinglePrecisionFloat=False,DefaultValue="0",AutogeneratedDefaultValue="0",LinkedTo=(K2Node_SetFieldsInStruct_2 02F2594048E33F102A675FAD3B9BF0A7,),PersistentGuid=00000000000000000000000000000000,bHidden=False,bNotConnectable=False,bDefaultValueIsReadOnly=False,bDefaultValueIsIgnored=False,bAdvancedView=False,bOrphanedPin=False,)
End Object
Begin Object Class=/Script/BlueprintGraph.K2Node_CallFunction Name="K2Node_CallFunction_17" ExportPath="/Script/BlueprintGraph.K2Node_CallFunction'/Game/Weapon.Weapon:EventGraph.K2Node_CallFunction_17'"
   bIsPureFunc=True
   FunctionReference=(MemberParent="/Script/CoreUObject.Class'/Script/Engine.KismetMathLibrary'",MemberName="RandomIntegerInRange")
   NodePosX=2608
   NodePosY=-240
   NodeGuid=BDFC770742D3C1741511B29673D7B17C
   CustomProperties Pin (PinId=DF9B72B94869D6A0D2B78CB3E1E744E4,PinName="self",PinFriendlyName=NSLOCTEXT("K2Node", "Target", "Target"),PinType.PinCategory="object",PinType.PinSubCategory="",PinType.PinSubCategoryObject="/Script/CoreUObject.Class'/Script/Engine.KismetMathLibrary'",PinType.PinSubCategoryMemberReference=(),PinType.PinValueType=(),PinType.ContainerType=None,PinType.bIsReference=False,PinType.bIsConst=False,PinType.bIsWeakPointer=False,PinType.bIsUObjectWrapper=False,PinType.bSerializeAsSinglePrecisionFloat=False,DefaultObject="/Script/Engine.Default__KismetMathLibrary",PersistentGuid=00000000000000000000000000000000,bHidden=True,bNotConnectable=False,bDefaultValueIsReadOnly=False,bDefaultValueIsIgnored=False,bAdvancedView=False,bOrphanedPin=False,)
   CustomProperties Pin (PinId=E8C0D135468C3FB7EEAE51A74A782B24,PinName="Min",PinType.PinCategory="int",PinType.PinSubCategory="",PinType.PinSubCategoryObject=None,PinType.PinSubCategoryMemberReference=(),PinType.PinValueType=(),PinType.ContainerType=None,PinType.bIsReference=False,PinType.bIsConst=False,PinType.bIsWeakPointer=False,PinType.bIsUObjectWrapper=False,PinType.bSerializeAsSinglePrecisionFloat=False,DefaultValue="500",AutogeneratedDefaultValue="0",PersistentGuid=00000000000000000000000000000000,bHidden=False,bNotConnectable=False,bDefaultValueIsReadOnly=False,bDefaultValueIsIgnored=False,bAdvancedView=False,bOrphanedPin=False,)
   CustomProperties Pin (PinId=72C12BD841C052E236D724A870520008,PinName="Max",PinType.PinCategory="int",PinType.PinSubCategory="",PinType.PinSubCategoryObject=None,PinType.PinSubCategoryMemberReference=(),PinType.PinValueType=(),PinType.ContainerType=None,PinType.bIsReference=False,PinType.bIsConst=False,PinType.bIsWeakPointer=False,PinType.bIsUObjectWrapper=False,PinType.bSerializeAsSinglePrecisionFloat=False,DefaultValue="5000",AutogeneratedDefaultValue="0",PersistentGuid=00000000000000000000000000000000,bHidden=False,bNotConnectable=False,bDefaultValueIsReadOnly=False,bDefaultValueIsIgnored=False,bAdvancedView=False,bOrphanedPin=False,)
   CustomProperties Pin (PinId=03A117ED4FB2A8C745BA93B229FB3716,PinName="ReturnValue",Direction="EGPD_Output",PinType.PinCategory="int",PinType.PinSubCategory="",PinType.PinSubCategoryObject=None,PinType.PinSubCategoryMemberReference=(),PinType.PinValueType=(),PinType.ContainerType=None,PinType.bIsReference=False,PinType.bIsConst=False,PinType.bIsWeakPointer=False,PinType.bIsUObjectWrapper=False,PinType.bSerializeAsSinglePrecisionFloat=False,DefaultValue="0",AutogeneratedDefaultValue="0",LinkedTo=(K2Node_SetFieldsInStruct_2 0C9B992B4F68A4778AF06D9D152F9471,),PersistentGuid=00000000000000000000000000000000,bHidden=False,bNotConnectable=False,bDefaultValueIsReadOnly=False,bDefaultValueIsIgnored=False,bAdvancedView=False,bOrphanedPin=False,)
End Object
Finally we need to create a data model from this array, by going to the HUD Blueprint, getting the Weapon actor and then getting the WeaponsArray from it. Using this struct we can then create a data model called WeaponModel.
   Begin Object Class=/Script/BlueprintGraph.K2Node_CallFunction Name="K2Node_CallFunction_5" ExportPath="/Script/BlueprintGraph.K2Node_CallFunction'/Game/coherentBP.coherentBP:EventGraph.K2Node_CallFunction_5'"
   FunctionReference=(MemberParent="/Script/CoreUObject.Class'/Script/CohtmlPlugin.CohtmlBaseComponent'",MemberName="CreateDataModelFromStruct")
   NodePosX=2016
   NodePosY=256
   ErrorType=1
   NodeGuid=6205AA774E648A491968A79000208472
   CustomProperties Pin (PinId=F7A1B0D34101E5277FC665950571DE0C,PinName="execute",PinType.PinCategory="exec",PinType.PinSubCategory="",PinType.PinSubCategoryObject=None,PinType.PinSubCategoryMemberReference=(),PinType.PinValueType=(),PinType.ContainerType=None,PinType.bIsReference=False,PinType.bIsConst=False,PinType.bIsWeakPointer=False,PinType.bIsUObjectWrapper=False,PinType.bSerializeAsSinglePrecisionFloat=False,LinkedTo=(K2Node_SetFieldsInStruct_0 98B9DB7D41477733CF37D8A4C996B71D,),PersistentGuid=00000000000000000000000000000000,bHidden=False,bNotConnectable=False,bDefaultValueIsReadOnly=False,bDefaultValueIsIgnored=False,bAdvancedView=False,bOrphanedPin=False,)
   CustomProperties Pin (PinId=305A79784037F5775B7D528D9AE00ED6,PinName="then",Direction="EGPD_Output",PinType.PinCategory="exec",PinType.PinSubCategory="",PinType.PinSubCategoryObject=None,PinType.PinSubCategoryMemberReference=(),PinType.PinValueType=(),PinType.ContainerType=None,PinType.bIsReference=False,PinType.bIsConst=False,PinType.bIsWeakPointer=False,PinType.bIsUObjectWrapper=False,PinType.bSerializeAsSinglePrecisionFloat=False,LinkedTo=(K2Node_SetFieldsInStruct_1 38B0769E4D45F4D2113833842A43E999,),PersistentGuid=00000000000000000000000000000000,bHidden=False,bNotConnectable=False,bDefaultValueIsReadOnly=False,bDefaultValueIsIgnored=False,bAdvancedView=False,bOrphanedPin=False,)
   CustomProperties Pin (PinId=0BCB03334E1E9CB08E5AFDA52875DCD0,PinName="self",PinFriendlyName=NSLOCTEXT("K2Node", "Target", "Target"),PinType.PinCategory="object",PinType.PinSubCategory="",PinType.PinSubCategoryObject="/Script/CoreUObject.Class'/Script/CohtmlPlugin.CohtmlBaseComponent'",PinType.PinSubCategoryMemberReference=(),PinType.PinValueType=(),PinType.ContainerType=None,PinType.bIsReference=False,PinType.bIsConst=False,PinType.bIsWeakPointer=False,PinType.bIsUObjectWrapper=False,PinType.bSerializeAsSinglePrecisionFloat=False,LinkedTo=(K2Node_VariableGet_0 38E3AF2744038116050BCC8193A8F1A4,),PersistentGuid=00000000000000000000000000000000,bHidden=False,bNotConnectable=False,bDefaultValueIsReadOnly=False,bDefaultValueIsIgnored=False,bAdvancedView=False,bOrphanedPin=False,)
   CustomProperties Pin (PinId=845EA7604B044C74268F699707F7922E,PinName="Name",PinType.PinCategory="string",PinType.PinSubCategory="",PinType.PinSubCategoryObject=None,PinType.PinSubCategoryMemberReference=(),PinType.PinValueType=(),PinType.ContainerType=None,PinType.bIsReference=False,PinType.bIsConst=False,PinType.bIsWeakPointer=False,PinType.bIsUObjectWrapper=False,PinType.bSerializeAsSinglePrecisionFloat=False,DefaultValue="WeaponModel",PersistentGuid=00000000000000000000000000000000,bHidden=False,bNotConnectable=False,bDefaultValueIsReadOnly=False,bDefaultValueIsIgnored=False,bAdvancedView=False,bOrphanedPin=False,)
   CustomProperties Pin (PinId=C51E0D024D2C165A46F9A1B2A52A9914,PinName="Struct",PinType.PinCategory="struct",PinType.PinSubCategory="",PinType.PinSubCategoryObject="/Script/Engine.UserDefinedStruct'/Game/Weapons.Weapons'",PinType.PinSubCategoryMemberReference=(),PinType.PinValueType=(),PinType.ContainerType=None,PinType.bIsReference=True,PinType.bIsConst=False,PinType.bIsWeakPointer=False,PinType.bIsUObjectWrapper=False,PinType.bSerializeAsSinglePrecisionFloat=False,LinkedTo=(K2Node_SetFieldsInStruct_0 6EE6E82C47443679D6BA47862D9D25BC,),PersistentGuid=00000000000000000000000000000000,bHidden=False,bNotConnectable=False,bDefaultValueIsReadOnly=False,bDefaultValueIsIgnored=False,bAdvancedView=False,bOrphanedPin=False,)
End Object
Begin Object Class=/Script/BlueprintGraph.K2Node_CallFunction Name="K2Node_CallFunction_4" ExportPath="/Script/BlueprintGraph.K2Node_CallFunction'/Game/coherentBP.coherentBP:EventGraph.K2Node_CallFunction_4'"
   FunctionReference=(MemberParent="/Script/CoreUObject.Class'/Script/Engine.GameplayStatics'",MemberName="GetActorOfClass")
   NodePosX=1056
   NodePosY=304
   NodeGuid=F40B4F06449A430F1DB6F08BB85F2E26
   CustomProperties Pin (PinId=4F913C0541E791D6956F219D1F4341AE,PinName="execute",PinToolTip="
Exec",PinType.PinCategory="exec",PinType.PinSubCategory="",PinType.PinSubCategoryObject=None,PinType.PinSubCategoryMemberReference=(),PinType.PinValueType=(),PinType.ContainerType=None,PinType.bIsReference=False,PinType.bIsConst=False,PinType.bIsWeakPointer=False,PinType.bIsUObjectWrapper=False,PinType.bSerializeAsSinglePrecisionFloat=False,LinkedTo=(K2Node_CustomEvent_0 0CAE98AB4973DEC1D51995A205A8F239,),PersistentGuid=00000000000000000000000000000000,bHidden=False,bNotConnectable=False,bDefaultValueIsReadOnly=False,bDefaultValueIsIgnored=False,bAdvancedView=False,bOrphanedPin=False,)
   CustomProperties Pin (PinId=E260251849A38BCF2470D4B9EFAA402D,PinName="then",PinToolTip="
Exec",Direction="EGPD_Output",PinType.PinCategory="exec",PinType.PinSubCategory="",PinType.PinSubCategoryObject=None,PinType.PinSubCategoryMemberReference=(),PinType.PinValueType=(),PinType.ContainerType=None,PinType.bIsReference=False,PinType.bIsConst=False,PinType.bIsWeakPointer=False,PinType.bIsUObjectWrapper=False,PinType.bSerializeAsSinglePrecisionFloat=False,LinkedTo=(K2Node_VariableSet_0 1055ED7A4E6896B0CE70E6B5CE07CF81,),PersistentGuid=00000000000000000000000000000000,bHidden=False,bNotConnectable=False,bDefaultValueIsReadOnly=False,bDefaultValueIsIgnored=False,bAdvancedView=False,bOrphanedPin=False,)
   CustomProperties Pin (PinId=442EC5D24B5CE6289DF541AFAF89A199,PinName="self",PinFriendlyName=NSLOCTEXT("K2Node", "Target", "Target"),PinToolTip="Target
Gameplay Statics Object Reference",PinType.PinCategory="object",PinType.PinSubCategory="",PinType.PinSubCategoryObject="/Script/CoreUObject.Class'/Script/Engine.GameplayStatics'",PinType.PinSubCategoryMemberReference=(),PinType.PinValueType=(),PinType.ContainerType=None,PinType.bIsReference=False,PinType.bIsConst=False,PinType.bIsWeakPointer=False,PinType.bIsUObjectWrapper=False,PinType.bSerializeAsSinglePrecisionFloat=False,DefaultObject="/Script/Engine.Default__GameplayStatics",PersistentGuid=00000000000000000000000000000000,bHidden=True,bNotConnectable=False,bDefaultValueIsReadOnly=False,bDefaultValueIsIgnored=False,bAdvancedView=False,bOrphanedPin=False,)
   CustomProperties Pin (PinId=B68B30E7443E9D7A8D34E6813A9007B1,PinName="WorldContextObject",PinToolTip="World Context Object
Object Reference",PinType.PinCategory="object",PinType.PinSubCategory="",PinType.PinSubCategoryObject="/Script/CoreUObject.Class'/Script/CoreUObject.Object'",PinType.PinSubCategoryMemberReference=(),PinType.PinValueType=(),PinType.ContainerType=None,PinType.bIsReference=False,PinType.bIsConst=True,PinType.bIsWeakPointer=False,PinType.bIsUObjectWrapper=False,PinType.bSerializeAsSinglePrecisionFloat=False,PersistentGuid=00000000000000000000000000000000,bHidden=True,bNotConnectable=False,bDefaultValueIsReadOnly=False,bDefaultValueIsIgnored=False,bAdvancedView=False,bOrphanedPin=False,)
   CustomProperties Pin (PinId=EC792CA441924D78ADBEB283BABB5D35,PinName="ActorClass",PinToolTip="Actor Class
Actor Class Reference

Class of Actor to find. Must be specified or result will be empty.",PinType.PinCategory="class",PinType.PinSubCategory="",PinType.PinSubCategoryObject="/Script/CoreUObject.Class'/Script/Engine.Actor'",PinType.PinSubCategoryMemberReference=(),PinType.PinValueType=(),PinType.ContainerType=None,PinType.bIsReference=False,PinType.bIsConst=False,PinType.bIsWeakPointer=False,PinType.bIsUObjectWrapper=True,PinType.bSerializeAsSinglePrecisionFloat=False,DefaultObject="/Game/Weapon.Weapon_C",PersistentGuid=00000000000000000000000000000000,bHidden=False,bNotConnectable=False,bDefaultValueIsReadOnly=False,bDefaultValueIsIgnored=False,bAdvancedView=False,bOrphanedPin=False,)
   CustomProperties Pin (PinId=72A9B64B40DFF30311B3C28B50CFDEA8,PinName="ReturnValue",PinToolTip="Return Value
Weapon Object Reference

Actor of the specified class.",Direction="EGPD_Output",PinType.PinCategory="object",PinType.PinSubCategory="",PinType.PinSubCategoryObject="/Script/Engine.BlueprintGeneratedClass'/Game/Weapon.Weapon_C'",PinType.PinSubCategoryMemberReference=(),PinType.PinValueType=(),PinType.ContainerType=None,PinType.bIsReference=False,PinType.bIsConst=False,PinType.bIsWeakPointer=False,PinType.bIsUObjectWrapper=False,PinType.bSerializeAsSinglePrecisionFloat=False,LinkedTo=(K2Node_VariableSet_0 350B725B48F22A467558D1B58F0DB3DB,),PersistentGuid=00000000000000000000000000000000,bHidden=False,bNotConnectable=False,bDefaultValueIsReadOnly=False,bDefaultValueIsIgnored=False,bAdvancedView=False,bOrphanedPin=False,)
End Object
Begin Object Class=/Script/BlueprintGraph.K2Node_VariableSet Name="K2Node_VariableSet_0" ExportPath="/Script/BlueprintGraph.K2Node_VariableSet'/Game/coherentBP.coherentBP:EventGraph.K2Node_VariableSet_0'"
   VariableReference=(MemberName="Weapon",MemberGuid=FA3E5BF946C11A92BA4C6BA49404E7CF,bSelfContext=True)
   NodePosX=1456
   NodePosY=320
   NodeGuid=CBB61E9B4A1FC900DAC89BB54CEB4E84
   CustomProperties Pin (PinId=1055ED7A4E6896B0CE70E6B5CE07CF81,PinName="execute",PinType.PinCategory="exec",PinType.PinSubCategory="",PinType.PinSubCategoryObject=None,PinType.PinSubCategoryMemberReference=(),PinType.PinValueType=(),PinType.ContainerType=None,PinType.bIsReference=False,PinType.bIsConst=False,PinType.bIsWeakPointer=False,PinType.bIsUObjectWrapper=False,PinType.bSerializeAsSinglePrecisionFloat=False,LinkedTo=(K2Node_CallFunction_4 E260251849A38BCF2470D4B9EFAA402D,),PersistentGuid=00000000000000000000000000000000,bHidden=False,bNotConnectable=False,bDefaultValueIsReadOnly=False,bDefaultValueIsIgnored=False,bAdvancedView=False,bOrphanedPin=False,)
   CustomProperties Pin (PinId=ACEC04254840B8E405FED2865A4801AB,PinName="then",Direction="EGPD_Output",PinType.PinCategory="exec",PinType.PinSubCategory="",PinType.PinSubCategoryObject=None,PinType.PinSubCategoryMemberReference=(),PinType.PinValueType=(),PinType.ContainerType=None,PinType.bIsReference=False,PinType.bIsConst=False,PinType.bIsWeakPointer=False,PinType.bIsUObjectWrapper=False,PinType.bSerializeAsSinglePrecisionFloat=False,LinkedTo=(K2Node_SetFieldsInStruct_0 A13EBE5C4B4CC10843E2F5B0AD5EAFD1,),PersistentGuid=00000000000000000000000000000000,bHidden=False,bNotConnectable=False,bDefaultValueIsReadOnly=False,bDefaultValueIsIgnored=False,bAdvancedView=False,bOrphanedPin=False,)
   CustomProperties Pin (PinId=350B725B48F22A467558D1B58F0DB3DB,PinName="Weapon",PinType.PinCategory="object",PinType.PinSubCategory="",PinType.PinSubCategoryObject="/Script/Engine.BlueprintGeneratedClass'/Game/Weapon.Weapon_C'",PinType.PinSubCategoryMemberReference=(),PinType.PinValueType=(),PinType.ContainerType=None,PinType.bIsReference=False,PinType.bIsConst=False,PinType.bIsWeakPointer=False,PinType.bIsUObjectWrapper=False,PinType.bSerializeAsSinglePrecisionFloat=False,LinkedTo=(K2Node_CallFunction_4 72A9B64B40DFF30311B3C28B50CFDEA8,),PersistentGuid=00000000000000000000000000000000,bHidden=False,bNotConnectable=False,bDefaultValueIsReadOnly=False,bDefaultValueIsIgnored=False,bAdvancedView=False,bOrphanedPin=False,)
   CustomProperties Pin (PinId=2C8EEC5B4797C749D1573EAC6B50A12D,PinName="Output_Get",PinToolTip="Retrieves the value of the variable, can use instead of a separate Get node",Direction="EGPD_Output",PinType.PinCategory="object",PinType.PinSubCategory="",PinType.PinSubCategoryObject="/Script/Engine.BlueprintGeneratedClass'/Game/Weapon.Weapon_C'",PinType.PinSubCategoryMemberReference=(),PinType.PinValueType=(),PinType.ContainerType=None,PinType.bIsReference=False,PinType.bIsConst=False,PinType.bIsWeakPointer=False,PinType.bIsUObjectWrapper=False,PinType.bSerializeAsSinglePrecisionFloat=False,LinkedTo=(K2Node_VariableGet_1 EB13D3C0492A4762D53E7EBBA20AF66A,),PersistentGuid=00000000000000000000000000000000,bHidden=False,bNotConnectable=False,bDefaultValueIsReadOnly=False,bDefaultValueIsIgnored=False,bAdvancedView=False,bOrphanedPin=False,)
   CustomProperties Pin (PinId=7FB8BE6A4E90A855DA72A483D3879475,PinName="self",PinFriendlyName=NSLOCTEXT("K2Node", "Target", "Target"),PinType.PinCategory="object",PinType.PinSubCategory="",PinType.PinSubCategoryObject="/Script/Engine.BlueprintGeneratedClass'/Game/coherentBP.coherentBP_C'",PinType.PinSubCategoryMemberReference=(),PinType.PinValueType=(),PinType.ContainerType=None,PinType.bIsReference=False,PinType.bIsConst=False,PinType.bIsWeakPointer=False,PinType.bIsUObjectWrapper=False,PinType.bSerializeAsSinglePrecisionFloat=False,PersistentGuid=00000000000000000000000000000000,bHidden=True,bNotConnectable=False,bDefaultValueIsReadOnly=False,bDefaultValueIsIgnored=False,bAdvancedView=False,bOrphanedPin=False,)
End Object
Begin Object Class=/Script/BlueprintGraph.K2Node_VariableGet Name="K2Node_VariableGet_1" ExportPath="/Script/BlueprintGraph.K2Node_VariableGet'/Game/coherentBP.coherentBP:EventGraph.K2Node_VariableGet_1'"
   VariableReference=(MemberParent="/Script/Engine.BlueprintGeneratedClass'/Game/Weapon.Weapon_C'",MemberName="weaponsArray",MemberGuid=E585F024471860BEA125DBB3A043677F)
   SelfContextInfo=NotSelfContext
   NodePosX=1536
   NodePosY=480
   ErrorType=1
   NodeGuid=3D0F15164C4F4AFEC54F6B815AAC41A4
   CustomProperties Pin (PinId=FD84569A48969E9881A65288C6EC14CD,PinName="weaponsArray",Direction="EGPD_Output",PinType.PinCategory="struct",PinType.PinSubCategory="",PinType.PinSubCategoryObject="/Script/Engine.UserDefinedStruct'/Game/WeaponStruct.WeaponStruct'",PinType.PinSubCategoryMemberReference=(),PinType.PinValueType=(),PinType.ContainerType=Array,PinType.bIsReference=False,PinType.bIsConst=False,PinType.bIsWeakPointer=False,PinType.bIsUObjectWrapper=False,PinType.bSerializeAsSinglePrecisionFloat=False,LinkedTo=(K2Node_SetFieldsInStruct_0 DEF270D64A210D8CE054E58FB7568888,K2Node_GetArrayItem_0 E77CA7D44E781384C7651895990F0DBF,),PersistentGuid=00000000000000000000000000000000,bHidden=False,bNotConnectable=False,bDefaultValueIsReadOnly=False,bDefaultValueIsIgnored=False,bAdvancedView=False,bOrphanedPin=False,)
   CustomProperties Pin (PinId=EB13D3C0492A4762D53E7EBBA20AF66A,PinName="self",PinFriendlyName=NSLOCTEXT("K2Node", "Target", "Target"),PinType.PinCategory="object",PinType.PinSubCategory="",PinType.PinSubCategoryObject="/Script/Engine.BlueprintGeneratedClass'/Game/Weapon.Weapon_C'",PinType.PinSubCategoryMemberReference=(),PinType.PinValueType=(),PinType.ContainerType=None,PinType.bIsReference=False,PinType.bIsConst=False,PinType.bIsWeakPointer=False,PinType.bIsUObjectWrapper=False,PinType.bSerializeAsSinglePrecisionFloat=False,LinkedTo=(K2Node_VariableSet_0 2C8EEC5B4797C749D1573EAC6B50A12D,),PersistentGuid=00000000000000000000000000000000,bHidden=False,bNotConnectable=False,bDefaultValueIsReadOnly=False,bDefaultValueIsIgnored=False,bAdvancedView=False,bOrphanedPin=False,)
End Object
Begin Object Class=/Script/BlueprintGraph.K2Node_VariableGet Name="K2Node_VariableGet_4" ExportPath="/Script/BlueprintGraph.K2Node_VariableGet'/Game/coherentBP.coherentBP:EventGraph.K2Node_VariableGet_4'"
   VariableReference=(MemberName="WeaponModel",MemberGuid=4E9C18DC41A29D676EB768A5125447B6,bSelfContext=True)
   NodePosX=1568
   NodePosY=160
   NodeGuid=7CF2F9EB4ED2867876323987753C8E24
   CustomProperties Pin (PinId=F9918C074A43CE4633FAE691E31D35FD,PinName="WeaponModel",Direction="EGPD_Output",PinType.PinCategory="struct",PinType.PinSubCategory="",PinType.PinSubCategoryObject="/Script/Engine.UserDefinedStruct'/Game/Weapons.Weapons'",PinType.PinSubCategoryMemberReference=(),PinType.PinValueType=(),PinType.ContainerType=None,PinType.bIsReference=False,PinType.bIsConst=False,PinType.bIsWeakPointer=False,PinType.bIsUObjectWrapper=False,PinType.bSerializeAsSinglePrecisionFloat=False,LinkedTo=(K2Node_SetFieldsInStruct_0 27E7BFAF4CDB915FB2D8339C17317AE6,),PersistentGuid=00000000000000000000000000000000,bHidden=False,bNotConnectable=False,bDefaultValueIsReadOnly=False,bDefaultValueIsIgnored=False,bAdvancedView=False,bOrphanedPin=False,)
   CustomProperties Pin (PinId=9042ED6140A5CF667AF281AF8C156360,PinName="self",PinFriendlyName=NSLOCTEXT("K2Node", "Target", "Target"),PinType.PinCategory="object",PinType.PinSubCategory="",PinType.PinSubCategoryObject="/Script/Engine.BlueprintGeneratedClass'/Game/coherentBP.coherentBP_C'",PinType.PinSubCategoryMemberReference=(),PinType.PinValueType=(),PinType.ContainerType=None,PinType.bIsReference=False,PinType.bIsConst=False,PinType.bIsWeakPointer=False,PinType.bIsUObjectWrapper=False,PinType.bSerializeAsSinglePrecisionFloat=False,PersistentGuid=00000000000000000000000000000000,bHidden=True,bNotConnectable=False,bDefaultValueIsReadOnly=False,bDefaultValueIsIgnored=False,bAdvancedView=False,bOrphanedPin=False,)
End Object
Begin Object Class=/Script/BlueprintGraph.K2Node_SetFieldsInStruct Name="K2Node_SetFieldsInStruct_0" ExportPath="/Script/BlueprintGraph.K2Node_SetFieldsInStruct'/Game/coherentBP.coherentBP:EventGraph.K2Node_SetFieldsInStruct_0'"
   bMadeAfterOverridePinRemoval=True
   ShowPinForProperties(0)=(PropertyName="weapons_3_87FEC4294366D9B492F602B11E927A39",PropertyFriendlyName="weapons",bShowPin=True,bCanToggleVisibility=True)
   StructType="/Script/Engine.UserDefinedStruct'/Game/Weapons.Weapons'"
   NodePosX=1744
   NodePosY=304
   NodeGuid=FDDB0F6F4FD2485AD71FCC90B7095D9C
   CustomProperties Pin (PinId=A13EBE5C4B4CC10843E2F5B0AD5EAFD1,PinName="execute",PinType.PinCategory="exec",PinType.PinSubCategory="",PinType.PinSubCategoryObject=None,PinType.PinSubCategoryMemberReference=(),PinType.PinValueType=(),PinType.ContainerType=None,PinType.bIsReference=False,PinType.bIsConst=False,PinType.bIsWeakPointer=False,PinType.bIsUObjectWrapper=False,PinType.bSerializeAsSinglePrecisionFloat=False,LinkedTo=(K2Node_VariableSet_0 ACEC04254840B8E405FED2865A4801AB,),PersistentGuid=00000000000000000000000000000000,bHidden=False,bNotConnectable=False,bDefaultValueIsReadOnly=False,bDefaultValueIsIgnored=False,bAdvancedView=False,bOrphanedPin=False,)
   CustomProperties Pin (PinId=98B9DB7D41477733CF37D8A4C996B71D,PinName="then",Direction="EGPD_Output",PinType.PinCategory="exec",PinType.PinSubCategory="",PinType.PinSubCategoryObject=None,PinType.PinSubCategoryMemberReference=(),PinType.PinValueType=(),PinType.ContainerType=None,PinType.bIsReference=False,PinType.bIsConst=False,PinType.bIsWeakPointer=False,PinType.bIsUObjectWrapper=False,PinType.bSerializeAsSinglePrecisionFloat=False,LinkedTo=(K2Node_CallFunction_5 F7A1B0D34101E5277FC665950571DE0C,),PersistentGuid=00000000000000000000000000000000,bHidden=False,bNotConnectable=False,bDefaultValueIsReadOnly=False,bDefaultValueIsIgnored=False,bAdvancedView=False,bOrphanedPin=False,)
   CustomProperties Pin (PinId=27E7BFAF4CDB915FB2D8339C17317AE6,PinName="StructRef",PinType.PinCategory="struct",PinType.PinSubCategory="",PinType.PinSubCategoryObject="/Script/Engine.UserDefinedStruct'/Game/Weapons.Weapons'",PinType.PinSubCategoryMemberReference=(),PinType.PinValueType=(),PinType.ContainerType=None,PinType.bIsReference=True,PinType.bIsConst=False,PinType.bIsWeakPointer=False,PinType.bIsUObjectWrapper=False,PinType.bSerializeAsSinglePrecisionFloat=False,LinkedTo=(K2Node_VariableGet_4 F9918C074A43CE4633FAE691E31D35FD,),ReferencePassThroughConnection=K2Node_SetFieldsInStruct_0 6EE6E82C47443679D6BA47862D9D25BC,PersistentGuid=00000000000000000000000000000000,bHidden=False,bNotConnectable=False,bDefaultValueIsReadOnly=False,bDefaultValueIsIgnored=False,bAdvancedView=False,bOrphanedPin=False,)
   CustomProperties Pin (PinId=6EE6E82C47443679D6BA47862D9D25BC,PinName="StructOut",PinToolTip="Reference to the input struct",Direction="EGPD_Output",PinType.PinCategory="struct",PinType.PinSubCategory="",PinType.PinSubCategoryObject="/Script/Engine.UserDefinedStruct'/Game/Weapons.Weapons'",PinType.PinSubCategoryMemberReference=(),PinType.PinValueType=(),PinType.ContainerType=None,PinType.bIsReference=True,PinType.bIsConst=False,PinType.bIsWeakPointer=False,PinType.bIsUObjectWrapper=False,PinType.bSerializeAsSinglePrecisionFloat=False,LinkedTo=(K2Node_CallFunction_5 C51E0D024D2C165A46F9A1B2A52A9914,),ReferencePassThroughConnection=K2Node_SetFieldsInStruct_0 27E7BFAF4CDB915FB2D8339C17317AE6,PersistentGuid=00000000000000000000000000000000,bHidden=False,bNotConnectable=False,bDefaultValueIsReadOnly=False,bDefaultValueIsIgnored=False,bAdvancedView=False,bOrphanedPin=False,)
   CustomProperties Pin (PinId=DEF270D64A210D8CE054E58FB7568888,PinName="weapons_3_87FEC4294366D9B492F602B11E927A39",PinFriendlyName="weapons",PinToolTip="Weapons
Array of Weapon Struct Structures",PinType.PinCategory="struct",PinType.PinSubCategory="",PinType.PinSubCategoryObject="/Script/Engine.UserDefinedStruct'/Game/WeaponStruct.WeaponStruct'",PinType.PinSubCategoryMemberReference=(),PinType.PinValueType=(),PinType.ContainerType=Array,PinType.bIsReference=False,PinType.bIsConst=False,PinType.bIsWeakPointer=False,PinType.bIsUObjectWrapper=False,PinType.bSerializeAsSinglePrecisionFloat=False,LinkedTo=(K2Node_VariableGet_1 FD84569A48969E9881A65288C6EC14CD,),PersistentGuid=87FEC4294366D9B492F602B11E927A39,bHidden=False,bNotConnectable=False,bDefaultValueIsReadOnly=False,bDefaultValueIsIgnored=False,bAdvancedView=False,bOrphanedPin=False,)
End Object
Setting the selected item model
The last thing we need to add is to create the SelectedItem model. This model will show which item is currently selected and all it’s stats.
To create it we’ll just get the first element of the WeaponModel, create and update a weapon struct and then create a new model from it.
   Begin Object Class=/Script/BlueprintGraph.K2Node_CallFunction Name="K2Node_CallFunction_7" ExportPath="/Script/BlueprintGraph.K2Node_CallFunction'/Game/coherentBP.coherentBP:EventGraph.K2Node_CallFunction_7'"
   FunctionReference=(MemberParent="/Script/CoreUObject.Class'/Script/CohtmlPlugin.CohtmlBaseComponent'",MemberName="CreateDataModelFromStruct")
   NodePosX=3264
   NodePosY=368
   NodeGuid=EC806A934633E6C5846DCBB51522055C
   CustomProperties Pin (PinId=B28D48A3418FD52C7049B2961679172B,PinName="execute",PinType.PinCategory="exec",PinType.PinSubCategory="",PinType.PinSubCategoryObject=None,PinType.PinSubCategoryMemberReference=(),PinType.PinValueType=(),PinType.ContainerType=None,PinType.bIsReference=False,PinType.bIsConst=False,PinType.bIsWeakPointer=False,PinType.bIsUObjectWrapper=False,PinType.bSerializeAsSinglePrecisionFloat=False,LinkedTo=(K2Node_SetFieldsInStruct_1 EFFF88624191B14A36C64DB96F9EC45F,),PersistentGuid=00000000000000000000000000000000,bHidden=False,bNotConnectable=False,bDefaultValueIsReadOnly=False,bDefaultValueIsIgnored=False,bAdvancedView=False,bOrphanedPin=False,)
   CustomProperties Pin (PinId=055BD10349CC4EB09BDA05AC193FC0D6,PinName="then",Direction="EGPD_Output",PinType.PinCategory="exec",PinType.PinSubCategory="",PinType.PinSubCategoryObject=None,PinType.PinSubCategoryMemberReference=(),PinType.PinValueType=(),PinType.ContainerType=None,PinType.bIsReference=False,PinType.bIsConst=False,PinType.bIsWeakPointer=False,PinType.bIsUObjectWrapper=False,PinType.bSerializeAsSinglePrecisionFloat=False,PersistentGuid=00000000000000000000000000000000,bHidden=False,bNotConnectable=False,bDefaultValueIsReadOnly=False,bDefaultValueIsIgnored=False,bAdvancedView=False,bOrphanedPin=False,)
   CustomProperties Pin (PinId=8D7FE3E14F2F85DCC53196A64D26DEAE,PinName="self",PinFriendlyName=NSLOCTEXT("K2Node", "Target", "Target"),PinType.PinCategory="object",PinType.PinSubCategory="",PinType.PinSubCategoryObject="/Script/CoreUObject.Class'/Script/CohtmlPlugin.CohtmlBaseComponent'",PinType.PinSubCategoryMemberReference=(),PinType.PinValueType=(),PinType.ContainerType=None,PinType.bIsReference=False,PinType.bIsConst=False,PinType.bIsWeakPointer=False,PinType.bIsUObjectWrapper=False,PinType.bSerializeAsSinglePrecisionFloat=False,LinkedTo=(K2Node_VariableGet_0 38E3AF2744038116050BCC8193A8F1A4,),PersistentGuid=00000000000000000000000000000000,bHidden=False,bNotConnectable=False,bDefaultValueIsReadOnly=False,bDefaultValueIsIgnored=False,bAdvancedView=False,bOrphanedPin=False,)
   CustomProperties Pin (PinId=EC1EA71845C488BFE7947A80032E616E,PinName="Name",PinType.PinCategory="string",PinType.PinSubCategory="",PinType.PinSubCategoryObject=None,PinType.PinSubCategoryMemberReference=(),PinType.PinValueType=(),PinType.ContainerType=None,PinType.bIsReference=False,PinType.bIsConst=False,PinType.bIsWeakPointer=False,PinType.bIsUObjectWrapper=False,PinType.bSerializeAsSinglePrecisionFloat=False,DefaultValue="SelectedItem",PersistentGuid=00000000000000000000000000000000,bHidden=False,bNotConnectable=False,bDefaultValueIsReadOnly=False,bDefaultValueIsIgnored=False,bAdvancedView=False,bOrphanedPin=False,)
   CustomProperties Pin (PinId=C3BEC83A43CFBB1DE5B35E94CCDBC535,PinName="Struct",PinType.PinCategory="struct",PinType.PinSubCategory="",PinType.PinSubCategoryObject="/Script/Engine.UserDefinedStruct'/Game/WeaponStruct.WeaponStruct'",PinType.PinSubCategoryMemberReference=(),PinType.PinValueType=(),PinType.ContainerType=None,PinType.bIsReference=True,PinType.bIsConst=False,PinType.bIsWeakPointer=False,PinType.bIsUObjectWrapper=False,PinType.bSerializeAsSinglePrecisionFloat=False,LinkedTo=(K2Node_SetFieldsInStruct_1 33C22BA54A65FC6F4624F690EDAD4A5F,),PersistentGuid=00000000000000000000000000000000,bHidden=False,bNotConnectable=False,bDefaultValueIsReadOnly=False,bDefaultValueIsIgnored=False,bAdvancedView=False,bOrphanedPin=False,)
End Object
Begin Object Class=/Script/BlueprintGraph.K2Node_VariableGet Name="K2Node_VariableGet_3" ExportPath="/Script/BlueprintGraph.K2Node_VariableGet'/Game/coherentBP.coherentBP:EventGraph.K2Node_VariableGet_3'"
   VariableReference=(MemberName="selectedWeapon",MemberGuid=089A486B47DB8D2DE986969BD4B0173F,bSelfContext=True)
   NodePosX=2704
   NodePosY=224
   NodeGuid=BFF000D9421FCA47D169DDABD11B143B
   CustomProperties Pin (PinId=1E6317284320D2A64331108C2D0552C7,PinName="selectedWeapon",Direction="EGPD_Output",PinType.PinCategory="struct",PinType.PinSubCategory="",PinType.PinSubCategoryObject="/Script/Engine.UserDefinedStruct'/Game/WeaponStruct.WeaponStruct'",PinType.PinSubCategoryMemberReference=(),PinType.PinValueType=(),PinType.ContainerType=None,PinType.bIsReference=False,PinType.bIsConst=False,PinType.bIsWeakPointer=False,PinType.bIsUObjectWrapper=False,PinType.bSerializeAsSinglePrecisionFloat=False,LinkedTo=(K2Node_SetFieldsInStruct_1 179F9C08443BDA77B72325BCCA2C86F8,),PersistentGuid=00000000000000000000000000000000,bHidden=False,bNotConnectable=False,bDefaultValueIsReadOnly=False,bDefaultValueIsIgnored=False,bAdvancedView=False,bOrphanedPin=False,)
   CustomProperties Pin (PinId=EFD1393C47E5BB6EFE6501BAA6C8F232,PinName="self",PinFriendlyName=NSLOCTEXT("K2Node", "Target", "Target"),PinType.PinCategory="object",PinType.PinSubCategory="",PinType.PinSubCategoryObject="/Script/Engine.BlueprintGeneratedClass'/Game/coherentBP.coherentBP_C'",PinType.PinSubCategoryMemberReference=(),PinType.PinValueType=(),PinType.ContainerType=None,PinType.bIsReference=False,PinType.bIsConst=False,PinType.bIsWeakPointer=False,PinType.bIsUObjectWrapper=False,PinType.bSerializeAsSinglePrecisionFloat=False,PersistentGuid=00000000000000000000000000000000,bHidden=True,bNotConnectable=False,bDefaultValueIsReadOnly=False,bDefaultValueIsIgnored=False,bAdvancedView=False,bOrphanedPin=False,)
End Object
Begin Object Class=/Script/BlueprintGraph.K2Node_SetFieldsInStruct Name="K2Node_SetFieldsInStruct_1" ExportPath="/Script/BlueprintGraph.K2Node_SetFieldsInStruct'/Game/coherentBP.coherentBP:EventGraph.K2Node_SetFieldsInStruct_1'"
   bMadeAfterOverridePinRemoval=True
   ShowPinForProperties(0)=(PropertyName="name_2_4EFD82EE4A41C49B2B82F8A545887E09",PropertyFriendlyName="name",bShowPin=True,bCanToggleVisibility=True)
   ShowPinForProperties(1)=(PropertyName="rank_5_1191FC9F43F46534C95BBE9EDC4FB074",PropertyFriendlyName="rank",bShowPin=True,bCanToggleVisibility=True)
   ShowPinForProperties(2)=(PropertyName="impact_9_1EF8F4944152A2BABCC2018BF55E9933",PropertyFriendlyName="impact",bShowPin=True,bCanToggleVisibility=True)
   ShowPinForProperties(3)=(PropertyName="range_11_1ECB70A94C043F5AEF660AA860D3EB96",PropertyFriendlyName="range",bShowPin=True,bCanToggleVisibility=True)
   ShowPinForProperties(4)=(PropertyName="stability_13_1D3B3EB9402E567C875FAFBD71F05A93",PropertyFriendlyName="stability",bShowPin=True,bCanToggleVisibility=True)
   ShowPinForProperties(5)=(PropertyName="reloadSpeed_15_D4AFF36343F7BD2B972142B8D12C8724",PropertyFriendlyName="reloadSpeed",bShowPin=True,bCanToggleVisibility=True)
   ShowPinForProperties(6)=(PropertyName="handling_17_4FC34D8E4EA287B8CAC9B5B432468B1A",PropertyFriendlyName="handling",bShowPin=True,bCanToggleVisibility=True)
   ShowPinForProperties(7)=(PropertyName="roundsPerMinute_19_A02D81E74CF7FE0DA44BBBAC5E4C736E",PropertyFriendlyName="roundsPerMinute",bShowPin=True,bCanToggleVisibility=True)
   ShowPinForProperties(8)=(PropertyName="magazine_21_967200F246A0215590CE33A687DFD3AE",PropertyFriendlyName="magazine",bShowPin=True,bCanToggleVisibility=True)
   ShowPinForProperties(9)=(PropertyName="update_23_DDF8803C4D8748252B42079A75AE3E6A",PropertyFriendlyName="update",bCanToggleVisibility=True)
   ShowPinForProperties(10)=(PropertyName="price_26_7833B6FD41F52F2705EFC4A389DB4980",PropertyFriendlyName="price",bCanToggleVisibility=True)
   StructType="/Script/Engine.UserDefinedStruct'/Game/WeaponStruct.WeaponStruct'"
   NodePosX=2864
   NodePosY=384
   NodeGuid=D090294245535E3C5B4384A279BA7D25
   CustomProperties Pin (PinId=38B0769E4D45F4D2113833842A43E999,PinName="execute",PinType.PinCategory="exec",PinType.PinSubCategory="",PinType.PinSubCategoryObject=None,PinType.PinSubCategoryMemberReference=(),PinType.PinValueType=(),PinType.ContainerType=None,PinType.bIsReference=False,PinType.bIsConst=False,PinType.bIsWeakPointer=False,PinType.bIsUObjectWrapper=False,PinType.bSerializeAsSinglePrecisionFloat=False,LinkedTo=(K2Node_CallFunction_5 305A79784037F5775B7D528D9AE00ED6,),PersistentGuid=00000000000000000000000000000000,bHidden=False,bNotConnectable=False,bDefaultValueIsReadOnly=False,bDefaultValueIsIgnored=False,bAdvancedView=False,bOrphanedPin=False,)
   CustomProperties Pin (PinId=EFFF88624191B14A36C64DB96F9EC45F,PinName="then",Direction="EGPD_Output",PinType.PinCategory="exec",PinType.PinSubCategory="",PinType.PinSubCategoryObject=None,PinType.PinSubCategoryMemberReference=(),PinType.PinValueType=(),PinType.ContainerType=None,PinType.bIsReference=False,PinType.bIsConst=False,PinType.bIsWeakPointer=False,PinType.bIsUObjectWrapper=False,PinType.bSerializeAsSinglePrecisionFloat=False,LinkedTo=(K2Node_CallFunction_7 B28D48A3418FD52C7049B2961679172B,),PersistentGuid=00000000000000000000000000000000,bHidden=False,bNotConnectable=False,bDefaultValueIsReadOnly=False,bDefaultValueIsIgnored=False,bAdvancedView=False,bOrphanedPin=False,)
   CustomProperties Pin (PinId=179F9C08443BDA77B72325BCCA2C86F8,PinName="StructRef",PinType.PinCategory="struct",PinType.PinSubCategory="",PinType.PinSubCategoryObject="/Script/Engine.UserDefinedStruct'/Game/WeaponStruct.WeaponStruct'",PinType.PinSubCategoryMemberReference=(),PinType.PinValueType=(),PinType.ContainerType=None,PinType.bIsReference=True,PinType.bIsConst=False,PinType.bIsWeakPointer=False,PinType.bIsUObjectWrapper=False,PinType.bSerializeAsSinglePrecisionFloat=False,LinkedTo=(K2Node_VariableGet_3 1E6317284320D2A64331108C2D0552C7,),ReferencePassThroughConnection=K2Node_SetFieldsInStruct_1 33C22BA54A65FC6F4624F690EDAD4A5F,PersistentGuid=00000000000000000000000000000000,bHidden=False,bNotConnectable=False,bDefaultValueIsReadOnly=False,bDefaultValueIsIgnored=False,bAdvancedView=False,bOrphanedPin=False,)
   CustomProperties Pin (PinId=33C22BA54A65FC6F4624F690EDAD4A5F,PinName="StructOut",PinToolTip="Reference to the input struct",Direction="EGPD_Output",PinType.PinCategory="struct",PinType.PinSubCategory="",PinType.PinSubCategoryObject="/Script/Engine.UserDefinedStruct'/Game/WeaponStruct.WeaponStruct'",PinType.PinSubCategoryMemberReference=(),PinType.PinValueType=(),PinType.ContainerType=None,PinType.bIsReference=True,PinType.bIsConst=False,PinType.bIsWeakPointer=False,PinType.bIsUObjectWrapper=False,PinType.bSerializeAsSinglePrecisionFloat=False,LinkedTo=(K2Node_CallFunction_7 C3BEC83A43CFBB1DE5B35E94CCDBC535,),ReferencePassThroughConnection=K2Node_SetFieldsInStruct_1 179F9C08443BDA77B72325BCCA2C86F8,PersistentGuid=00000000000000000000000000000000,bHidden=False,bNotConnectable=False,bDefaultValueIsReadOnly=False,bDefaultValueIsIgnored=False,bAdvancedView=False,bOrphanedPin=False,)
   CustomProperties Pin (PinId=7C765FE546665422297FA5B182ECE077,PinName="name_2_4EFD82EE4A41C49B2B82F8A545887E09",PinFriendlyName="name",PinToolTip="Name
String",PinType.PinCategory="string",PinType.PinSubCategory="",PinType.PinSubCategoryObject=None,PinType.PinSubCategoryMemberReference=(),PinType.PinValueType=(),PinType.ContainerType=None,PinType.bIsReference=False,PinType.bIsConst=False,PinType.bIsWeakPointer=False,PinType.bIsUObjectWrapper=False,PinType.bSerializeAsSinglePrecisionFloat=False,LinkedTo=(K2Node_GetArrayItem_0 569BD5A44D1C367A9435AB807E22118B,),PersistentGuid=4EFD82EE4A41C49B2B82F8A545887E09,bHidden=False,bNotConnectable=False,bDefaultValueIsReadOnly=False,bDefaultValueIsIgnored=False,bAdvancedView=False,bOrphanedPin=False,)
   CustomProperties Pin (PinId=B1D8BABF4DA272AAC73405A097E1E418,PinName="rank_5_1191FC9F43F46534C95BBE9EDC4FB074",PinFriendlyName="rank",PinToolTip="Rank
Integer",PinType.PinCategory="int",PinType.PinSubCategory="",PinType.PinSubCategoryObject=None,PinType.PinSubCategoryMemberReference=(),PinType.PinValueType=(),PinType.ContainerType=None,PinType.bIsReference=False,PinType.bIsConst=False,PinType.bIsWeakPointer=False,PinType.bIsUObjectWrapper=False,PinType.bSerializeAsSinglePrecisionFloat=False,DefaultValue="0",AutogeneratedDefaultValue="0",LinkedTo=(K2Node_GetArrayItem_0 277F057849A4CFD189D85D9312EBCB70,),PersistentGuid=1191FC9F43F46534C95BBE9EDC4FB074,bHidden=False,bNotConnectable=False,bDefaultValueIsReadOnly=False,bDefaultValueIsIgnored=False,bAdvancedView=False,bOrphanedPin=False,)
   CustomProperties Pin (PinId=F33C49A04F4460FCC27EEFADDE5A109E,PinName="impact_9_1EF8F4944152A2BABCC2018BF55E9933",PinFriendlyName="impact",PinToolTip="Impact
Integer",PinType.PinCategory="int",PinType.PinSubCategory="",PinType.PinSubCategoryObject=None,PinType.PinSubCategoryMemberReference=(),PinType.PinValueType=(),PinType.ContainerType=None,PinType.bIsReference=False,PinType.bIsConst=False,PinType.bIsWeakPointer=False,PinType.bIsUObjectWrapper=False,PinType.bSerializeAsSinglePrecisionFloat=False,DefaultValue="0",AutogeneratedDefaultValue="0",LinkedTo=(K2Node_GetArrayItem_0 2B92921B49C099E3C513588C18FCDF0D,),PersistentGuid=1EF8F4944152A2BABCC2018BF55E9933,bHidden=False,bNotConnectable=False,bDefaultValueIsReadOnly=False,bDefaultValueIsIgnored=False,bAdvancedView=False,bOrphanedPin=False,)
   CustomProperties Pin (PinId=6390D3A34B0888235C1C39A8AFB1A2CE,PinName="range_11_1ECB70A94C043F5AEF660AA860D3EB96",PinFriendlyName="range",PinToolTip="Range
Integer",PinType.PinCategory="int",PinType.PinSubCategory="",PinType.PinSubCategoryObject=None,PinType.PinSubCategoryMemberReference=(),PinType.PinValueType=(),PinType.ContainerType=None,PinType.bIsReference=False,PinType.bIsConst=False,PinType.bIsWeakPointer=False,PinType.bIsUObjectWrapper=False,PinType.bSerializeAsSinglePrecisionFloat=False,DefaultValue="0",AutogeneratedDefaultValue="0",LinkedTo=(K2Node_GetArrayItem_0 BA1CE36348A1F45AE4E8FFB8DE463E79,),PersistentGuid=1ECB70A94C043F5AEF660AA860D3EB96,bHidden=False,bNotConnectable=False,bDefaultValueIsReadOnly=False,bDefaultValueIsIgnored=False,bAdvancedView=False,bOrphanedPin=False,)
   CustomProperties Pin (PinId=B00473AF437BC0463C1CD2B11BEE8481,PinName="stability_13_1D3B3EB9402E567C875FAFBD71F05A93",PinFriendlyName="stability",PinToolTip="Stability
Integer",PinType.PinCategory="int",PinType.PinSubCategory="",PinType.PinSubCategoryObject=None,PinType.PinSubCategoryMemberReference=(),PinType.PinValueType=(),PinType.ContainerType=None,PinType.bIsReference=False,PinType.bIsConst=False,PinType.bIsWeakPointer=False,PinType.bIsUObjectWrapper=False,PinType.bSerializeAsSinglePrecisionFloat=False,DefaultValue="0",AutogeneratedDefaultValue="0",LinkedTo=(K2Node_GetArrayItem_0 B3CAF3DD43E0CDCF0E2F6696E2AE2026,),PersistentGuid=1D3B3EB9402E567C875FAFBD71F05A93,bHidden=False,bNotConnectable=False,bDefaultValueIsReadOnly=False,bDefaultValueIsIgnored=False,bAdvancedView=False,bOrphanedPin=False,)
   CustomProperties Pin (PinId=FEACC946499DD76F377CD9BA57E04B6B,PinName="reloadSpeed_15_D4AFF36343F7BD2B972142B8D12C8724",PinFriendlyName="reloadSpeed",PinToolTip="Reload Speed
Integer",PinType.PinCategory="int",PinType.PinSubCategory="",PinType.PinSubCategoryObject=None,PinType.PinSubCategoryMemberReference=(),PinType.PinValueType=(),PinType.ContainerType=None,PinType.bIsReference=False,PinType.bIsConst=False,PinType.bIsWeakPointer=False,PinType.bIsUObjectWrapper=False,PinType.bSerializeAsSinglePrecisionFloat=False,DefaultValue="0",AutogeneratedDefaultValue="0",LinkedTo=(K2Node_GetArrayItem_0 172E4F8541863C6CCF0DCF90C8535739,),PersistentGuid=D4AFF36343F7BD2B972142B8D12C8724,bHidden=False,bNotConnectable=False,bDefaultValueIsReadOnly=False,bDefaultValueIsIgnored=False,bAdvancedView=False,bOrphanedPin=False,)
   CustomProperties Pin (PinId=D2327415454332649FF816891F03BFD3,PinName="handling_17_4FC34D8E4EA287B8CAC9B5B432468B1A",PinFriendlyName="handling",PinToolTip="Handling
Integer",PinType.PinCategory="int",PinType.PinSubCategory="",PinType.PinSubCategoryObject=None,PinType.PinSubCategoryMemberReference=(),PinType.PinValueType=(),PinType.ContainerType=None,PinType.bIsReference=False,PinType.bIsConst=False,PinType.bIsWeakPointer=False,PinType.bIsUObjectWrapper=False,PinType.bSerializeAsSinglePrecisionFloat=False,DefaultValue="0",AutogeneratedDefaultValue="0",LinkedTo=(K2Node_GetArrayItem_0 FCC2432649F76AD3500D47B5F94CCD5B,),PersistentGuid=4FC34D8E4EA287B8CAC9B5B432468B1A,bHidden=False,bNotConnectable=False,bDefaultValueIsReadOnly=False,bDefaultValueIsIgnored=False,bAdvancedView=False,bOrphanedPin=False,)
   CustomProperties Pin (PinId=84699202416D2D0D49A0BCA41AB91522,PinName="roundsPerMinute_19_A02D81E74CF7FE0DA44BBBAC5E4C736E",PinFriendlyName="roundsPerMinute",PinToolTip="Rounds Per Minute
Integer",PinType.PinCategory="int",PinType.PinSubCategory="",PinType.PinSubCategoryObject=None,PinType.PinSubCategoryMemberReference=(),PinType.PinValueType=(),PinType.ContainerType=None,PinType.bIsReference=False,PinType.bIsConst=False,PinType.bIsWeakPointer=False,PinType.bIsUObjectWrapper=False,PinType.bSerializeAsSinglePrecisionFloat=False,DefaultValue="0",AutogeneratedDefaultValue="0",LinkedTo=(K2Node_GetArrayItem_0 B50D2FD94718A162A27B02B81CC52623,),PersistentGuid=A02D81E74CF7FE0DA44BBBAC5E4C736E,bHidden=False,bNotConnectable=False,bDefaultValueIsReadOnly=False,bDefaultValueIsIgnored=False,bAdvancedView=False,bOrphanedPin=False,)
   CustomProperties Pin (PinId=5FD926F14B1D950974A31B9D934A1684,PinName="magazine_21_967200F246A0215590CE33A687DFD3AE",PinFriendlyName="magazine",PinToolTip="Magazine
Integer",PinType.PinCategory="int",PinType.PinSubCategory="",PinType.PinSubCategoryObject=None,PinType.PinSubCategoryMemberReference=(),PinType.PinValueType=(),PinType.ContainerType=None,PinType.bIsReference=False,PinType.bIsConst=False,PinType.bIsWeakPointer=False,PinType.bIsUObjectWrapper=False,PinType.bSerializeAsSinglePrecisionFloat=False,DefaultValue="0",AutogeneratedDefaultValue="0",LinkedTo=(K2Node_GetArrayItem_0 DC43077C40A999BE73B3B3951E57FCC1,),PersistentGuid=967200F246A0215590CE33A687DFD3AE,bHidden=False,bNotConnectable=False,bDefaultValueIsReadOnly=False,bDefaultValueIsIgnored=False,bAdvancedView=False,bOrphanedPin=False,)
End Object
Begin Object Class=/Script/BlueprintGraph.K2Node_GetArrayItem Name="K2Node_GetArrayItem_0" ExportPath="/Script/BlueprintGraph.K2Node_GetArrayItem'/Game/coherentBP.coherentBP:EventGraph.K2Node_GetArrayItem_0'"
   NodePosX=2512
   NodePosY=656
   NodeGuid=308A97FA4196918004AB3A89F5C3478F
   CustomProperties Pin (PinId=E77CA7D44E781384C7651895990F0DBF,PinName="Array",PinType.PinCategory="struct",PinType.PinSubCategory="",PinType.PinSubCategoryObject="/Script/Engine.UserDefinedStruct'/Game/WeaponStruct.WeaponStruct'",PinType.PinSubCategoryMemberReference=(),PinType.PinValueType=(),PinType.ContainerType=Array,PinType.bIsReference=False,PinType.bIsConst=False,PinType.bIsWeakPointer=False,PinType.bIsUObjectWrapper=False,PinType.bSerializeAsSinglePrecisionFloat=False,LinkedTo=(K2Node_VariableGet_1 FD84569A48969E9881A65288C6EC14CD,),PersistentGuid=00000000000000000000000000000000,bHidden=False,bNotConnectable=False,bDefaultValueIsReadOnly=False,bDefaultValueIsIgnored=False,bAdvancedView=False,bOrphanedPin=False,)
   CustomProperties Pin (PinId=72B114924926038D032AC58BD921E15D,PinName="Dimension 1",PinType.PinCategory="int",PinType.PinSubCategory="",PinType.PinSubCategoryObject=None,PinType.PinSubCategoryMemberReference=(),PinType.PinValueType=(),PinType.ContainerType=None,PinType.bIsReference=False,PinType.bIsConst=False,PinType.bIsWeakPointer=False,PinType.bIsUObjectWrapper=False,PinType.bSerializeAsSinglePrecisionFloat=False,DefaultValue="0",AutogeneratedDefaultValue="0",PersistentGuid=00000000000000000000000000000000,bHidden=False,bNotConnectable=False,bDefaultValueIsReadOnly=False,bDefaultValueIsIgnored=False,bAdvancedView=False,bOrphanedPin=False,)
   CustomProperties Pin (PinId=3490C6FB41AAE861BD2BFFB0F89E21CA,PinName="Output",Direction="EGPD_Output",PinType.PinCategory="struct",PinType.PinSubCategory="",PinType.PinSubCategoryObject="/Script/Engine.UserDefinedStruct'/Game/WeaponStruct.WeaponStruct'",PinType.PinSubCategoryMemberReference=(),PinType.PinValueType=(),PinType.ContainerType=None,PinType.bIsReference=True,PinType.bIsConst=False,PinType.bIsWeakPointer=False,PinType.bIsUObjectWrapper=False,PinType.bSerializeAsSinglePrecisionFloat=False,SubPins=(K2Node_GetArrayItem_0 569BD5A44D1C367A9435AB807E22118B,K2Node_GetArrayItem_0 277F057849A4CFD189D85D9312EBCB70,K2Node_GetArrayItem_0 2B92921B49C099E3C513588C18FCDF0D,K2Node_GetArrayItem_0 BA1CE36348A1F45AE4E8FFB8DE463E79,K2Node_GetArrayItem_0 B3CAF3DD43E0CDCF0E2F6696E2AE2026,K2Node_GetArrayItem_0 172E4F8541863C6CCF0DCF90C8535739,K2Node_GetArrayItem_0 FCC2432649F76AD3500D47B5F94CCD5B,K2Node_GetArrayItem_0 B50D2FD94718A162A27B02B81CC52623,K2Node_GetArrayItem_0 DC43077C40A999BE73B3B3951E57FCC1,K2Node_GetArrayItem_0 84D2AEB849858A1ABFEC9BB2A0687AF2,K2Node_GetArrayItem_0 34C2C2F14EA9E79D2B2A2888F6993E57,),PersistentGuid=00000000000000000000000000000000,bHidden=True,bNotConnectable=False,bDefaultValueIsReadOnly=False,bDefaultValueIsIgnored=False,bAdvancedView=False,bOrphanedPin=False,)
   CustomProperties Pin (PinId=569BD5A44D1C367A9435AB807E22118B,PinName="Output_name_2_4EFD82EE4A41C49B2B82F8A545887E09",PinFriendlyName="Name",Direction="EGPD_Output",PinType.PinCategory="string",PinType.PinSubCategory="",PinType.PinSubCategoryObject=None,PinType.PinSubCategoryMemberReference=(),PinType.PinValueType=(),PinType.ContainerType=None,PinType.bIsReference=False,PinType.bIsConst=False,PinType.bIsWeakPointer=False,PinType.bIsUObjectWrapper=False,PinType.bSerializeAsSinglePrecisionFloat=False,LinkedTo=(K2Node_SetFieldsInStruct_1 7C765FE546665422297FA5B182ECE077,),ParentPin=K2Node_GetArrayItem_0 3490C6FB41AAE861BD2BFFB0F89E21CA,PersistentGuid=00000000000000000000000000000000,bHidden=False,bNotConnectable=False,bDefaultValueIsReadOnly=False,bDefaultValueIsIgnored=False,bAdvancedView=False,bOrphanedPin=False,)
   CustomProperties Pin (PinId=277F057849A4CFD189D85D9312EBCB70,PinName="Output_rank_5_1191FC9F43F46534C95BBE9EDC4FB074",PinFriendlyName="Rank",Direction="EGPD_Output",PinType.PinCategory="int",PinType.PinSubCategory="",PinType.PinSubCategoryObject=None,PinType.PinSubCategoryMemberReference=(),PinType.PinValueType=(),PinType.ContainerType=None,PinType.bIsReference=False,PinType.bIsConst=False,PinType.bIsWeakPointer=False,PinType.bIsUObjectWrapper=False,PinType.bSerializeAsSinglePrecisionFloat=False,LinkedTo=(K2Node_SetFieldsInStruct_1 B1D8BABF4DA272AAC73405A097E1E418,),ParentPin=K2Node_GetArrayItem_0 3490C6FB41AAE861BD2BFFB0F89E21CA,PersistentGuid=00000000000000000000000000000000,bHidden=False,bNotConnectable=False,bDefaultValueIsReadOnly=False,bDefaultValueIsIgnored=False,bAdvancedView=False,bOrphanedPin=False,)
   CustomProperties Pin (PinId=2B92921B49C099E3C513588C18FCDF0D,PinName="Output_impact_9_1EF8F4944152A2BABCC2018BF55E9933",PinFriendlyName="Impact",Direction="EGPD_Output",PinType.PinCategory="int",PinType.PinSubCategory="",PinType.PinSubCategoryObject=None,PinType.PinSubCategoryMemberReference=(),PinType.PinValueType=(),PinType.ContainerType=None,PinType.bIsReference=False,PinType.bIsConst=False,PinType.bIsWeakPointer=False,PinType.bIsUObjectWrapper=False,PinType.bSerializeAsSinglePrecisionFloat=False,LinkedTo=(K2Node_SetFieldsInStruct_1 F33C49A04F4460FCC27EEFADDE5A109E,),ParentPin=K2Node_GetArrayItem_0 3490C6FB41AAE861BD2BFFB0F89E21CA,PersistentGuid=00000000000000000000000000000000,bHidden=False,bNotConnectable=False,bDefaultValueIsReadOnly=False,bDefaultValueIsIgnored=False,bAdvancedView=False,bOrphanedPin=False,)
   CustomProperties Pin (PinId=BA1CE36348A1F45AE4E8FFB8DE463E79,PinName="Output_range_11_1ECB70A94C043F5AEF660AA860D3EB96",PinFriendlyName="Range",Direction="EGPD_Output",PinType.PinCategory="int",PinType.PinSubCategory="",PinType.PinSubCategoryObject=None,PinType.PinSubCategoryMemberReference=(),PinType.PinValueType=(),PinType.ContainerType=None,PinType.bIsReference=False,PinType.bIsConst=False,PinType.bIsWeakPointer=False,PinType.bIsUObjectWrapper=False,PinType.bSerializeAsSinglePrecisionFloat=False,LinkedTo=(K2Node_SetFieldsInStruct_1 6390D3A34B0888235C1C39A8AFB1A2CE,),ParentPin=K2Node_GetArrayItem_0 3490C6FB41AAE861BD2BFFB0F89E21CA,PersistentGuid=00000000000000000000000000000000,bHidden=False,bNotConnectable=False,bDefaultValueIsReadOnly=False,bDefaultValueIsIgnored=False,bAdvancedView=False,bOrphanedPin=False,)
   CustomProperties Pin (PinId=B3CAF3DD43E0CDCF0E2F6696E2AE2026,PinName="Output_stability_13_1D3B3EB9402E567C875FAFBD71F05A93",PinFriendlyName="Stability",Direction="EGPD_Output",PinType.PinCategory="int",PinType.PinSubCategory="",PinType.PinSubCategoryObject=None,PinType.PinSubCategoryMemberReference=(),PinType.PinValueType=(),PinType.ContainerType=None,PinType.bIsReference=False,PinType.bIsConst=False,PinType.bIsWeakPointer=False,PinType.bIsUObjectWrapper=False,PinType.bSerializeAsSinglePrecisionFloat=False,LinkedTo=(K2Node_SetFieldsInStruct_1 B00473AF437BC0463C1CD2B11BEE8481,),ParentPin=K2Node_GetArrayItem_0 3490C6FB41AAE861BD2BFFB0F89E21CA,PersistentGuid=00000000000000000000000000000000,bHidden=False,bNotConnectable=False,bDefaultValueIsReadOnly=False,bDefaultValueIsIgnored=False,bAdvancedView=False,bOrphanedPin=False,)
   CustomProperties Pin (PinId=172E4F8541863C6CCF0DCF90C8535739,PinName="Output_reloadSpeed_15_D4AFF36343F7BD2B972142B8D12C8724",PinFriendlyName="Reload Speed",Direction="EGPD_Output",PinType.PinCategory="int",PinType.PinSubCategory="",PinType.PinSubCategoryObject=None,PinType.PinSubCategoryMemberReference=(),PinType.PinValueType=(),PinType.ContainerType=None,PinType.bIsReference=False,PinType.bIsConst=False,PinType.bIsWeakPointer=False,PinType.bIsUObjectWrapper=False,PinType.bSerializeAsSinglePrecisionFloat=False,LinkedTo=(K2Node_SetFieldsInStruct_1 FEACC946499DD76F377CD9BA57E04B6B,),ParentPin=K2Node_GetArrayItem_0 3490C6FB41AAE861BD2BFFB0F89E21CA,PersistentGuid=00000000000000000000000000000000,bHidden=False,bNotConnectable=False,bDefaultValueIsReadOnly=False,bDefaultValueIsIgnored=False,bAdvancedView=False,bOrphanedPin=False,)
   CustomProperties Pin (PinId=FCC2432649F76AD3500D47B5F94CCD5B,PinName="Output_handling_17_4FC34D8E4EA287B8CAC9B5B432468B1A",PinFriendlyName="Handling",Direction="EGPD_Output",PinType.PinCategory="int",PinType.PinSubCategory="",PinType.PinSubCategoryObject=None,PinType.PinSubCategoryMemberReference=(),PinType.PinValueType=(),PinType.ContainerType=None,PinType.bIsReference=False,PinType.bIsConst=False,PinType.bIsWeakPointer=False,PinType.bIsUObjectWrapper=False,PinType.bSerializeAsSinglePrecisionFloat=False,LinkedTo=(K2Node_SetFieldsInStruct_1 D2327415454332649FF816891F03BFD3,),ParentPin=K2Node_GetArrayItem_0 3490C6FB41AAE861BD2BFFB0F89E21CA,PersistentGuid=00000000000000000000000000000000,bHidden=False,bNotConnectable=False,bDefaultValueIsReadOnly=False,bDefaultValueIsIgnored=False,bAdvancedView=False,bOrphanedPin=False,)
   CustomProperties Pin (PinId=B50D2FD94718A162A27B02B81CC52623,PinName="Output_roundsPerMinute_19_A02D81E74CF7FE0DA44BBBAC5E4C736E",PinFriendlyName="Rounds Per Minute",Direction="EGPD_Output",PinType.PinCategory="int",PinType.PinSubCategory="",PinType.PinSubCategoryObject=None,PinType.PinSubCategoryMemberReference=(),PinType.PinValueType=(),PinType.ContainerType=None,PinType.bIsReference=False,PinType.bIsConst=False,PinType.bIsWeakPointer=False,PinType.bIsUObjectWrapper=False,PinType.bSerializeAsSinglePrecisionFloat=False,LinkedTo=(K2Node_SetFieldsInStruct_1 84699202416D2D0D49A0BCA41AB91522,),ParentPin=K2Node_GetArrayItem_0 3490C6FB41AAE861BD2BFFB0F89E21CA,PersistentGuid=00000000000000000000000000000000,bHidden=False,bNotConnectable=False,bDefaultValueIsReadOnly=False,bDefaultValueIsIgnored=False,bAdvancedView=False,bOrphanedPin=False,)
   CustomProperties Pin (PinId=DC43077C40A999BE73B3B3951E57FCC1,PinName="Output_magazine_21_967200F246A0215590CE33A687DFD3AE",PinFriendlyName="Magazine",Direction="EGPD_Output",PinType.PinCategory="int",PinType.PinSubCategory="",PinType.PinSubCategoryObject=None,PinType.PinSubCategoryMemberReference=(),PinType.PinValueType=(),PinType.ContainerType=None,PinType.bIsReference=False,PinType.bIsConst=False,PinType.bIsWeakPointer=False,PinType.bIsUObjectWrapper=False,PinType.bSerializeAsSinglePrecisionFloat=False,LinkedTo=(K2Node_SetFieldsInStruct_1 5FD926F14B1D950974A31B9D934A1684,),ParentPin=K2Node_GetArrayItem_0 3490C6FB41AAE861BD2BFFB0F89E21CA,PersistentGuid=00000000000000000000000000000000,bHidden=False,bNotConnectable=False,bDefaultValueIsReadOnly=False,bDefaultValueIsIgnored=False,bAdvancedView=False,bOrphanedPin=False,)
   CustomProperties Pin (PinId=84D2AEB849858A1ABFEC9BB2A0687AF2,PinName="Output_update_23_DDF8803C4D8748252B42079A75AE3E6A",PinFriendlyName="Update",Direction="EGPD_Output",PinType.PinCategory="bool",PinType.PinSubCategory="",PinType.PinSubCategoryObject=None,PinType.PinSubCategoryMemberReference=(),PinType.PinValueType=(),PinType.ContainerType=None,PinType.bIsReference=False,PinType.bIsConst=False,PinType.bIsWeakPointer=False,PinType.bIsUObjectWrapper=False,PinType.bSerializeAsSinglePrecisionFloat=False,ParentPin=K2Node_GetArrayItem_0 3490C6FB41AAE861BD2BFFB0F89E21CA,PersistentGuid=00000000000000000000000000000000,bHidden=False,bNotConnectable=False,bDefaultValueIsReadOnly=False,bDefaultValueIsIgnored=False,bAdvancedView=False,bOrphanedPin=False,)
   CustomProperties Pin (PinId=34C2C2F14EA9E79D2B2A2888F6993E57,PinName="Output_price_26_7833B6FD41F52F2705EFC4A389DB4980",PinFriendlyName="Price",Direction="EGPD_Output",PinType.PinCategory="int",PinType.PinSubCategory="",PinType.PinSubCategoryObject=None,PinType.PinSubCategoryMemberReference=(),PinType.PinValueType=(),PinType.ContainerType=None,PinType.bIsReference=False,PinType.bIsConst=False,PinType.bIsWeakPointer=False,PinType.bIsUObjectWrapper=False,PinType.bSerializeAsSinglePrecisionFloat=False,ParentPin=K2Node_GetArrayItem_0 3490C6FB41AAE861BD2BFFB0F89E21CA,PersistentGuid=00000000000000000000000000000000,bHidden=False,bNotConnectable=False,bDefaultValueIsReadOnly=False,bDefaultValueIsIgnored=False,bAdvancedView=False,bOrphanedPin=False,)
End Object
Making sure to synchronize the models
We need to make sure to synchronize the models on each tick so that when we load our UI all of the data will be available to us in the bindings.
   Begin Object Class=/Script/BlueprintGraph.K2Node_CallFunction Name="K2Node_CallFunction_6" ExportPath="/Script/BlueprintGraph.K2Node_CallFunction'/Game/coherentBP.coherentBP:EventGraph.K2Node_CallFunction_6'"
   bIsConstFunc=True
   FunctionReference=(MemberParent="/Script/CoreUObject.Class'/Script/CohtmlPlugin.CohtmlBaseComponent'",MemberName="SynchronizeModels")
   NodePosX=672
   NodePosY=496
   NodeGuid=5FB94A1040E45423D2614DA5A59E8A3D
   CustomProperties Pin (PinId=ACB9808948321787F6C321A5A6A68103,PinName="execute",PinToolTip="
Exec",PinType.PinCategory="exec",PinType.PinSubCategory="",PinType.PinSubCategoryObject=None,PinType.PinSubCategoryMemberReference=(),PinType.PinValueType=(),PinType.ContainerType=None,PinType.bIsReference=False,PinType.bIsConst=False,PinType.bIsWeakPointer=False,PinType.bIsUObjectWrapper=False,PinType.bSerializeAsSinglePrecisionFloat=False,LinkedTo=(K2Node_CallFunction_1 576F9F3D4824A37030B3D4AF5AEBC507,),PersistentGuid=00000000000000000000000000000000,bHidden=False,bNotConnectable=False,bDefaultValueIsReadOnly=False,bDefaultValueIsIgnored=False,bAdvancedView=False,bOrphanedPin=False,)
   CustomProperties Pin (PinId=A7EF8DC146E76281C580D69F7095DEA4,PinName="then",PinToolTip="
Exec",Direction="EGPD_Output",PinType.PinCategory="exec",PinType.PinSubCategory="",PinType.PinSubCategoryObject=None,PinType.PinSubCategoryMemberReference=(),PinType.PinValueType=(),PinType.ContainerType=None,PinType.bIsReference=False,PinType.bIsConst=False,PinType.bIsWeakPointer=False,PinType.bIsUObjectWrapper=False,PinType.bSerializeAsSinglePrecisionFloat=False,PersistentGuid=00000000000000000000000000000000,bHidden=False,bNotConnectable=False,bDefaultValueIsReadOnly=False,bDefaultValueIsIgnored=False,bAdvancedView=False,bOrphanedPin=False,)
   CustomProperties Pin (PinId=0B88E4F74F09C544417D9081276A5CBA,PinName="self",PinFriendlyName=NSLOCTEXT("K2Node", "Target", "Target"),PinToolTip="Target
Gameface Base Component Object Reference",PinType.PinCategory="object",PinType.PinSubCategory="",PinType.PinSubCategoryObject="/Script/CoreUObject.Class'/Script/CohtmlPlugin.CohtmlBaseComponent'",PinType.PinSubCategoryMemberReference=(),PinType.PinValueType=(),PinType.ContainerType=None,PinType.bIsReference=False,PinType.bIsConst=False,PinType.bIsWeakPointer=False,PinType.bIsUObjectWrapper=False,PinType.bSerializeAsSinglePrecisionFloat=False,LinkedTo=(K2Node_VariableGet_8 197DD9C24BB34E4CB82CFC9D49B36F00,),PersistentGuid=00000000000000000000000000000000,bHidden=False,bNotConnectable=False,bDefaultValueIsReadOnly=False,bDefaultValueIsIgnored=False,bAdvancedView=False,bOrphanedPin=False,)
End Object
Begin Object Class=/Script/BlueprintGraph.K2Node_VariableGet Name="K2Node_VariableGet_8" ExportPath="/Script/BlueprintGraph.K2Node_VariableGet'/Game/coherentBP.coherentBP:EventGraph.K2Node_VariableGet_8'"
   VariableReference=(MemberName="CohtmlHUD",bSelfContext=True)
   NodePosX=460
   NodePosY=451
   NodeGuid=B44297A8422EEE78CF3276B7E9594711
   CustomProperties Pin (PinId=197DD9C24BB34E4CB82CFC9D49B36F00,PinName="CohtmlHUD",PinFriendlyName="Gameface HUD",Direction="EGPD_Output",PinType.PinCategory="object",PinType.PinSubCategory="",PinType.PinSubCategoryObject="/Script/CoreUObject.Class'/Script/CohtmlPlugin.CohtmlHUD'",PinType.PinSubCategoryMemberReference=(),PinType.PinValueType=(),PinType.ContainerType=None,PinType.bIsReference=False,PinType.bIsConst=False,PinType.bIsWeakPointer=False,PinType.bIsUObjectWrapper=False,PinType.bSerializeAsSinglePrecisionFloat=False,LinkedTo=(K2Node_CallFunction_6 0B88E4F74F09C544417D9081276A5CBA,),PersistentGuid=00000000000000000000000000000000,bHidden=False,bNotConnectable=False,bDefaultValueIsReadOnly=False,bDefaultValueIsIgnored=False,bAdvancedView=False,bOrphanedPin=False,)
   CustomProperties Pin (PinId=36A1467C42CAF737DCFEEAB35839A99B,PinName="self",PinFriendlyName=NSLOCTEXT("K2Node", "Target", "Target"),PinType.PinCategory="object",PinType.PinSubCategory="",PinType.PinSubCategoryObject="/Script/CoreUObject.Class'/Script/CohtmlPlugin.CohtmlGameHUD'",PinType.PinSubCategoryMemberReference=(),PinType.PinValueType=(),PinType.ContainerType=None,PinType.bIsReference=False,PinType.bIsConst=False,PinType.bIsWeakPointer=False,PinType.bIsUObjectWrapper=False,PinType.bSerializeAsSinglePrecisionFloat=False,PersistentGuid=00000000000000000000000000000000,bHidden=True,bNotConnectable=False,bDefaultValueIsReadOnly=False,bDefaultValueIsIgnored=False,bAdvancedView=False,bOrphanedPin=False,)
End Object
Making the frontend
In our Parallax UI project we’ll create a new page called Shop and set it up to look like the rest of the UI (we won’t be diving deeper into this).
What we’ll do is create two columns, one for the shop items holding a single shop item with default values and another column for the selected item again with default settings.
Creating the Shop items
To create the shop items, we’ll be using the WeaponModel that we’ve created earlier and loop through it’s weapons using data-bind-for on a wrapper <div> element.
1 <div data-bind-for="index,item:{{WeaponModel.weapons}}"></div>Then we’ll add the rest of the data-bindings to change the default values. In our case this would be data-bind-background-image-url for the image, data-bind-value for the texts and data-bind-class-toggle to toggle a red text if the item costs more than what the Player has.
1 <div className="shop-item">2 <div className="shop-item-image" data-bind-style-background-image-url="'./images/shop/' + {{item.name}} + '.png'"></div>3 <div className="shop-item-gradient">4 <div className="shop-item-info">5 <div className="shop-item-title" data-bind-value="{{item.name}}"> Dehumanizer </div>6 <div className="shop-item-price" data-bind-value="'¥ '+{{item.price}}" data-bind-class-toggle="shop-item-expensive:{{item.price}} > {{Player.currency}}">7 ¥ 3008 </div>9 </div>10 </div>11</div>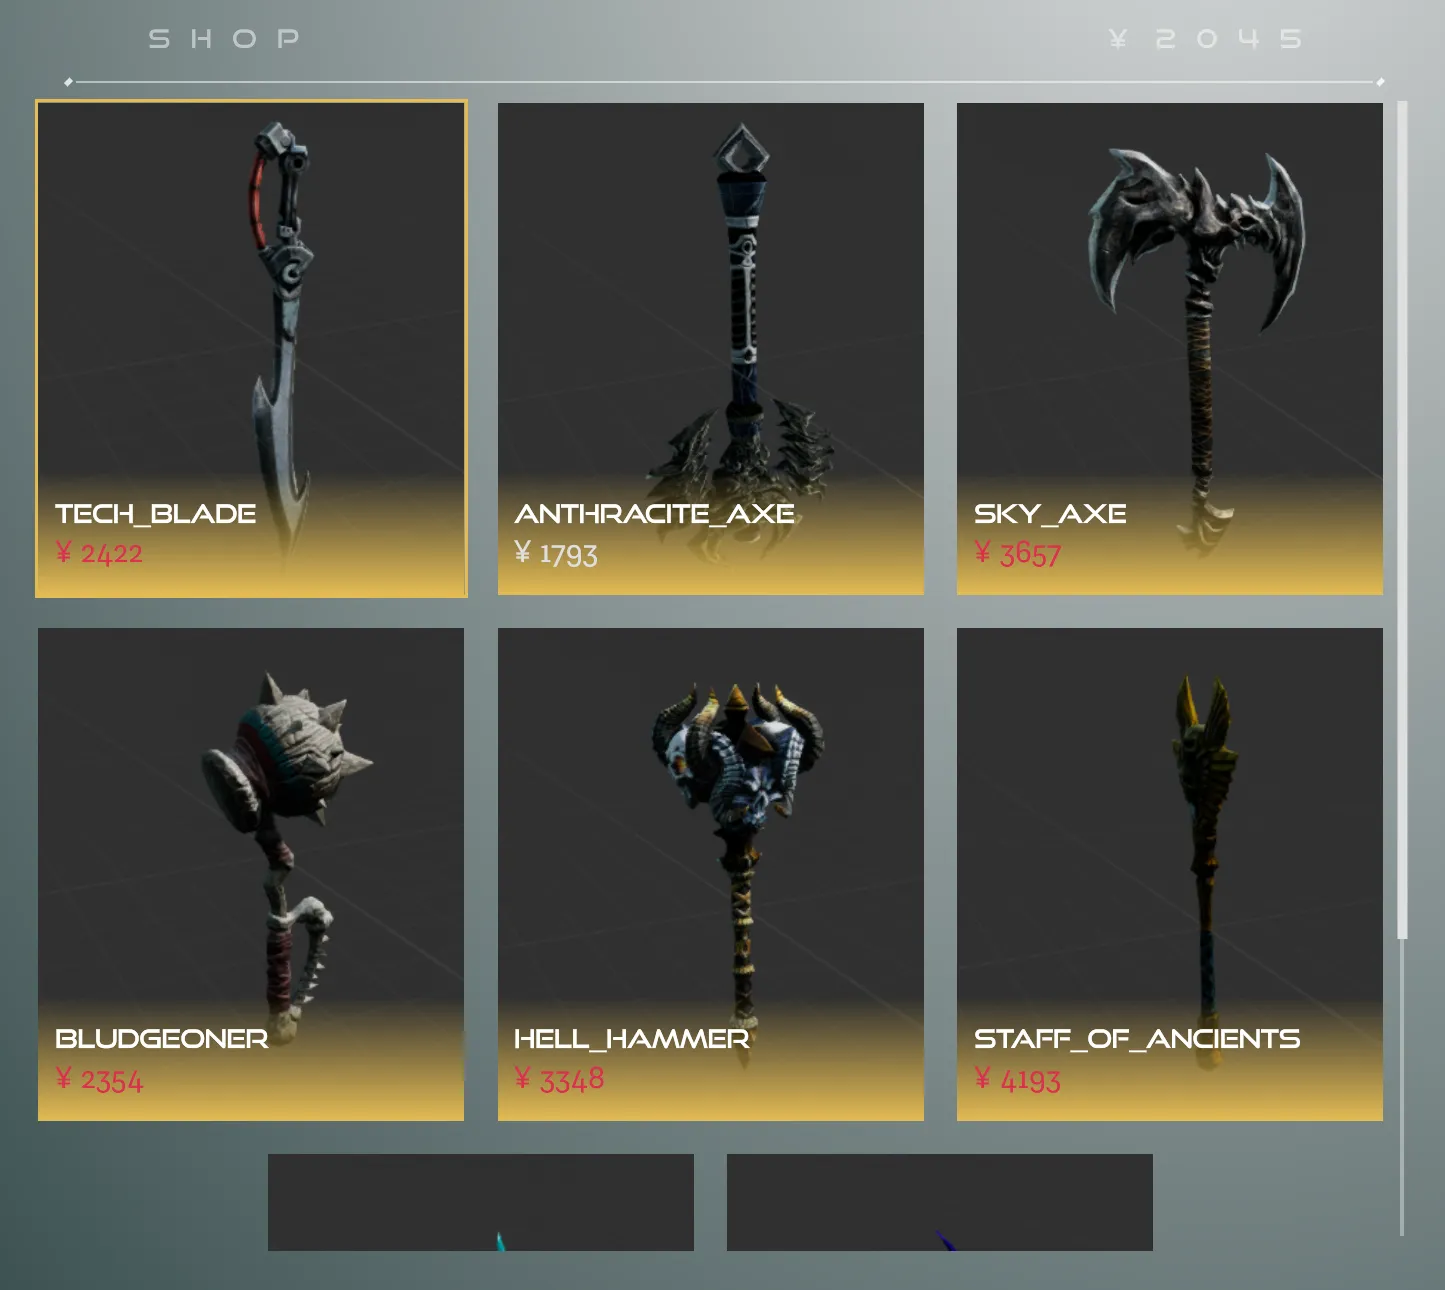
For the images, we’ve just screenshotted the models in Unreal and added that to our UI.
To make sure that the selected item is shown or hidden we’ll use the focus and blur events in the .shop-item element. To make sure we can change focus we’ll also add the option to focus it by clicking on an item.
1data-bind-focus="engine.trigger('setWeapon', {{item.name}}, true, {{index}} )"2data-bind-blur="engine.trigger('setWeapon', {{item.name}}, false, {{index}} )"3tabIndex="1"4onClick={() => this.focus()}We are using data-bind-focus and data-bind-blur here to be able to use the model data in our events. And in those bindings we’ll be calling engine.trigger which we’ll fire an event that we can later handle in the backend.
Adding the selected item
To add the selected item we’ll just add the corresponding data bindings to the HTML.
1 <div className="shop-item-data">2    <div className="shop-item-row">3        <div className="shop-item-name">Name:</div>4        <div className="shop-item-data-title" data-bind-value="{{SelectedItem}}.name">5            Dehumanizer6        </div>7    </div>8    <div className="shop-item-row">9        <div className="shop-item-name">Rank:</div>10        <div className="shop-item-data-title" data-bind-value="{{SelectedItem.rank}}" >11            12312        </div>13    </div>14    <div className="shop-item-row">15        <div className="shop-item-name">Impact:</div>16        <div className="shop-item-data-bar">17            <div className="shop-item-data-bar-fill" data-bind-style-width="{{SelectedItem.impact}} + '%'"></div>18        </div>19    </div>20    <div className="shop-item-row">21        <div className="shop-item-name">Range:</div>22        <div className="shop-item-data-bar">23            <div className="shop-item-data-bar-fill" data-bind-style-width="{{SelectedItem.range}} + '%'"></div>24        </div>25    </div>26
27    <div className="shop-item-row">28        <div className="shop-item-name">Stability:</div>29        <div className="shop-item-data-bar">30            <div className="shop-item-data-bar-fill" data-bind-style-width="{{SelectedItem.stability}} + '%'"></div>31        </div>32    </div>33
34    <div className="shop-item-row">35        <div className="shop-item-name">Handling:</div>36        <div className="shop-item-data-bar">37            <div className="shop-item-data-bar-fill" data-bind-style-width="{{SelectedItem.handling}} + '%'"></div>38        </div>39    </div>40</div>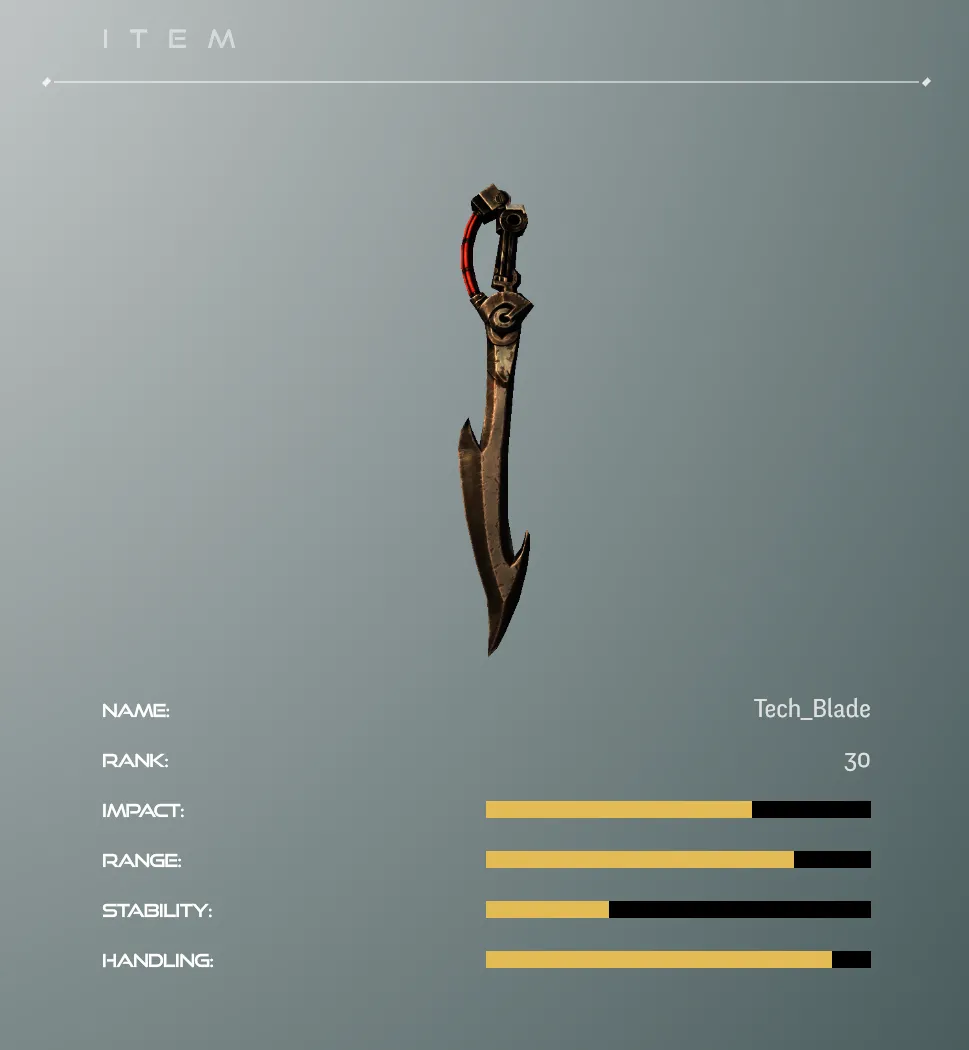
3D item preview
To add the live view to our UI we’ll just need to copy the reference from Unreal and add it as an <image> source.
1<img src="/Script/Engine.TextureRenderTarget2D'/Game/LiveViewRT.LiveViewRT'" className="shop-item-preview"/>Rotating the weapon
To rotate the weapon we’ll need to trigger the events that we’ve set up in our backend. This can be done utilizing our Interaction Manager library for binding them to some key presses.
We’ll start by adding the library to our page and importing the keyboard module:
1import { keyboard } from "coherent-gameface-interaction-manager";Then in our useEffect we’ll bind the A and D keys to rotate the item left and right respectively.
1 useEffect(() => {2    keyboard.on({3      keys: ["A"],4      type: "hold",5      callback: () => {6        engine.trigger("rotateCameraLeft");7      },8    });9
10    keyboard.on({11      keys: ["A"],12      type: "press",13      callback: () => {14        engine.trigger("rotateCameraLeft");15      },16    });17
18    keyboard.on({19      keys: ["D"],20      type: "hold",21      callback: () => {22        engine.trigger("rotateCameraRight");23      },24    });25
26    keyboard.on({27      keys: ["D"],28      type: "press",29      callback: () => {30        engine.trigger("rotateCameraRight");31      },32    });33
34    window.requestAnimationFrame(() => {35      document.querySelector(".shop-item").focus();36    });37
38    return () => {39      keyboard.off(["A"]);40      keyboard.off(["D"]);41    };42  }, []);
Here you can see that we are binding to both the key press and hold.
Wrapping it up
The last thing to do is to set the listener for the setWeapon event in the backend, so that we can hide and show the correct weapon.
Since receivng events with parameters in the blueprints is not currently supported out of the box, we’ll need to write some C++ to make the event listener available in the blueprint. You can see how to do it here
After that we’ll simply need to call the ToggleWeapon function in our Weapon actor and pass the necessary data.
   Begin Object Class=/Script/BlueprintGraph.K2Node_Event Name="K2Node_Event_2" ExportPath="/Script/BlueprintGraph.K2Node_Event'/Game/coherentBP.coherentBP:EventGraph.K2Node_Event_2'"
   EventReference=(MemberParent="/Script/CoreUObject.Class'/Script/CohtmlPlugin.MyCohtmlGameHUD'",MemberName="EventToBeTriggered")
   bOverrideFunction=True
   NodePosX=-736
   NodePosY=768
   NodeGuid=90E147D04399D1D59B89338DFFC51E0D
   CustomProperties Pin (PinId=AC97F2F3436C285DED7D728278C2B67D,PinName="OutputDelegate",Direction="EGPD_Output",PinType.PinCategory="delegate",PinType.PinSubCategory="",PinType.PinSubCategoryObject=None,PinType.PinSubCategoryMemberReference=(MemberParent="/Script/CoreUObject.Class'/Script/CohtmlPlugin.MyCohtmlGameHUD'",MemberName="EventToBeTriggered"),PinType.PinValueType=(),PinType.ContainerType=None,PinType.bIsReference=False,PinType.bIsConst=False,PinType.bIsWeakPointer=False,PinType.bIsUObjectWrapper=False,PinType.bSerializeAsSinglePrecisionFloat=False,PersistentGuid=00000000000000000000000000000000,bHidden=False,bNotConnectable=False,bDefaultValueIsReadOnly=False,bDefaultValueIsIgnored=False,bAdvancedView=False,bOrphanedPin=False,)
   CustomProperties Pin (PinId=A1A10ABF4A2BB25C6B1EC28B1B101F61,PinName="then",Direction="EGPD_Output",PinType.PinCategory="exec",PinType.PinSubCategory="",PinType.PinSubCategoryObject=None,PinType.PinSubCategoryMemberReference=(),PinType.PinValueType=(),PinType.ContainerType=None,PinType.bIsReference=False,PinType.bIsConst=False,PinType.bIsWeakPointer=False,PinType.bIsUObjectWrapper=False,PinType.bSerializeAsSinglePrecisionFloat=False,LinkedTo=(K2Node_CallFunction_3 71C1358146B3CACDFFB5188421345423,),PersistentGuid=00000000000000000000000000000000,bHidden=False,bNotConnectable=False,bDefaultValueIsReadOnly=False,bDefaultValueIsIgnored=False,bAdvancedView=False,bOrphanedPin=False,)
   CustomProperties Pin (PinId=F1AC2B98458BB61036785A87B8DD9A17,PinName="weaponName",PinToolTip="Weapon Name
String",Direction="EGPD_Output",PinType.PinCategory="string",PinType.PinSubCategory="",PinType.PinSubCategoryObject=None,PinType.PinSubCategoryMemberReference=(),PinType.PinValueType=(),PinType.ContainerType=None,PinType.bIsReference=False,PinType.bIsConst=False,PinType.bIsWeakPointer=False,PinType.bIsUObjectWrapper=False,PinType.bSerializeAsSinglePrecisionFloat=False,LinkedTo=(K2Node_CallFunction_3 072C8CFB45458DCD11752FBBC3CF4790,),PersistentGuid=00000000000000000000000000000000,bHidden=False,bNotConnectable=False,bDefaultValueIsReadOnly=False,bDefaultValueIsIgnored=False,bAdvancedView=False,bOrphanedPin=False,)
   CustomProperties Pin (PinId=35AF50734B40F0F4C271F0B72BEA8DA8,PinName="selected",PinToolTip="Selected
Boolean",Direction="EGPD_Output",PinType.PinCategory="bool",PinType.PinSubCategory="",PinType.PinSubCategoryObject=None,PinType.PinSubCategoryMemberReference=(),PinType.PinValueType=(),PinType.ContainerType=None,PinType.bIsReference=False,PinType.bIsConst=True,PinType.bIsWeakPointer=False,PinType.bIsUObjectWrapper=False,PinType.bSerializeAsSinglePrecisionFloat=False,DefaultValue="false",AutogeneratedDefaultValue="false",LinkedTo=(K2Node_CallFunction_3 52AE73C64965FE4991DA919861EF504E,K2Node_IfThenElse_0 2C042B0C48CF9A3DAE7FF9BFB8915F5E,),PersistentGuid=00000000000000000000000000000000,bHidden=False,bNotConnectable=False,bDefaultValueIsReadOnly=False,bDefaultValueIsIgnored=False,bAdvancedView=False,bOrphanedPin=False,)
   CustomProperties Pin (PinId=9158CD6A41F1D0D17C53D0B95E6BC0C4,PinName="index",PinToolTip="Index
Integer",Direction="EGPD_Output",PinType.PinCategory="int",PinType.PinSubCategory="",PinType.PinSubCategoryObject=None,PinType.PinSubCategoryMemberReference=(),PinType.PinValueType=(),PinType.ContainerType=None,PinType.bIsReference=False,PinType.bIsConst=True,PinType.bIsWeakPointer=False,PinType.bIsUObjectWrapper=False,PinType.bSerializeAsSinglePrecisionFloat=False,DefaultValue="0",AutogeneratedDefaultValue="0",LinkedTo=(K2Node_GetArrayItem_1 00E42103494232916AAD5C8FBC806260,),PersistentGuid=00000000000000000000000000000000,bHidden=False,bNotConnectable=False,bDefaultValueIsReadOnly=False,bDefaultValueIsIgnored=False,bAdvancedView=False,bOrphanedPin=False,)
End Object
Begin Object Class=/Script/BlueprintGraph.K2Node_VariableGet Name="K2Node_VariableGet_2" ExportPath="/Script/BlueprintGraph.K2Node_VariableGet'/Game/coherentBP.coherentBP:EventGraph.K2Node_VariableGet_2'"
   VariableReference=(MemberName="Weapon",MemberGuid=FA3E5BF946C11A92BA4C6BA49404E7CF,bSelfContext=True)
   NodePosX=-432
   NodePosY=720
   NodeGuid=9FE0D7E24DE079DB1A688FBC1B253F3B
   CustomProperties Pin (PinId=A1A4201B4275C4A5F8992E9D96EDF033,PinName="Weapon",Direction="EGPD_Output",PinType.PinCategory="object",PinType.PinSubCategory="",PinType.PinSubCategoryObject="/Script/Engine.BlueprintGeneratedClass'/Game/Weapon.Weapon_C'",PinType.PinSubCategoryMemberReference=(),PinType.PinValueType=(),PinType.ContainerType=None,PinType.bIsReference=False,PinType.bIsConst=False,PinType.bIsWeakPointer=False,PinType.bIsUObjectWrapper=False,PinType.bSerializeAsSinglePrecisionFloat=False,LinkedTo=(K2Node_CallFunction_3 2A2D83DD46CF9B1D77F5F496751CCA13,),PersistentGuid=00000000000000000000000000000000,bHidden=False,bNotConnectable=False,bDefaultValueIsReadOnly=False,bDefaultValueIsIgnored=False,bAdvancedView=False,bOrphanedPin=False,)
   CustomProperties Pin (PinId=F8A8A87741F2D03EC824B6B44D9D8718,PinName="self",PinFriendlyName=NSLOCTEXT("K2Node", "Target", "Target"),PinType.PinCategory="object",PinType.PinSubCategory="",PinType.PinSubCategoryObject="/Script/Engine.BlueprintGeneratedClass'/Game/coherentBP.coherentBP_C'",PinType.PinSubCategoryMemberReference=(),PinType.PinValueType=(),PinType.ContainerType=None,PinType.bIsReference=False,PinType.bIsConst=False,PinType.bIsWeakPointer=False,PinType.bIsUObjectWrapper=False,PinType.bSerializeAsSinglePrecisionFloat=False,PersistentGuid=00000000000000000000000000000000,bHidden=True,bNotConnectable=False,bDefaultValueIsReadOnly=False,bDefaultValueIsIgnored=False,bAdvancedView=False,bOrphanedPin=False,)
End Object
Begin Object Class=/Script/BlueprintGraph.K2Node_CallFunction Name="K2Node_CallFunction_3" ExportPath="/Script/BlueprintGraph.K2Node_CallFunction'/Game/coherentBP.coherentBP:EventGraph.K2Node_CallFunction_3'"
   FunctionReference=(MemberParent="/Script/Engine.BlueprintGeneratedClass'/Game/Weapon.Weapon_C'",MemberName="toggleWeapon",MemberGuid=6E5D822344FDFAFBAAB7E8B08F11ED6C)
   NodePosX=80
   NodePosY=752
   ErrorType=1
   NodeGuid=C60D33E4412232ABF494D999B916B661
   CustomProperties Pin (PinId=71C1358146B3CACDFFB5188421345423,PinName="execute",PinToolTip="
Exec",PinType.PinCategory="exec",PinType.PinSubCategory="",PinType.PinSubCategoryObject=None,PinType.PinSubCategoryMemberReference=(),PinType.PinValueType=(),PinType.ContainerType=None,PinType.bIsReference=False,PinType.bIsConst=False,PinType.bIsWeakPointer=False,PinType.bIsUObjectWrapper=False,PinType.bSerializeAsSinglePrecisionFloat=False,LinkedTo=(K2Node_Event_2 A1A10ABF4A2BB25C6B1EC28B1B101F61,),PersistentGuid=00000000000000000000000000000000,bHidden=False,bNotConnectable=False,bDefaultValueIsReadOnly=False,bDefaultValueIsIgnored=False,bAdvancedView=False,bOrphanedPin=False,)
   CustomProperties Pin (PinId=C094DB964FBB3B6720FB468BE01B0E80,PinName="then",PinToolTip="
Exec",Direction="EGPD_Output",PinType.PinCategory="exec",PinType.PinSubCategory="",PinType.PinSubCategoryObject=None,PinType.PinSubCategoryMemberReference=(),PinType.PinValueType=(),PinType.ContainerType=None,PinType.bIsReference=False,PinType.bIsConst=False,PinType.bIsWeakPointer=False,PinType.bIsUObjectWrapper=False,PinType.bSerializeAsSinglePrecisionFloat=False,LinkedTo=(K2Node_IfThenElse_0 6DD605694E0B7F2673D1F08841CB0E97,),PersistentGuid=00000000000000000000000000000000,bHidden=False,bNotConnectable=False,bDefaultValueIsReadOnly=False,bDefaultValueIsIgnored=False,bAdvancedView=False,bOrphanedPin=False,)
   CustomProperties Pin (PinId=2A2D83DD46CF9B1D77F5F496751CCA13,PinName="self",PinFriendlyName=NSLOCTEXT("K2Node", "Target", "Target"),PinToolTip="Target
Weapon Object Reference",PinType.PinCategory="object",PinType.PinSubCategory="",PinType.PinSubCategoryObject="/Script/Engine.BlueprintGeneratedClass'/Game/Weapon.Weapon_C'",PinType.PinSubCategoryMemberReference=(),PinType.PinValueType=(),PinType.ContainerType=None,PinType.bIsReference=False,PinType.bIsConst=False,PinType.bIsWeakPointer=False,PinType.bIsUObjectWrapper=False,PinType.bSerializeAsSinglePrecisionFloat=False,LinkedTo=(K2Node_VariableGet_2 A1A4201B4275C4A5F8992E9D96EDF033,),PersistentGuid=00000000000000000000000000000000,bHidden=False,bNotConnectable=False,bDefaultValueIsReadOnly=False,bDefaultValueIsIgnored=False,bAdvancedView=False,bOrphanedPin=False,)
   CustomProperties Pin (PinId=072C8CFB45458DCD11752FBBC3CF4790,PinName="weapon",PinToolTip="Weapon
String",PinType.PinCategory="string",PinType.PinSubCategory="",PinType.PinSubCategoryObject=None,PinType.PinSubCategoryMemberReference=(),PinType.PinValueType=(),PinType.ContainerType=None,PinType.bIsReference=False,PinType.bIsConst=False,PinType.bIsWeakPointer=False,PinType.bIsUObjectWrapper=False,PinType.bSerializeAsSinglePrecisionFloat=False,LinkedTo=(K2Node_Event_2 F1AC2B98458BB61036785A87B8DD9A17,),PersistentGuid=00000000000000000000000000000000,bHidden=False,bNotConnectable=False,bDefaultValueIsReadOnly=False,bDefaultValueIsIgnored=False,bAdvancedView=False,bOrphanedPin=False,)
   CustomProperties Pin (PinId=52AE73C64965FE4991DA919861EF504E,PinName="visible",PinToolTip="Visible
Boolean",PinType.PinCategory="bool",PinType.PinSubCategory="",PinType.PinSubCategoryObject=None,PinType.PinSubCategoryMemberReference=(),PinType.PinValueType=(),PinType.ContainerType=None,PinType.bIsReference=False,PinType.bIsConst=False,PinType.bIsWeakPointer=False,PinType.bIsUObjectWrapper=False,PinType.bSerializeAsSinglePrecisionFloat=False,DefaultValue="false",AutogeneratedDefaultValue="false",LinkedTo=(K2Node_Event_2 35AF50734B40F0F4C271F0B72BEA8DA8,),PersistentGuid=00000000000000000000000000000000,bHidden=False,bNotConnectable=False,bDefaultValueIsReadOnly=False,bDefaultValueIsIgnored=False,bAdvancedView=False,bOrphanedPin=False,)
End Object
The last thing we need to set up is to make sure the SelectedItem is being updated as well. So we’ll first check if the item has been selected and if so we’ll get the correct one from the array and set it.
   Begin Object Class=/Script/BlueprintGraph.K2Node_VariableGet Name="K2Node_VariableGet_5" ExportPath="/Script/BlueprintGraph.K2Node_VariableGet'/Game/coherentBP.coherentBP:EventGraph.K2Node_VariableGet_5'"
   VariableReference=(MemberName="selectedWeapon",MemberGuid=089A486B47DB8D2DE986969BD4B0173F,bSelfContext=True)
   NodePosX=1328
   NodePosY=1408
   NodeGuid=843CA1DF4CDBCF53DA8812AF0D6104E4
   CustomProperties Pin (PinId=0A051EDE42C9AC6C25130B9FFC23F197,PinName="selectedWeapon",Direction="EGPD_Output",PinType.PinCategory="struct",PinType.PinSubCategory="",PinType.PinSubCategoryObject="/Script/Engine.UserDefinedStruct'/Game/WeaponStruct.WeaponStruct'",PinType.PinSubCategoryMemberReference=(),PinType.PinValueType=(),PinType.ContainerType=None,PinType.bIsReference=False,PinType.bIsConst=False,PinType.bIsWeakPointer=False,PinType.bIsUObjectWrapper=False,PinType.bSerializeAsSinglePrecisionFloat=False,LinkedTo=(K2Node_SetFieldsInStruct_2 4B02202B44A96459351262A9F69569DF,),PersistentGuid=00000000000000000000000000000000,bHidden=False,bNotConnectable=False,bDefaultValueIsReadOnly=False,bDefaultValueIsIgnored=False,bAdvancedView=False,bOrphanedPin=False,)
   CustomProperties Pin (PinId=BB5C526C4AD3413ED4C862BD6E671674,PinName="self",PinFriendlyName=NSLOCTEXT("K2Node", "Target", "Target"),PinType.PinCategory="object",PinType.PinSubCategory="",PinType.PinSubCategoryObject="/Script/Engine.BlueprintGeneratedClass'/Game/coherentBP.coherentBP_C'",PinType.PinSubCategoryMemberReference=(),PinType.PinValueType=(),PinType.ContainerType=None,PinType.bIsReference=False,PinType.bIsConst=False,PinType.bIsWeakPointer=False,PinType.bIsUObjectWrapper=False,PinType.bSerializeAsSinglePrecisionFloat=False,PersistentGuid=00000000000000000000000000000000,bHidden=True,bNotConnectable=False,bDefaultValueIsReadOnly=False,bDefaultValueIsIgnored=False,bAdvancedView=False,bOrphanedPin=False,)
End Object
Begin Object Class=/Script/BlueprintGraph.K2Node_SetFieldsInStruct Name="K2Node_SetFieldsInStruct_2" ExportPath="/Script/BlueprintGraph.K2Node_SetFieldsInStruct'/Game/coherentBP.coherentBP:EventGraph.K2Node_SetFieldsInStruct_2'"
   bMadeAfterOverridePinRemoval=True
   ShowPinForProperties(0)=(PropertyName="name_2_4EFD82EE4A41C49B2B82F8A545887E09",PropertyFriendlyName="name",bShowPin=True,bCanToggleVisibility=True)
   ShowPinForProperties(1)=(PropertyName="rank_5_1191FC9F43F46534C95BBE9EDC4FB074",PropertyFriendlyName="rank",bShowPin=True,bCanToggleVisibility=True)
   ShowPinForProperties(2)=(PropertyName="impact_9_1EF8F4944152A2BABCC2018BF55E9933",PropertyFriendlyName="impact",bShowPin=True,bCanToggleVisibility=True)
   ShowPinForProperties(3)=(PropertyName="range_11_1ECB70A94C043F5AEF660AA860D3EB96",PropertyFriendlyName="range",bShowPin=True,bCanToggleVisibility=True)
   ShowPinForProperties(4)=(PropertyName="stability_13_1D3B3EB9402E567C875FAFBD71F05A93",PropertyFriendlyName="stability",bShowPin=True,bCanToggleVisibility=True)
   ShowPinForProperties(5)=(PropertyName="reloadSpeed_15_D4AFF36343F7BD2B972142B8D12C8724",PropertyFriendlyName="reloadSpeed",bShowPin=True,bCanToggleVisibility=True)
   ShowPinForProperties(6)=(PropertyName="handling_17_4FC34D8E4EA287B8CAC9B5B432468B1A",PropertyFriendlyName="handling",bShowPin=True,bCanToggleVisibility=True)
   ShowPinForProperties(7)=(PropertyName="roundsPerMinute_19_A02D81E74CF7FE0DA44BBBAC5E4C736E",PropertyFriendlyName="roundsPerMinute",bShowPin=True,bCanToggleVisibility=True)
   ShowPinForProperties(8)=(PropertyName="magazine_21_967200F246A0215590CE33A687DFD3AE",PropertyFriendlyName="magazine",bShowPin=True,bCanToggleVisibility=True)
   ShowPinForProperties(9)=(PropertyName="update_23_DDF8803C4D8748252B42079A75AE3E6A",PropertyFriendlyName="update",bCanToggleVisibility=True)
   ShowPinForProperties(10)=(PropertyName="price_26_7833B6FD41F52F2705EFC4A389DB4980",PropertyFriendlyName="price",bCanToggleVisibility=True)
   StructType="/Script/Engine.UserDefinedStruct'/Game/WeaponStruct.WeaponStruct'"
   NodePosX=1568
   NodePosY=1440
   NodeGuid=CDA4D43B40FABE5A6E6CEE90572D962C
   CustomProperties Pin (PinId=770C4D354890A33E4A281BA74BE97D3E,PinName="execute",PinType.PinCategory="exec",PinType.PinSubCategory="",PinType.PinSubCategoryObject=None,PinType.PinSubCategoryMemberReference=(),PinType.PinValueType=(),PinType.ContainerType=None,PinType.bIsReference=False,PinType.bIsConst=False,PinType.bIsWeakPointer=False,PinType.bIsUObjectWrapper=False,PinType.bSerializeAsSinglePrecisionFloat=False,LinkedTo=(K2Node_IfThenElse_0 E2CCA2064175A925449A0BBB9158792B,),PersistentGuid=00000000000000000000000000000000,bHidden=False,bNotConnectable=False,bDefaultValueIsReadOnly=False,bDefaultValueIsIgnored=False,bAdvancedView=False,bOrphanedPin=False,)
   CustomProperties Pin (PinId=A0C4943A4EBF2048D7B17684197CAD1C,PinName="then",Direction="EGPD_Output",PinType.PinCategory="exec",PinType.PinSubCategory="",PinType.PinSubCategoryObject=None,PinType.PinSubCategoryMemberReference=(),PinType.PinValueType=(),PinType.ContainerType=None,PinType.bIsReference=False,PinType.bIsConst=False,PinType.bIsWeakPointer=False,PinType.bIsUObjectWrapper=False,PinType.bSerializeAsSinglePrecisionFloat=False,LinkedTo=(K2Node_CallFunction_8 1C4C3305414753703B25E7841F64F6C6,),PersistentGuid=00000000000000000000000000000000,bHidden=False,bNotConnectable=False,bDefaultValueIsReadOnly=False,bDefaultValueIsIgnored=False,bAdvancedView=False,bOrphanedPin=False,)
   CustomProperties Pin (PinId=4B02202B44A96459351262A9F69569DF,PinName="StructRef",PinType.PinCategory="struct",PinType.PinSubCategory="",PinType.PinSubCategoryObject="/Script/Engine.UserDefinedStruct'/Game/WeaponStruct.WeaponStruct'",PinType.PinSubCategoryMemberReference=(),PinType.PinValueType=(),PinType.ContainerType=None,PinType.bIsReference=True,PinType.bIsConst=False,PinType.bIsWeakPointer=False,PinType.bIsUObjectWrapper=False,PinType.bSerializeAsSinglePrecisionFloat=False,LinkedTo=(K2Node_VariableGet_5 0A051EDE42C9AC6C25130B9FFC23F197,),ReferencePassThroughConnection=K2Node_SetFieldsInStruct_2 38BF8CE24C1461A18B032095795D59C9,PersistentGuid=00000000000000000000000000000000,bHidden=False,bNotConnectable=False,bDefaultValueIsReadOnly=False,bDefaultValueIsIgnored=False,bAdvancedView=False,bOrphanedPin=False,)
   CustomProperties Pin (PinId=38BF8CE24C1461A18B032095795D59C9,PinName="StructOut",PinToolTip="Reference to the input struct",Direction="EGPD_Output",PinType.PinCategory="struct",PinType.PinSubCategory="",PinType.PinSubCategoryObject="/Script/Engine.UserDefinedStruct'/Game/WeaponStruct.WeaponStruct'",PinType.PinSubCategoryMemberReference=(),PinType.PinValueType=(),PinType.ContainerType=None,PinType.bIsReference=True,PinType.bIsConst=False,PinType.bIsWeakPointer=False,PinType.bIsUObjectWrapper=False,PinType.bSerializeAsSinglePrecisionFloat=False,LinkedTo=(K2Node_CallFunction_8 DD53E3D34345BFF69AB998B1A9EB8759,),ReferencePassThroughConnection=K2Node_SetFieldsInStruct_2 4B02202B44A96459351262A9F69569DF,PersistentGuid=00000000000000000000000000000000,bHidden=False,bNotConnectable=False,bDefaultValueIsReadOnly=False,bDefaultValueIsIgnored=False,bAdvancedView=False,bOrphanedPin=False,)
   CustomProperties Pin (PinId=F63F40134D8B7ABD8BA13EB17D71CAA9,PinName="name_2_4EFD82EE4A41C49B2B82F8A545887E09",PinFriendlyName="name",PinToolTip="Name
String",PinType.PinCategory="string",PinType.PinSubCategory="",PinType.PinSubCategoryObject=None,PinType.PinSubCategoryMemberReference=(),PinType.PinValueType=(),PinType.ContainerType=None,PinType.bIsReference=False,PinType.bIsConst=False,PinType.bIsWeakPointer=False,PinType.bIsUObjectWrapper=False,PinType.bSerializeAsSinglePrecisionFloat=False,LinkedTo=(K2Node_GetArrayItem_1 81D08EF34F22027C96BE479C2B0DED80,),PersistentGuid=4EFD82EE4A41C49B2B82F8A545887E09,bHidden=False,bNotConnectable=False,bDefaultValueIsReadOnly=False,bDefaultValueIsIgnored=False,bAdvancedView=False,bOrphanedPin=False,)
   CustomProperties Pin (PinId=F40A3A5447EB4C2829CBAEA674F9B2AD,PinName="rank_5_1191FC9F43F46534C95BBE9EDC4FB074",PinFriendlyName="rank",PinToolTip="Rank
Integer",PinType.PinCategory="int",PinType.PinSubCategory="",PinType.PinSubCategoryObject=None,PinType.PinSubCategoryMemberReference=(),PinType.PinValueType=(),PinType.ContainerType=None,PinType.bIsReference=False,PinType.bIsConst=False,PinType.bIsWeakPointer=False,PinType.bIsUObjectWrapper=False,PinType.bSerializeAsSinglePrecisionFloat=False,DefaultValue="0",AutogeneratedDefaultValue="0",LinkedTo=(K2Node_GetArrayItem_1 8176A4444D663344AC092F836BAF5814,),PersistentGuid=1191FC9F43F46534C95BBE9EDC4FB074,bHidden=False,bNotConnectable=False,bDefaultValueIsReadOnly=False,bDefaultValueIsIgnored=False,bAdvancedView=False,bOrphanedPin=False,)
   CustomProperties Pin (PinId=777CDCF84CAAEC33FFFCA599FFFD8AEE,PinName="impact_9_1EF8F4944152A2BABCC2018BF55E9933",PinFriendlyName="impact",PinToolTip="Impact
Integer",PinType.PinCategory="int",PinType.PinSubCategory="",PinType.PinSubCategoryObject=None,PinType.PinSubCategoryMemberReference=(),PinType.PinValueType=(),PinType.ContainerType=None,PinType.bIsReference=False,PinType.bIsConst=False,PinType.bIsWeakPointer=False,PinType.bIsUObjectWrapper=False,PinType.bSerializeAsSinglePrecisionFloat=False,DefaultValue="0",AutogeneratedDefaultValue="0",LinkedTo=(K2Node_GetArrayItem_1 58B6B6C1480882FE111986A29A39C58D,),PersistentGuid=1EF8F4944152A2BABCC2018BF55E9933,bHidden=False,bNotConnectable=False,bDefaultValueIsReadOnly=False,bDefaultValueIsIgnored=False,bAdvancedView=False,bOrphanedPin=False,)
   CustomProperties Pin (PinId=C1F1225D4A2CA6C02885A1A45C23CC4D,PinName="range_11_1ECB70A94C043F5AEF660AA860D3EB96",PinFriendlyName="range",PinToolTip="Range
Integer",PinType.PinCategory="int",PinType.PinSubCategory="",PinType.PinSubCategoryObject=None,PinType.PinSubCategoryMemberReference=(),PinType.PinValueType=(),PinType.ContainerType=None,PinType.bIsReference=False,PinType.bIsConst=False,PinType.bIsWeakPointer=False,PinType.bIsUObjectWrapper=False,PinType.bSerializeAsSinglePrecisionFloat=False,DefaultValue="0",AutogeneratedDefaultValue="0",LinkedTo=(K2Node_GetArrayItem_1 9D949D3C40E5EDA29101A9ACF1DDD34A,),PersistentGuid=1ECB70A94C043F5AEF660AA860D3EB96,bHidden=False,bNotConnectable=False,bDefaultValueIsReadOnly=False,bDefaultValueIsIgnored=False,bAdvancedView=False,bOrphanedPin=False,)
   CustomProperties Pin (PinId=0AB115E142F359F1E77ACAAF195A56B6,PinName="stability_13_1D3B3EB9402E567C875FAFBD71F05A93",PinFriendlyName="stability",PinToolTip="Stability
Integer",PinType.PinCategory="int",PinType.PinSubCategory="",PinType.PinSubCategoryObject=None,PinType.PinSubCategoryMemberReference=(),PinType.PinValueType=(),PinType.ContainerType=None,PinType.bIsReference=False,PinType.bIsConst=False,PinType.bIsWeakPointer=False,PinType.bIsUObjectWrapper=False,PinType.bSerializeAsSinglePrecisionFloat=False,DefaultValue="0",AutogeneratedDefaultValue="0",LinkedTo=(K2Node_GetArrayItem_1 D5D60DB643E7B1B954558BB149AE9036,),PersistentGuid=1D3B3EB9402E567C875FAFBD71F05A93,bHidden=False,bNotConnectable=False,bDefaultValueIsReadOnly=False,bDefaultValueIsIgnored=False,bAdvancedView=False,bOrphanedPin=False,)
   CustomProperties Pin (PinId=AC94A38C4D2DA3AB6C227592954CF446,PinName="reloadSpeed_15_D4AFF36343F7BD2B972142B8D12C8724",PinFriendlyName="reloadSpeed",PinToolTip="Reload Speed
Integer",PinType.PinCategory="int",PinType.PinSubCategory="",PinType.PinSubCategoryObject=None,PinType.PinSubCategoryMemberReference=(),PinType.PinValueType=(),PinType.ContainerType=None,PinType.bIsReference=False,PinType.bIsConst=False,PinType.bIsWeakPointer=False,PinType.bIsUObjectWrapper=False,PinType.bSerializeAsSinglePrecisionFloat=False,DefaultValue="0",AutogeneratedDefaultValue="0",LinkedTo=(K2Node_GetArrayItem_1 52256B4847174D1BCB346E962D747E89,),PersistentGuid=D4AFF36343F7BD2B972142B8D12C8724,bHidden=False,bNotConnectable=False,bDefaultValueIsReadOnly=False,bDefaultValueIsIgnored=False,bAdvancedView=False,bOrphanedPin=False,)
   CustomProperties Pin (PinId=4813D30145D36F22028DD48A1CB97501,PinName="handling_17_4FC34D8E4EA287B8CAC9B5B432468B1A",PinFriendlyName="handling",PinToolTip="Handling
Integer",PinType.PinCategory="int",PinType.PinSubCategory="",PinType.PinSubCategoryObject=None,PinType.PinSubCategoryMemberReference=(),PinType.PinValueType=(),PinType.ContainerType=None,PinType.bIsReference=False,PinType.bIsConst=False,PinType.bIsWeakPointer=False,PinType.bIsUObjectWrapper=False,PinType.bSerializeAsSinglePrecisionFloat=False,DefaultValue="0",AutogeneratedDefaultValue="0",LinkedTo=(K2Node_GetArrayItem_1 37F2BAA04E9CFD3BC8924DB2D4507042,),PersistentGuid=4FC34D8E4EA287B8CAC9B5B432468B1A,bHidden=False,bNotConnectable=False,bDefaultValueIsReadOnly=False,bDefaultValueIsIgnored=False,bAdvancedView=False,bOrphanedPin=False,)
   CustomProperties Pin (PinId=467FF643488AB1C13E52D6A61D6C1310,PinName="roundsPerMinute_19_A02D81E74CF7FE0DA44BBBAC5E4C736E",PinFriendlyName="roundsPerMinute",PinToolTip="Rounds Per Minute
Integer",PinType.PinCategory="int",PinType.PinSubCategory="",PinType.PinSubCategoryObject=None,PinType.PinSubCategoryMemberReference=(),PinType.PinValueType=(),PinType.ContainerType=None,PinType.bIsReference=False,PinType.bIsConst=False,PinType.bIsWeakPointer=False,PinType.bIsUObjectWrapper=False,PinType.bSerializeAsSinglePrecisionFloat=False,DefaultValue="0",AutogeneratedDefaultValue="0",LinkedTo=(K2Node_GetArrayItem_1 DC93C908419EB544EE0F4E8A6CB90B5A,),PersistentGuid=A02D81E74CF7FE0DA44BBBAC5E4C736E,bHidden=False,bNotConnectable=False,bDefaultValueIsReadOnly=False,bDefaultValueIsIgnored=False,bAdvancedView=False,bOrphanedPin=False,)
   CustomProperties Pin (PinId=F927AC6F45A761458310C0B23CFA59A8,PinName="magazine_21_967200F246A0215590CE33A687DFD3AE",PinFriendlyName="magazine",PinToolTip="Magazine
Integer",PinType.PinCategory="int",PinType.PinSubCategory="",PinType.PinSubCategoryObject=None,PinType.PinSubCategoryMemberReference=(),PinType.PinValueType=(),PinType.ContainerType=None,PinType.bIsReference=False,PinType.bIsConst=False,PinType.bIsWeakPointer=False,PinType.bIsUObjectWrapper=False,PinType.bSerializeAsSinglePrecisionFloat=False,DefaultValue="0",AutogeneratedDefaultValue="0",LinkedTo=(K2Node_GetArrayItem_1 F8CF4C4B450D195184CAB2A8DB64416E,),PersistentGuid=967200F246A0215590CE33A687DFD3AE,bHidden=False,bNotConnectable=False,bDefaultValueIsReadOnly=False,bDefaultValueIsIgnored=False,bAdvancedView=False,bOrphanedPin=False,)
End Object
Begin Object Class=/Script/BlueprintGraph.K2Node_IfThenElse Name="K2Node_IfThenElse_0" ExportPath="/Script/BlueprintGraph.K2Node_IfThenElse'/Game/coherentBP.coherentBP:EventGraph.K2Node_IfThenElse_0'"
   NodePosX=752
   NodePosY=1104
   NodeGuid=1E50374B49EEB2955B2073A09D4E3E68
   CustomProperties Pin (PinId=6DD605694E0B7F2673D1F08841CB0E97,PinName="execute",PinType.PinCategory="exec",PinType.PinSubCategory="",PinType.PinSubCategoryObject=None,PinType.PinSubCategoryMemberReference=(),PinType.PinValueType=(),PinType.ContainerType=None,PinType.bIsReference=False,PinType.bIsConst=False,PinType.bIsWeakPointer=False,PinType.bIsUObjectWrapper=False,PinType.bSerializeAsSinglePrecisionFloat=False,LinkedTo=(K2Node_CallFunction_3 C094DB964FBB3B6720FB468BE01B0E80,),PersistentGuid=00000000000000000000000000000000,bHidden=False,bNotConnectable=False,bDefaultValueIsReadOnly=False,bDefaultValueIsIgnored=False,bAdvancedView=False,bOrphanedPin=False,)
   CustomProperties Pin (PinId=2C042B0C48CF9A3DAE7FF9BFB8915F5E,PinName="Condition",PinType.PinCategory="bool",PinType.PinSubCategory="",PinType.PinSubCategoryObject=None,PinType.PinSubCategoryMemberReference=(),PinType.PinValueType=(),PinType.ContainerType=None,PinType.bIsReference=False,PinType.bIsConst=False,PinType.bIsWeakPointer=False,PinType.bIsUObjectWrapper=False,PinType.bSerializeAsSinglePrecisionFloat=False,DefaultValue="true",AutogeneratedDefaultValue="true",LinkedTo=(K2Node_Event_2 35AF50734B40F0F4C271F0B72BEA8DA8,),PersistentGuid=00000000000000000000000000000000,bHidden=False,bNotConnectable=False,bDefaultValueIsReadOnly=False,bDefaultValueIsIgnored=False,bAdvancedView=False,bOrphanedPin=False,)
   CustomProperties Pin (PinId=E2CCA2064175A925449A0BBB9158792B,PinName="then",PinFriendlyName=NSLOCTEXT("K2Node", "true", "true"),Direction="EGPD_Output",PinType.PinCategory="exec",PinType.PinSubCategory="",PinType.PinSubCategoryObject=None,PinType.PinSubCategoryMemberReference=(),PinType.PinValueType=(),PinType.ContainerType=None,PinType.bIsReference=False,PinType.bIsConst=False,PinType.bIsWeakPointer=False,PinType.bIsUObjectWrapper=False,PinType.bSerializeAsSinglePrecisionFloat=False,LinkedTo=(K2Node_SetFieldsInStruct_2 770C4D354890A33E4A281BA74BE97D3E,),PersistentGuid=00000000000000000000000000000000,bHidden=False,bNotConnectable=False,bDefaultValueIsReadOnly=False,bDefaultValueIsIgnored=False,bAdvancedView=False,bOrphanedPin=False,)
   CustomProperties Pin (PinId=E5F2210948BB30693E35D8BA6D587311,PinName="else",PinFriendlyName=NSLOCTEXT("K2Node", "false", "false"),Direction="EGPD_Output",PinType.PinCategory="exec",PinType.PinSubCategory="",PinType.PinSubCategoryObject=None,PinType.PinSubCategoryMemberReference=(),PinType.PinValueType=(),PinType.ContainerType=None,PinType.bIsReference=False,PinType.bIsConst=False,PinType.bIsWeakPointer=False,PinType.bIsUObjectWrapper=False,PinType.bSerializeAsSinglePrecisionFloat=False,PersistentGuid=00000000000000000000000000000000,bHidden=False,bNotConnectable=False,bDefaultValueIsReadOnly=False,bDefaultValueIsIgnored=False,bAdvancedView=False,bOrphanedPin=False,)
End Object
Begin Object Class=/Script/BlueprintGraph.K2Node_VariableGet Name="K2Node_VariableGet_6" ExportPath="/Script/BlueprintGraph.K2Node_VariableGet'/Game/coherentBP.coherentBP:EventGraph.K2Node_VariableGet_6'"
   VariableReference=(MemberName="WeaponModel",MemberGuid=4E9C18DC41A29D676EB768A5125447B6,bSelfContext=True)
   NodePosX=576
   NodePosY=1568
   NodeGuid=1EB75E67497AFE2833CDB1AA8F9629DC
   CustomProperties Pin (PinId=918066D34B0F62C310DACAAD3DA831FE,PinName="WeaponModel",Direction="EGPD_Output",PinType.PinCategory="struct",PinType.PinSubCategory="",PinType.PinSubCategoryObject="/Script/Engine.UserDefinedStruct'/Game/Weapons.Weapons'",PinType.PinSubCategoryMemberReference=(),PinType.PinValueType=(),PinType.ContainerType=None,PinType.bIsReference=False,PinType.bIsConst=False,PinType.bIsWeakPointer=False,PinType.bIsUObjectWrapper=False,PinType.bSerializeAsSinglePrecisionFloat=False,SubPins=(K2Node_VariableGet_6 19CDC7204043182AD9E83D9E38B5E255,),PersistentGuid=00000000000000000000000000000000,bHidden=True,bNotConnectable=False,bDefaultValueIsReadOnly=False,bDefaultValueIsIgnored=False,bAdvancedView=False,bOrphanedPin=False,)
   CustomProperties Pin (PinId=19CDC7204043182AD9E83D9E38B5E255,PinName="WeaponModel_weapons_3_87FEC4294366D9B492F602B11E927A39",PinFriendlyName=LOCGEN_FORMAT_NAMED(NSLOCTEXT("KismetSchema", "SplitPinFriendlyNameFormat", "{PinDisplayName} {ProtoPinDisplayName}"), "PinDisplayName", "Weapon Model", "ProtoPinDisplayName", "Weapons"),Direction="EGPD_Output",PinType.PinCategory="struct",PinType.PinSubCategory="",PinType.PinSubCategoryObject="/Script/Engine.UserDefinedStruct'/Game/WeaponStruct.WeaponStruct'",PinType.PinSubCategoryMemberReference=(),PinType.PinValueType=(),PinType.ContainerType=Array,PinType.bIsReference=False,PinType.bIsConst=False,PinType.bIsWeakPointer=False,PinType.bIsUObjectWrapper=False,PinType.bSerializeAsSinglePrecisionFloat=False,LinkedTo=(K2Node_GetArrayItem_1 57129A634CB0B2130B10F0932E1E9785,),ParentPin=K2Node_VariableGet_6 918066D34B0F62C310DACAAD3DA831FE,PersistentGuid=00000000000000000000000000000000,bHidden=False,bNotConnectable=False,bDefaultValueIsReadOnly=False,bDefaultValueIsIgnored=False,bAdvancedView=False,bOrphanedPin=False,)
   CustomProperties Pin (PinId=0B42AB094649C5588044E095DB608C5A,PinName="self",PinFriendlyName=NSLOCTEXT("K2Node", "Target", "Target"),PinType.PinCategory="object",PinType.PinSubCategory="",PinType.PinSubCategoryObject="/Script/Engine.BlueprintGeneratedClass'/Game/coherentBP.coherentBP_C'",PinType.PinSubCategoryMemberReference=(),PinType.PinValueType=(),PinType.ContainerType=None,PinType.bIsReference=False,PinType.bIsConst=False,PinType.bIsWeakPointer=False,PinType.bIsUObjectWrapper=False,PinType.bSerializeAsSinglePrecisionFloat=False,PersistentGuid=00000000000000000000000000000000,bHidden=True,bNotConnectable=False,bDefaultValueIsReadOnly=False,bDefaultValueIsIgnored=False,bAdvancedView=False,bOrphanedPin=False,)
End Object
Begin Object Class=/Script/BlueprintGraph.K2Node_GetArrayItem Name="K2Node_GetArrayItem_1" ExportPath="/Script/BlueprintGraph.K2Node_GetArrayItem'/Game/coherentBP.coherentBP:EventGraph.K2Node_GetArrayItem_1'"
   NodePosX=928
   NodePosY=1408
   NodeGuid=F346C5104C87D4BA709538A518C59391
   CustomProperties Pin (PinId=57129A634CB0B2130B10F0932E1E9785,PinName="Array",PinType.PinCategory="struct",PinType.PinSubCategory="",PinType.PinSubCategoryObject="/Script/Engine.UserDefinedStruct'/Game/WeaponStruct.WeaponStruct'",PinType.PinSubCategoryMemberReference=(),PinType.PinValueType=(),PinType.ContainerType=Array,PinType.bIsReference=False,PinType.bIsConst=False,PinType.bIsWeakPointer=False,PinType.bIsUObjectWrapper=False,PinType.bSerializeAsSinglePrecisionFloat=False,LinkedTo=(K2Node_VariableGet_6 19CDC7204043182AD9E83D9E38B5E255,),PersistentGuid=00000000000000000000000000000000,bHidden=False,bNotConnectable=False,bDefaultValueIsReadOnly=False,bDefaultValueIsIgnored=False,bAdvancedView=False,bOrphanedPin=False,)
   CustomProperties Pin (PinId=00E42103494232916AAD5C8FBC806260,PinName="Dimension 1",PinType.PinCategory="int",PinType.PinSubCategory="",PinType.PinSubCategoryObject=None,PinType.PinSubCategoryMemberReference=(),PinType.PinValueType=(),PinType.ContainerType=None,PinType.bIsReference=False,PinType.bIsConst=False,PinType.bIsWeakPointer=False,PinType.bIsUObjectWrapper=False,PinType.bSerializeAsSinglePrecisionFloat=False,DefaultValue="0",AutogeneratedDefaultValue="0",LinkedTo=(K2Node_Event_2 9158CD6A41F1D0D17C53D0B95E6BC0C4,),PersistentGuid=00000000000000000000000000000000,bHidden=False,bNotConnectable=False,bDefaultValueIsReadOnly=False,bDefaultValueIsIgnored=False,bAdvancedView=False,bOrphanedPin=False,)
   CustomProperties Pin (PinId=66F71D574E1D64B2DB31AFB2B14981CC,PinName="Output",Direction="EGPD_Output",PinType.PinCategory="struct",PinType.PinSubCategory="",PinType.PinSubCategoryObject="/Script/Engine.UserDefinedStruct'/Game/WeaponStruct.WeaponStruct'",PinType.PinSubCategoryMemberReference=(),PinType.PinValueType=(),PinType.ContainerType=None,PinType.bIsReference=True,PinType.bIsConst=False,PinType.bIsWeakPointer=False,PinType.bIsUObjectWrapper=False,PinType.bSerializeAsSinglePrecisionFloat=False,SubPins=(K2Node_GetArrayItem_1 81D08EF34F22027C96BE479C2B0DED80,K2Node_GetArrayItem_1 8176A4444D663344AC092F836BAF5814,K2Node_GetArrayItem_1 58B6B6C1480882FE111986A29A39C58D,K2Node_GetArrayItem_1 9D949D3C40E5EDA29101A9ACF1DDD34A,K2Node_GetArrayItem_1 D5D60DB643E7B1B954558BB149AE9036,K2Node_GetArrayItem_1 52256B4847174D1BCB346E962D747E89,K2Node_GetArrayItem_1 37F2BAA04E9CFD3BC8924DB2D4507042,K2Node_GetArrayItem_1 DC93C908419EB544EE0F4E8A6CB90B5A,K2Node_GetArrayItem_1 F8CF4C4B450D195184CAB2A8DB64416E,K2Node_GetArrayItem_1 9E6710F0490655CDEA00438B60E312B2,K2Node_GetArrayItem_1 B351E70F466D63311924D0B6761D7AF9,),PersistentGuid=00000000000000000000000000000000,bHidden=True,bNotConnectable=False,bDefaultValueIsReadOnly=False,bDefaultValueIsIgnored=False,bAdvancedView=False,bOrphanedPin=False,)
   CustomProperties Pin (PinId=81D08EF34F22027C96BE479C2B0DED80,PinName="Output_name_2_4EFD82EE4A41C49B2B82F8A545887E09",PinFriendlyName="Name",Direction="EGPD_Output",PinType.PinCategory="string",PinType.PinSubCategory="",PinType.PinSubCategoryObject=None,PinType.PinSubCategoryMemberReference=(),PinType.PinValueType=(),PinType.ContainerType=None,PinType.bIsReference=False,PinType.bIsConst=False,PinType.bIsWeakPointer=False,PinType.bIsUObjectWrapper=False,PinType.bSerializeAsSinglePrecisionFloat=False,LinkedTo=(K2Node_SetFieldsInStruct_2 F63F40134D8B7ABD8BA13EB17D71CAA9,),ParentPin=K2Node_GetArrayItem_1 66F71D574E1D64B2DB31AFB2B14981CC,PersistentGuid=00000000000000000000000000000000,bHidden=False,bNotConnectable=False,bDefaultValueIsReadOnly=False,bDefaultValueIsIgnored=False,bAdvancedView=False,bOrphanedPin=False,)
   CustomProperties Pin (PinId=8176A4444D663344AC092F836BAF5814,PinName="Output_rank_5_1191FC9F43F46534C95BBE9EDC4FB074",PinFriendlyName="Rank",Direction="EGPD_Output",PinType.PinCategory="int",PinType.PinSubCategory="",PinType.PinSubCategoryObject=None,PinType.PinSubCategoryMemberReference=(),PinType.PinValueType=(),PinType.ContainerType=None,PinType.bIsReference=False,PinType.bIsConst=False,PinType.bIsWeakPointer=False,PinType.bIsUObjectWrapper=False,PinType.bSerializeAsSinglePrecisionFloat=False,LinkedTo=(K2Node_SetFieldsInStruct_2 F40A3A5447EB4C2829CBAEA674F9B2AD,),ParentPin=K2Node_GetArrayItem_1 66F71D574E1D64B2DB31AFB2B14981CC,PersistentGuid=00000000000000000000000000000000,bHidden=False,bNotConnectable=False,bDefaultValueIsReadOnly=False,bDefaultValueIsIgnored=False,bAdvancedView=False,bOrphanedPin=False,)
   CustomProperties Pin (PinId=58B6B6C1480882FE111986A29A39C58D,PinName="Output_impact_9_1EF8F4944152A2BABCC2018BF55E9933",PinFriendlyName="Impact",Direction="EGPD_Output",PinType.PinCategory="int",PinType.PinSubCategory="",PinType.PinSubCategoryObject=None,PinType.PinSubCategoryMemberReference=(),PinType.PinValueType=(),PinType.ContainerType=None,PinType.bIsReference=False,PinType.bIsConst=False,PinType.bIsWeakPointer=False,PinType.bIsUObjectWrapper=False,PinType.bSerializeAsSinglePrecisionFloat=False,LinkedTo=(K2Node_SetFieldsInStruct_2 777CDCF84CAAEC33FFFCA599FFFD8AEE,),ParentPin=K2Node_GetArrayItem_1 66F71D574E1D64B2DB31AFB2B14981CC,PersistentGuid=00000000000000000000000000000000,bHidden=False,bNotConnectable=False,bDefaultValueIsReadOnly=False,bDefaultValueIsIgnored=False,bAdvancedView=False,bOrphanedPin=False,)
   CustomProperties Pin (PinId=9D949D3C40E5EDA29101A9ACF1DDD34A,PinName="Output_range_11_1ECB70A94C043F5AEF660AA860D3EB96",PinFriendlyName="Range",Direction="EGPD_Output",PinType.PinCategory="int",PinType.PinSubCategory="",PinType.PinSubCategoryObject=None,PinType.PinSubCategoryMemberReference=(),PinType.PinValueType=(),PinType.ContainerType=None,PinType.bIsReference=False,PinType.bIsConst=False,PinType.bIsWeakPointer=False,PinType.bIsUObjectWrapper=False,PinType.bSerializeAsSinglePrecisionFloat=False,LinkedTo=(K2Node_SetFieldsInStruct_2 C1F1225D4A2CA6C02885A1A45C23CC4D,),ParentPin=K2Node_GetArrayItem_1 66F71D574E1D64B2DB31AFB2B14981CC,PersistentGuid=00000000000000000000000000000000,bHidden=False,bNotConnectable=False,bDefaultValueIsReadOnly=False,bDefaultValueIsIgnored=False,bAdvancedView=False,bOrphanedPin=False,)
   CustomProperties Pin (PinId=D5D60DB643E7B1B954558BB149AE9036,PinName="Output_stability_13_1D3B3EB9402E567C875FAFBD71F05A93",PinFriendlyName="Stability",Direction="EGPD_Output",PinType.PinCategory="int",PinType.PinSubCategory="",PinType.PinSubCategoryObject=None,PinType.PinSubCategoryMemberReference=(),PinType.PinValueType=(),PinType.ContainerType=None,PinType.bIsReference=False,PinType.bIsConst=False,PinType.bIsWeakPointer=False,PinType.bIsUObjectWrapper=False,PinType.bSerializeAsSinglePrecisionFloat=False,LinkedTo=(K2Node_SetFieldsInStruct_2 0AB115E142F359F1E77ACAAF195A56B6,),ParentPin=K2Node_GetArrayItem_1 66F71D574E1D64B2DB31AFB2B14981CC,PersistentGuid=00000000000000000000000000000000,bHidden=False,bNotConnectable=False,bDefaultValueIsReadOnly=False,bDefaultValueIsIgnored=False,bAdvancedView=False,bOrphanedPin=False,)
   CustomProperties Pin (PinId=52256B4847174D1BCB346E962D747E89,PinName="Output_reloadSpeed_15_D4AFF36343F7BD2B972142B8D12C8724",PinFriendlyName="Reload Speed",Direction="EGPD_Output",PinType.PinCategory="int",PinType.PinSubCategory="",PinType.PinSubCategoryObject=None,PinType.PinSubCategoryMemberReference=(),PinType.PinValueType=(),PinType.ContainerType=None,PinType.bIsReference=False,PinType.bIsConst=False,PinType.bIsWeakPointer=False,PinType.bIsUObjectWrapper=False,PinType.bSerializeAsSinglePrecisionFloat=False,LinkedTo=(K2Node_SetFieldsInStruct_2 AC94A38C4D2DA3AB6C227592954CF446,),ParentPin=K2Node_GetArrayItem_1 66F71D574E1D64B2DB31AFB2B14981CC,PersistentGuid=00000000000000000000000000000000,bHidden=False,bNotConnectable=False,bDefaultValueIsReadOnly=False,bDefaultValueIsIgnored=False,bAdvancedView=False,bOrphanedPin=False,)
   CustomProperties Pin (PinId=37F2BAA04E9CFD3BC8924DB2D4507042,PinName="Output_handling_17_4FC34D8E4EA287B8CAC9B5B432468B1A",PinFriendlyName="Handling",Direction="EGPD_Output",PinType.PinCategory="int",PinType.PinSubCategory="",PinType.PinSubCategoryObject=None,PinType.PinSubCategoryMemberReference=(),PinType.PinValueType=(),PinType.ContainerType=None,PinType.bIsReference=False,PinType.bIsConst=False,PinType.bIsWeakPointer=False,PinType.bIsUObjectWrapper=False,PinType.bSerializeAsSinglePrecisionFloat=False,LinkedTo=(K2Node_SetFieldsInStruct_2 4813D30145D36F22028DD48A1CB97501,),ParentPin=K2Node_GetArrayItem_1 66F71D574E1D64B2DB31AFB2B14981CC,PersistentGuid=00000000000000000000000000000000,bHidden=False,bNotConnectable=False,bDefaultValueIsReadOnly=False,bDefaultValueIsIgnored=False,bAdvancedView=False,bOrphanedPin=False,)
   CustomProperties Pin (PinId=DC93C908419EB544EE0F4E8A6CB90B5A,PinName="Output_roundsPerMinute_19_A02D81E74CF7FE0DA44BBBAC5E4C736E",PinFriendlyName="Rounds Per Minute",Direction="EGPD_Output",PinType.PinCategory="int",PinType.PinSubCategory="",PinType.PinSubCategoryObject=None,PinType.PinSubCategoryMemberReference=(),PinType.PinValueType=(),PinType.ContainerType=None,PinType.bIsReference=False,PinType.bIsConst=False,PinType.bIsWeakPointer=False,PinType.bIsUObjectWrapper=False,PinType.bSerializeAsSinglePrecisionFloat=False,LinkedTo=(K2Node_SetFieldsInStruct_2 467FF643488AB1C13E52D6A61D6C1310,),ParentPin=K2Node_GetArrayItem_1 66F71D574E1D64B2DB31AFB2B14981CC,PersistentGuid=00000000000000000000000000000000,bHidden=False,bNotConnectable=False,bDefaultValueIsReadOnly=False,bDefaultValueIsIgnored=False,bAdvancedView=False,bOrphanedPin=False,)
   CustomProperties Pin (PinId=F8CF4C4B450D195184CAB2A8DB64416E,PinName="Output_magazine_21_967200F246A0215590CE33A687DFD3AE",PinFriendlyName="Magazine",Direction="EGPD_Output",PinType.PinCategory="int",PinType.PinSubCategory="",PinType.PinSubCategoryObject=None,PinType.PinSubCategoryMemberReference=(),PinType.PinValueType=(),PinType.ContainerType=None,PinType.bIsReference=False,PinType.bIsConst=False,PinType.bIsWeakPointer=False,PinType.bIsUObjectWrapper=False,PinType.bSerializeAsSinglePrecisionFloat=False,LinkedTo=(K2Node_SetFieldsInStruct_2 F927AC6F45A761458310C0B23CFA59A8,),ParentPin=K2Node_GetArrayItem_1 66F71D574E1D64B2DB31AFB2B14981CC,PersistentGuid=00000000000000000000000000000000,bHidden=False,bNotConnectable=False,bDefaultValueIsReadOnly=False,bDefaultValueIsIgnored=False,bAdvancedView=False,bOrphanedPin=False,)
   CustomProperties Pin (PinId=9E6710F0490655CDEA00438B60E312B2,PinName="Output_update_23_DDF8803C4D8748252B42079A75AE3E6A",PinFriendlyName="Update",Direction="EGPD_Output",PinType.PinCategory="bool",PinType.PinSubCategory="",PinType.PinSubCategoryObject=None,PinType.PinSubCategoryMemberReference=(),PinType.PinValueType=(),PinType.ContainerType=None,PinType.bIsReference=False,PinType.bIsConst=False,PinType.bIsWeakPointer=False,PinType.bIsUObjectWrapper=False,PinType.bSerializeAsSinglePrecisionFloat=False,ParentPin=K2Node_GetArrayItem_1 66F71D574E1D64B2DB31AFB2B14981CC,PersistentGuid=00000000000000000000000000000000,bHidden=False,bNotConnectable=False,bDefaultValueIsReadOnly=False,bDefaultValueIsIgnored=False,bAdvancedView=False,bOrphanedPin=False,)
   CustomProperties Pin (PinId=B351E70F466D63311924D0B6761D7AF9,PinName="Output_price_26_7833B6FD41F52F2705EFC4A389DB4980",PinFriendlyName="Price",Direction="EGPD_Output",PinType.PinCategory="int",PinType.PinSubCategory="",PinType.PinSubCategoryObject=None,PinType.PinSubCategoryMemberReference=(),PinType.PinValueType=(),PinType.ContainerType=None,PinType.bIsReference=False,PinType.bIsConst=False,PinType.bIsWeakPointer=False,PinType.bIsUObjectWrapper=False,PinType.bSerializeAsSinglePrecisionFloat=False,ParentPin=K2Node_GetArrayItem_1 66F71D574E1D64B2DB31AFB2B14981CC,PersistentGuid=00000000000000000000000000000000,bHidden=False,bNotConnectable=False,bDefaultValueIsReadOnly=False,bDefaultValueIsIgnored=False,bAdvancedView=False,bOrphanedPin=False,)
End Object
After that we’ll need to update the whole data model with the new data.
   Begin Object Class=/Script/BlueprintGraph.K2Node_SetFieldsInStruct Name="K2Node_SetFieldsInStruct_2" ExportPath="/Script/BlueprintGraph.K2Node_SetFieldsInStruct'/Game/coherentBP.coherentBP:EventGraph.K2Node_SetFieldsInStruct_2'"
   bMadeAfterOverridePinRemoval=True
   ShowPinForProperties(0)=(PropertyName="name_2_4EFD82EE4A41C49B2B82F8A545887E09",PropertyFriendlyName="name",bShowPin=True,bCanToggleVisibility=True)
   ShowPinForProperties(1)=(PropertyName="rank_5_1191FC9F43F46534C95BBE9EDC4FB074",PropertyFriendlyName="rank",bShowPin=True,bCanToggleVisibility=True)
   ShowPinForProperties(2)=(PropertyName="impact_9_1EF8F4944152A2BABCC2018BF55E9933",PropertyFriendlyName="impact",bShowPin=True,bCanToggleVisibility=True)
   ShowPinForProperties(3)=(PropertyName="range_11_1ECB70A94C043F5AEF660AA860D3EB96",PropertyFriendlyName="range",bShowPin=True,bCanToggleVisibility=True)
   ShowPinForProperties(4)=(PropertyName="stability_13_1D3B3EB9402E567C875FAFBD71F05A93",PropertyFriendlyName="stability",bShowPin=True,bCanToggleVisibility=True)
   ShowPinForProperties(5)=(PropertyName="reloadSpeed_15_D4AFF36343F7BD2B972142B8D12C8724",PropertyFriendlyName="reloadSpeed",bShowPin=True,bCanToggleVisibility=True)
   ShowPinForProperties(6)=(PropertyName="handling_17_4FC34D8E4EA287B8CAC9B5B432468B1A",PropertyFriendlyName="handling",bShowPin=True,bCanToggleVisibility=True)
   ShowPinForProperties(7)=(PropertyName="roundsPerMinute_19_A02D81E74CF7FE0DA44BBBAC5E4C736E",PropertyFriendlyName="roundsPerMinute",bShowPin=True,bCanToggleVisibility=True)
   ShowPinForProperties(8)=(PropertyName="magazine_21_967200F246A0215590CE33A687DFD3AE",PropertyFriendlyName="magazine",bShowPin=True,bCanToggleVisibility=True)
   ShowPinForProperties(9)=(PropertyName="update_23_DDF8803C4D8748252B42079A75AE3E6A",PropertyFriendlyName="update",bCanToggleVisibility=True)
   ShowPinForProperties(10)=(PropertyName="price_26_7833B6FD41F52F2705EFC4A389DB4980",PropertyFriendlyName="price",bCanToggleVisibility=True)
   StructType="/Script/Engine.UserDefinedStruct'/Game/WeaponStruct.WeaponStruct'"
   NodePosX=1568
   NodePosY=1440
   NodeGuid=CDA4D43B40FABE5A6E6CEE90572D962C
   CustomProperties Pin (PinId=770C4D354890A33E4A281BA74BE97D3E,PinName="execute",PinType.PinCategory="exec",PinType.PinSubCategory="",PinType.PinSubCategoryObject=None,PinType.PinSubCategoryMemberReference=(),PinType.PinValueType=(),PinType.ContainerType=None,PinType.bIsReference=False,PinType.bIsConst=False,PinType.bIsWeakPointer=False,PinType.bIsUObjectWrapper=False,PinType.bSerializeAsSinglePrecisionFloat=False,LinkedTo=(K2Node_IfThenElse_0 E2CCA2064175A925449A0BBB9158792B,),PersistentGuid=00000000000000000000000000000000,bHidden=False,bNotConnectable=False,bDefaultValueIsReadOnly=False,bDefaultValueIsIgnored=False,bAdvancedView=False,bOrphanedPin=False,)
   CustomProperties Pin (PinId=A0C4943A4EBF2048D7B17684197CAD1C,PinName="then",Direction="EGPD_Output",PinType.PinCategory="exec",PinType.PinSubCategory="",PinType.PinSubCategoryObject=None,PinType.PinSubCategoryMemberReference=(),PinType.PinValueType=(),PinType.ContainerType=None,PinType.bIsReference=False,PinType.bIsConst=False,PinType.bIsWeakPointer=False,PinType.bIsUObjectWrapper=False,PinType.bSerializeAsSinglePrecisionFloat=False,LinkedTo=(K2Node_CallFunction_8 1C4C3305414753703B25E7841F64F6C6,),PersistentGuid=00000000000000000000000000000000,bHidden=False,bNotConnectable=False,bDefaultValueIsReadOnly=False,bDefaultValueIsIgnored=False,bAdvancedView=False,bOrphanedPin=False,)
   CustomProperties Pin (PinId=4B02202B44A96459351262A9F69569DF,PinName="StructRef",PinType.PinCategory="struct",PinType.PinSubCategory="",PinType.PinSubCategoryObject="/Script/Engine.UserDefinedStruct'/Game/WeaponStruct.WeaponStruct'",PinType.PinSubCategoryMemberReference=(),PinType.PinValueType=(),PinType.ContainerType=None,PinType.bIsReference=True,PinType.bIsConst=False,PinType.bIsWeakPointer=False,PinType.bIsUObjectWrapper=False,PinType.bSerializeAsSinglePrecisionFloat=False,LinkedTo=(K2Node_VariableGet_5 0A051EDE42C9AC6C25130B9FFC23F197,),ReferencePassThroughConnection=K2Node_SetFieldsInStruct_2 38BF8CE24C1461A18B032095795D59C9,PersistentGuid=00000000000000000000000000000000,bHidden=False,bNotConnectable=False,bDefaultValueIsReadOnly=False,bDefaultValueIsIgnored=False,bAdvancedView=False,bOrphanedPin=False,)
   CustomProperties Pin (PinId=38BF8CE24C1461A18B032095795D59C9,PinName="StructOut",PinToolTip="Reference to the input struct",Direction="EGPD_Output",PinType.PinCategory="struct",PinType.PinSubCategory="",PinType.PinSubCategoryObject="/Script/Engine.UserDefinedStruct'/Game/WeaponStruct.WeaponStruct'",PinType.PinSubCategoryMemberReference=(),PinType.PinValueType=(),PinType.ContainerType=None,PinType.bIsReference=True,PinType.bIsConst=False,PinType.bIsWeakPointer=False,PinType.bIsUObjectWrapper=False,PinType.bSerializeAsSinglePrecisionFloat=False,LinkedTo=(K2Node_CallFunction_8 DD53E3D34345BFF69AB998B1A9EB8759,),ReferencePassThroughConnection=K2Node_SetFieldsInStruct_2 4B02202B44A96459351262A9F69569DF,PersistentGuid=00000000000000000000000000000000,bHidden=False,bNotConnectable=False,bDefaultValueIsReadOnly=False,bDefaultValueIsIgnored=False,bAdvancedView=False,bOrphanedPin=False,)
   CustomProperties Pin (PinId=F63F40134D8B7ABD8BA13EB17D71CAA9,PinName="name_2_4EFD82EE4A41C49B2B82F8A545887E09",PinFriendlyName="name",PinToolTip="Name
String",PinType.PinCategory="string",PinType.PinSubCategory="",PinType.PinSubCategoryObject=None,PinType.PinSubCategoryMemberReference=(),PinType.PinValueType=(),PinType.ContainerType=None,PinType.bIsReference=False,PinType.bIsConst=False,PinType.bIsWeakPointer=False,PinType.bIsUObjectWrapper=False,PinType.bSerializeAsSinglePrecisionFloat=False,LinkedTo=(K2Node_GetArrayItem_1 81D08EF34F22027C96BE479C2B0DED80,),PersistentGuid=4EFD82EE4A41C49B2B82F8A545887E09,bHidden=False,bNotConnectable=False,bDefaultValueIsReadOnly=False,bDefaultValueIsIgnored=False,bAdvancedView=False,bOrphanedPin=False,)
   CustomProperties Pin (PinId=F40A3A5447EB4C2829CBAEA674F9B2AD,PinName="rank_5_1191FC9F43F46534C95BBE9EDC4FB074",PinFriendlyName="rank",PinToolTip="Rank
Integer",PinType.PinCategory="int",PinType.PinSubCategory="",PinType.PinSubCategoryObject=None,PinType.PinSubCategoryMemberReference=(),PinType.PinValueType=(),PinType.ContainerType=None,PinType.bIsReference=False,PinType.bIsConst=False,PinType.bIsWeakPointer=False,PinType.bIsUObjectWrapper=False,PinType.bSerializeAsSinglePrecisionFloat=False,DefaultValue="0",AutogeneratedDefaultValue="0",LinkedTo=(K2Node_GetArrayItem_1 8176A4444D663344AC092F836BAF5814,),PersistentGuid=1191FC9F43F46534C95BBE9EDC4FB074,bHidden=False,bNotConnectable=False,bDefaultValueIsReadOnly=False,bDefaultValueIsIgnored=False,bAdvancedView=False,bOrphanedPin=False,)
   CustomProperties Pin (PinId=777CDCF84CAAEC33FFFCA599FFFD8AEE,PinName="impact_9_1EF8F4944152A2BABCC2018BF55E9933",PinFriendlyName="impact",PinToolTip="Impact
Integer",PinType.PinCategory="int",PinType.PinSubCategory="",PinType.PinSubCategoryObject=None,PinType.PinSubCategoryMemberReference=(),PinType.PinValueType=(),PinType.ContainerType=None,PinType.bIsReference=False,PinType.bIsConst=False,PinType.bIsWeakPointer=False,PinType.bIsUObjectWrapper=False,PinType.bSerializeAsSinglePrecisionFloat=False,DefaultValue="0",AutogeneratedDefaultValue="0",LinkedTo=(K2Node_GetArrayItem_1 58B6B6C1480882FE111986A29A39C58D,),PersistentGuid=1EF8F4944152A2BABCC2018BF55E9933,bHidden=False,bNotConnectable=False,bDefaultValueIsReadOnly=False,bDefaultValueIsIgnored=False,bAdvancedView=False,bOrphanedPin=False,)
   CustomProperties Pin (PinId=C1F1225D4A2CA6C02885A1A45C23CC4D,PinName="range_11_1ECB70A94C043F5AEF660AA860D3EB96",PinFriendlyName="range",PinToolTip="Range
Integer",PinType.PinCategory="int",PinType.PinSubCategory="",PinType.PinSubCategoryObject=None,PinType.PinSubCategoryMemberReference=(),PinType.PinValueType=(),PinType.ContainerType=None,PinType.bIsReference=False,PinType.bIsConst=False,PinType.bIsWeakPointer=False,PinType.bIsUObjectWrapper=False,PinType.bSerializeAsSinglePrecisionFloat=False,DefaultValue="0",AutogeneratedDefaultValue="0",LinkedTo=(K2Node_GetArrayItem_1 9D949D3C40E5EDA29101A9ACF1DDD34A,),PersistentGuid=1ECB70A94C043F5AEF660AA860D3EB96,bHidden=False,bNotConnectable=False,bDefaultValueIsReadOnly=False,bDefaultValueIsIgnored=False,bAdvancedView=False,bOrphanedPin=False,)
   CustomProperties Pin (PinId=0AB115E142F359F1E77ACAAF195A56B6,PinName="stability_13_1D3B3EB9402E567C875FAFBD71F05A93",PinFriendlyName="stability",PinToolTip="Stability
Integer",PinType.PinCategory="int",PinType.PinSubCategory="",PinType.PinSubCategoryObject=None,PinType.PinSubCategoryMemberReference=(),PinType.PinValueType=(),PinType.ContainerType=None,PinType.bIsReference=False,PinType.bIsConst=False,PinType.bIsWeakPointer=False,PinType.bIsUObjectWrapper=False,PinType.bSerializeAsSinglePrecisionFloat=False,DefaultValue="0",AutogeneratedDefaultValue="0",LinkedTo=(K2Node_GetArrayItem_1 D5D60DB643E7B1B954558BB149AE9036,),PersistentGuid=1D3B3EB9402E567C875FAFBD71F05A93,bHidden=False,bNotConnectable=False,bDefaultValueIsReadOnly=False,bDefaultValueIsIgnored=False,bAdvancedView=False,bOrphanedPin=False,)
   CustomProperties Pin (PinId=AC94A38C4D2DA3AB6C227592954CF446,PinName="reloadSpeed_15_D4AFF36343F7BD2B972142B8D12C8724",PinFriendlyName="reloadSpeed",PinToolTip="Reload Speed
Integer",PinType.PinCategory="int",PinType.PinSubCategory="",PinType.PinSubCategoryObject=None,PinType.PinSubCategoryMemberReference=(),PinType.PinValueType=(),PinType.ContainerType=None,PinType.bIsReference=False,PinType.bIsConst=False,PinType.bIsWeakPointer=False,PinType.bIsUObjectWrapper=False,PinType.bSerializeAsSinglePrecisionFloat=False,DefaultValue="0",AutogeneratedDefaultValue="0",LinkedTo=(K2Node_GetArrayItem_1 52256B4847174D1BCB346E962D747E89,),PersistentGuid=D4AFF36343F7BD2B972142B8D12C8724,bHidden=False,bNotConnectable=False,bDefaultValueIsReadOnly=False,bDefaultValueIsIgnored=False,bAdvancedView=False,bOrphanedPin=False,)
   CustomProperties Pin (PinId=4813D30145D36F22028DD48A1CB97501,PinName="handling_17_4FC34D8E4EA287B8CAC9B5B432468B1A",PinFriendlyName="handling",PinToolTip="Handling
Integer",PinType.PinCategory="int",PinType.PinSubCategory="",PinType.PinSubCategoryObject=None,PinType.PinSubCategoryMemberReference=(),PinType.PinValueType=(),PinType.ContainerType=None,PinType.bIsReference=False,PinType.bIsConst=False,PinType.bIsWeakPointer=False,PinType.bIsUObjectWrapper=False,PinType.bSerializeAsSinglePrecisionFloat=False,DefaultValue="0",AutogeneratedDefaultValue="0",LinkedTo=(K2Node_GetArrayItem_1 37F2BAA04E9CFD3BC8924DB2D4507042,),PersistentGuid=4FC34D8E4EA287B8CAC9B5B432468B1A,bHidden=False,bNotConnectable=False,bDefaultValueIsReadOnly=False,bDefaultValueIsIgnored=False,bAdvancedView=False,bOrphanedPin=False,)
   CustomProperties Pin (PinId=467FF643488AB1C13E52D6A61D6C1310,PinName="roundsPerMinute_19_A02D81E74CF7FE0DA44BBBAC5E4C736E",PinFriendlyName="roundsPerMinute",PinToolTip="Rounds Per Minute
Integer",PinType.PinCategory="int",PinType.PinSubCategory="",PinType.PinSubCategoryObject=None,PinType.PinSubCategoryMemberReference=(),PinType.PinValueType=(),PinType.ContainerType=None,PinType.bIsReference=False,PinType.bIsConst=False,PinType.bIsWeakPointer=False,PinType.bIsUObjectWrapper=False,PinType.bSerializeAsSinglePrecisionFloat=False,DefaultValue="0",AutogeneratedDefaultValue="0",LinkedTo=(K2Node_GetArrayItem_1 DC93C908419EB544EE0F4E8A6CB90B5A,),PersistentGuid=A02D81E74CF7FE0DA44BBBAC5E4C736E,bHidden=False,bNotConnectable=False,bDefaultValueIsReadOnly=False,bDefaultValueIsIgnored=False,bAdvancedView=False,bOrphanedPin=False,)
   CustomProperties Pin (PinId=F927AC6F45A761458310C0B23CFA59A8,PinName="magazine_21_967200F246A0215590CE33A687DFD3AE",PinFriendlyName="magazine",PinToolTip="Magazine
Integer",PinType.PinCategory="int",PinType.PinSubCategory="",PinType.PinSubCategoryObject=None,PinType.PinSubCategoryMemberReference=(),PinType.PinValueType=(),PinType.ContainerType=None,PinType.bIsReference=False,PinType.bIsConst=False,PinType.bIsWeakPointer=False,PinType.bIsUObjectWrapper=False,PinType.bSerializeAsSinglePrecisionFloat=False,DefaultValue="0",AutogeneratedDefaultValue="0",LinkedTo=(K2Node_GetArrayItem_1 F8CF4C4B450D195184CAB2A8DB64416E,),PersistentGuid=967200F246A0215590CE33A687DFD3AE,bHidden=False,bNotConnectable=False,bDefaultValueIsReadOnly=False,bDefaultValueIsIgnored=False,bAdvancedView=False,bOrphanedPin=False,)
End Object
Begin Object Class=/Script/BlueprintGraph.K2Node_CallFunction Name="K2Node_CallFunction_8" ExportPath="/Script/BlueprintGraph.K2Node_CallFunction'/Game/coherentBP.coherentBP:EventGraph.K2Node_CallFunction_8'"
   bIsConstFunc=True
   FunctionReference=(MemberParent="/Script/CoreUObject.Class'/Script/CohtmlPlugin.CohtmlBaseComponent'",MemberName="UpdateWholeDataModelFromStruct")
   NodePosX=2320
   NodePosY=1424
   ErrorType=1
   NodeGuid=6FE1174D4E1F38CF36231FB44CFC9958
   CustomProperties Pin (PinId=1C4C3305414753703B25E7841F64F6C6,PinName="execute",PinType.PinCategory="exec",PinType.PinSubCategory="",PinType.PinSubCategoryObject=None,PinType.PinSubCategoryMemberReference=(),PinType.PinValueType=(),PinType.ContainerType=None,PinType.bIsReference=False,PinType.bIsConst=False,PinType.bIsWeakPointer=False,PinType.bIsUObjectWrapper=False,PinType.bSerializeAsSinglePrecisionFloat=False,LinkedTo=(K2Node_SetFieldsInStruct_2 A0C4943A4EBF2048D7B17684197CAD1C,),PersistentGuid=00000000000000000000000000000000,bHidden=False,bNotConnectable=False,bDefaultValueIsReadOnly=False,bDefaultValueIsIgnored=False,bAdvancedView=False,bOrphanedPin=False,)
   CustomProperties Pin (PinId=199F98A24A952D8205636AAD9A21633A,PinName="then",Direction="EGPD_Output",PinType.PinCategory="exec",PinType.PinSubCategory="",PinType.PinSubCategoryObject=None,PinType.PinSubCategoryMemberReference=(),PinType.PinValueType=(),PinType.ContainerType=None,PinType.bIsReference=False,PinType.bIsConst=False,PinType.bIsWeakPointer=False,PinType.bIsUObjectWrapper=False,PinType.bSerializeAsSinglePrecisionFloat=False,PersistentGuid=00000000000000000000000000000000,bHidden=False,bNotConnectable=False,bDefaultValueIsReadOnly=False,bDefaultValueIsIgnored=False,bAdvancedView=False,bOrphanedPin=False,)
   CustomProperties Pin (PinId=EB36B14B4C290A443434A4B8F9B2DE8B,PinName="self",PinFriendlyName=NSLOCTEXT("K2Node", "Target", "Target"),PinType.PinCategory="object",PinType.PinSubCategory="",PinType.PinSubCategoryObject="/Script/CoreUObject.Class'/Script/CohtmlPlugin.CohtmlBaseComponent'",PinType.PinSubCategoryMemberReference=(),PinType.PinValueType=(),PinType.ContainerType=None,PinType.bIsReference=False,PinType.bIsConst=False,PinType.bIsWeakPointer=False,PinType.bIsUObjectWrapper=False,PinType.bSerializeAsSinglePrecisionFloat=False,LinkedTo=(K2Node_VariableGet_7 68DD70574E9EB43523E45DBC5C41EB85,),PersistentGuid=00000000000000000000000000000000,bHidden=False,bNotConnectable=False,bDefaultValueIsReadOnly=False,bDefaultValueIsIgnored=False,bAdvancedView=False,bOrphanedPin=False,)
   CustomProperties Pin (PinId=DD53E3D34345BFF69AB998B1A9EB8759,PinName="Struct",PinType.PinCategory="struct",PinType.PinSubCategory="",PinType.PinSubCategoryObject="/Script/Engine.UserDefinedStruct'/Game/WeaponStruct.WeaponStruct'",PinType.PinSubCategoryMemberReference=(),PinType.PinValueType=(),PinType.ContainerType=None,PinType.bIsReference=True,PinType.bIsConst=False,PinType.bIsWeakPointer=False,PinType.bIsUObjectWrapper=False,PinType.bSerializeAsSinglePrecisionFloat=False,LinkedTo=(K2Node_SetFieldsInStruct_2 38BF8CE24C1461A18B032095795D59C9,),PersistentGuid=00000000000000000000000000000000,bHidden=False,bNotConnectable=False,bDefaultValueIsReadOnly=False,bDefaultValueIsIgnored=False,bAdvancedView=False,bOrphanedPin=False,)
End Object
Begin Object Class=/Script/BlueprintGraph.K2Node_VariableGet Name="K2Node_VariableGet_7" ExportPath="/Script/BlueprintGraph.K2Node_VariableGet'/Game/coherentBP.coherentBP:EventGraph.K2Node_VariableGet_7'"
   VariableReference=(MemberName="CohtmlHUD",bSelfContext=True)
   NodePosX=1848
   NodePosY=1389
   NodeGuid=F2212FC74D57337706998B809A27C75B
   CustomProperties Pin (PinId=68DD70574E9EB43523E45DBC5C41EB85,PinName="CohtmlHUD",PinFriendlyName="Gameface HUD",Direction="EGPD_Output",PinType.PinCategory="object",PinType.PinSubCategory="",PinType.PinSubCategoryObject="/Script/CoreUObject.Class'/Script/CohtmlPlugin.CohtmlHUD'",PinType.PinSubCategoryMemberReference=(),PinType.PinValueType=(),PinType.ContainerType=None,PinType.bIsReference=False,PinType.bIsConst=False,PinType.bIsWeakPointer=False,PinType.bIsUObjectWrapper=False,PinType.bSerializeAsSinglePrecisionFloat=False,LinkedTo=(K2Node_CallFunction_8 EB36B14B4C290A443434A4B8F9B2DE8B,),PersistentGuid=00000000000000000000000000000000,bHidden=False,bNotConnectable=False,bDefaultValueIsReadOnly=False,bDefaultValueIsIgnored=False,bAdvancedView=False,bOrphanedPin=False,)
   CustomProperties Pin (PinId=18D0805540FD18B10D86EBAC2AEF1E2D,PinName="self",PinFriendlyName=NSLOCTEXT("K2Node", "Target", "Target"),PinType.PinCategory="object",PinType.PinSubCategory="",PinType.PinSubCategoryObject="/Script/CoreUObject.Class'/Script/CohtmlPlugin.CohtmlGameHUD'",PinType.PinSubCategoryMemberReference=(),PinType.PinValueType=(),PinType.ContainerType=None,PinType.bIsReference=False,PinType.bIsConst=False,PinType.bIsWeakPointer=False,PinType.bIsUObjectWrapper=False,PinType.bSerializeAsSinglePrecisionFloat=False,PersistentGuid=00000000000000000000000000000000,bHidden=True,bNotConnectable=False,bDefaultValueIsReadOnly=False,bDefaultValueIsIgnored=False,bAdvancedView=False,bOrphanedPin=False,)
End Object
Now if we open our UI we’ll see how it changes between weapons when we click on a new weapon.
