Multiplayer UI - Inventory (Part 4)
10/3/2024
Kaloyan Geshev
In any multiplayer game, a well-designed inventory page is essential for managing your gear, items, and resources.
You can find the rest Multiplayer UI series here.
Showcase Overview
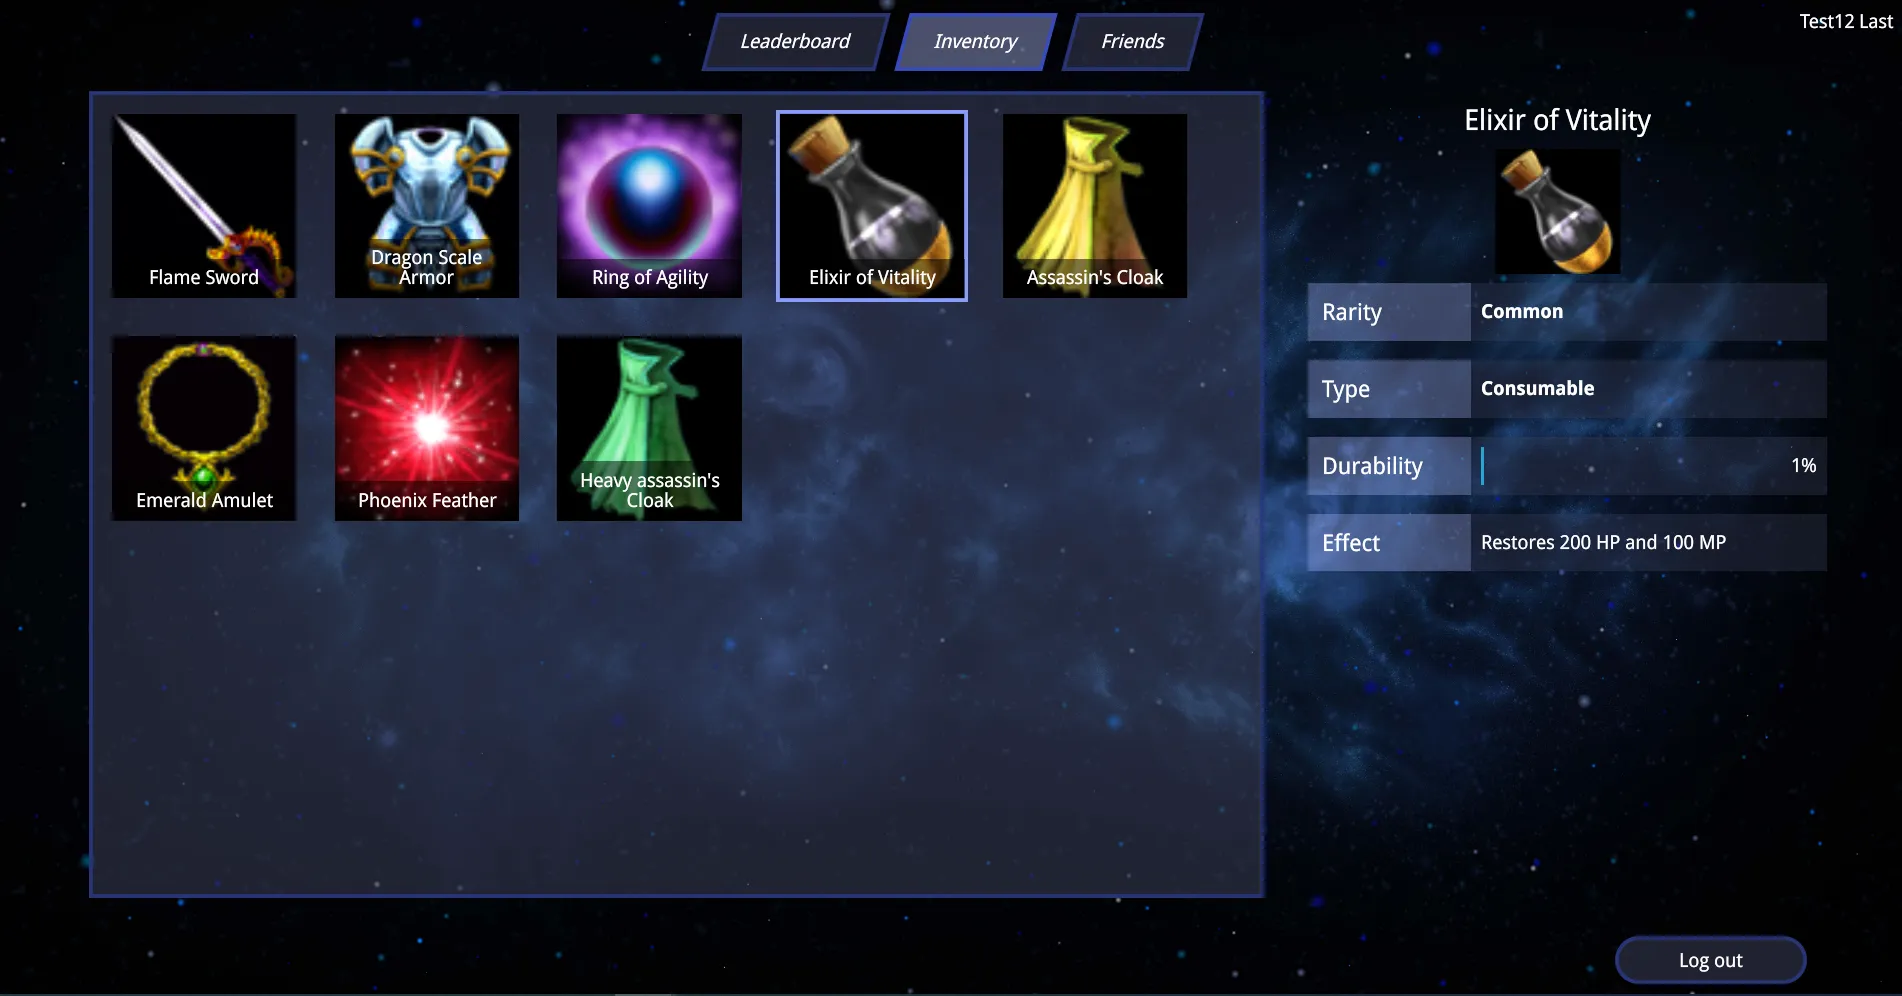
In this tutorial, we will expand upon the previous multiplayer UI by introducing an inventory page that displays the items owned by the player.
Additionally, we’ll enhance the existing Express server by adding new API endpoints that will fetch the player’s items so they can be displayed in the UI.
Source location
You can find the complete sample source within the ${Gameface package}/Samples/uiresources/UITutorials/MultiplayerUI directory.
srcfolder contains the UI source code.apifolder contains the Express server source code.
Ensure to run npm i before testing the sample.
Refer to the README.md file in this directory for information on running the sample locally or previewing it without building or starting any processes.
Getting started - Backend
We’ll begin by updating the backend to include new API endpoints that return data for the player’s items, which will be shown in the UI.
New items collection schema
To store player items in the database, we’ll define a new schema for the item collection. The schema will include details such as the item name, image, type, rarity, and stats.
1const mongoose = require('mongoose');2
3const schema = new mongoose.Schema({4    name: String,5    image: String,6    type: String,7    stats: {8        damage: Number,9        durability: Number,10        effect: String,11        criticalHit: Number,12        armor: Number,13        criticalChance: Number,14        attackPower: Number,15    },16    rarity: String,17});18
19module.exports = mongoose.model('items', schema);
Extending user schema to include items
To allow users to own items, we’ll extend the user schema in the database by adding an array of item IDs.
1const schema = new mongoose.Schema({7 collapsed lines
2 firstName: String,3 lastName: String,4 email: String,5 password: String,6 status: Boolean,7 totpSecret: String,8 twoFactorEnabled: Boolean,9 friends: [{ type: String }],10 items: [{ type: String }],11 stats: {3 collapsed lines
12 games: Number,13 wins: Number,14 scores: Number15 }16});Creating an API to retrieve user items
When the inventory page is accessed, the player’s items will be retrieved from the server. We’ll add a new route to fetch the user’s items.
1router.get('/users/:id/items', auth, idValidator, UserController.getUserItems);getUserItems method
This method retrieves the items owned by the user. We use the items collection to pull data such as the item name, image, and ID.
1const Items = require('../db/items');2
3class UserController {4    async getUserItems(req, res) {5        const user = await User.findById(req.params.id);6
7        if (!user) {8            return res.status(404).send('User not found');9        }10
11        const userItems = [];12        for (const itemId of user.items) {13            const itemData = await Items.findById(itemId);14            userItems.push({ name: itemData.name, image: itemData.image, id: itemData._id });15        }16
17        res.json(userItems);18    }19}
Creating an API to retrieve item data
When players interact with their inventory and select an item, we’ll fetch detailed data about that item. A new route and controller will be created to retrieve item data by its ID.
1const ItemsController = require('../../controllers/itemsController');2const auth = require('../../middlewares/auth');3const idValidator = require('../../middlewares/idValidator');4
5module.exports = (router) => {6    router.get('/items/:id', auth, idValidator, ItemsController.getItem);7};
And the controller:
1const Items = require('../db/items');2const generateRandomItemObject = require('../itemsGenerator');3
4class ItemsController {5    async getItem(req, res) {6        const user = await Items.findById(req.params.id);7        if (!user) {8            return res.status(404).send('Item not found');9        }10        res.json(user);11    }12}13
14module.exports = new ItemsController();
We also need to ensure these routes are added to the router in our Express server.
3 collapsed lines
1const express = require('express');2const router = express.Router();3
4require('./routes/user')(router);5require('./routes/items')(router);6
7module.exports = router;Adding random items to the users
Since our UI isn’t connected to a live game, we need to generate items when a new user registers or logs in and doesn’t have any items.
We’ve already developed a simple item generator that creates objects filled with randomly generated data. You can review this generator in the ${Gameface package}/Samples/uiresources/UITutorials/MultiplayerUI/api/itemsGenerator.js file. This file exports the generateRandomItemObject method by default, which returns a random item object that follows the schema in the database.
Once we have this generator, we can use it to create random items for users.
We’ll add a new method in the items controller, which was created earlier, to generate a random item and save it to the database:
1const Items = require('../db/items');2const generateRandomItemObject = require('../itemsGenerator');3
4class ItemsController {7 collapsed lines
5 async getItem(req, res) {6 const user = await Items.findById(req.params.id);7 if (!user) {8 return res.status(404).send('Item not found');9 }10 res.json(user);11 }12
13 async generateRandomItem() {14 const item = new Items(await generateRandomItemObject());15 await item.save();16 return item._id;17 }3 collapsed lines
18}19
20module.exports = new ItemsController();Next, we can integrate the generateRandomItem method into the usersController to add items when the user logs in and has no items yet.
Here’s how we can add items for the user when they log in:
1const Items = require('../db/items');2const itemsController = require('./itemsController');3
4class UserController {5 constructor() {6 this.login = this.login.bind(this);7 }8
9 async login(req, res) {6 collapsed lines
10 const sessionId = req.headers['session-id'];11 if (sessionId && await sessions.findOne({ _id: sessionId })) return res.send(sessionId);12
13 const user = await User.findOne({ email: req.body.email, password: req.body.password });14 if (!user) return res.status(404).send('Wrong email or password!');15
16 if (!user.items.length) {17 await this.generateUserItems(user);18 await user.save();19 }17 collapsed lines
20 if (!process.env.TWO_FACTOR_AUTHENTICATION_ENABLED) {21 user.status = true;22 await user.save();23 emit('user-online', user.id);24
25 return res.json({ id: user._id.toString(), sessionId: req.sessionID, firstName: user.firstName, lastName: user.lastName });26 }27
28 if (!user.totpSecret) {29 const secret = authenticator.generateSecret();30 const keyUri = authenticator.keyuri(user.email, 'CoherentSample', secret);31 const secretQrCode = await qrcode.toDataURL(keyUri);32 return res.status(403).json({ error: 'missing_totp', secretQrCode, secret, id: user._id.toString() });33 }34
35 return res.status(403).json({ error: 'totp_verification_required', id: user._id.toString() });36 }37}The generateUserItems method will create 7 new items for the user and add them to the database:
1async generateUserItems(user) {2    const items = [];3
4    for (let i = 0; i < 7; i++) {5        items.push(await itemsController.generateRandomItem());6    }7
8    user.items = items;9}
Similarly, we will ensure items are generated for new users during registration.
We’ll refactor the register method to include the item generation, by combining the user stats data and item data generation under a new generateUserData method:
1const Items = require('../db/items');2
3class UserController {4 constructor() {5 this.login = this.login.bind(this);6 this.register = this.register.bind(this);7 this.generateUserData = this.generateUserData.bind(this);8 }9
10 async register(req, res) {10 collapsed lines
11 if (!req.body.email) return res.status(202).send(`Please fill your email!`);12 if (!req.body.firstName) return res.status(202).send(`Please fill your first name!`);13 if (!req.body.lastName) return res.status(202).send(`Please fill your last name!`);14 if (!req.body.password) return res.status(202).send(`Please fill your password name!`);15
16 const exists = await User.findOne({ email: req.body.email });17 if (exists) {18 return res.status(202).send('User already exists');19 }20
21 try {22 const user = new User({ ...req.body, status: false });23 const totalGames = parseInt(Math.random() * 500);24 // Generate mock stats data for the new user25 user.stats = {26 games: totalGames,27 wins: parseInt(Math.random() * totalGames),28 scores: parseInt(Math.random() * 50000)29 };30 await this.generateUserData(user);31 await user.save();4 collapsed lines
32 } catch (error) {33 return res.status(202).send(`Unable to create user: ${error.message}`);34 }35 res.status(200).send();36 }The generateUserData method will create mock stats and generate random items for the new user:
1async generateUserData(user) {2    const totalGames = parseInt(Math.random() * 500);3
4    // Generate mock stats data for the new user5    user.stats = {6        games: totalGames,7        wins: parseInt(Math.random() * totalGames),8        scores: parseInt(Math.random() * 50000),9        money: 5000010    };11
12    await this.generateUserItems(user);13}
This ensures that users will have items generated both upon login and registration.
Serving the items icons
Since the item icons will be loaded from the server, we need to configure the server to serve them properly.
We’ll start by creating a new folder within the api directory, named public, and inside it, we will add another folder to store the item icons, called items.
The full path will be: /api/public/items.
Next, we need to serve this folder statically in our Express app:
1app.use('/items', express.static(path.join(__dirname, './public/items')));Once the folder is set up, we’ll store the item icons inside, and to load an icon in the frontend, we can use the image name from the item data. The URL format will be: ${server-host}/api/items/${item-image-name}.png.
Getting started - Frontend
For the inventory page, we’ll create a new interface that displays a grid with all the items the user owns. On the right-hand side, the selected item’s stats will be shown.

Inventory page
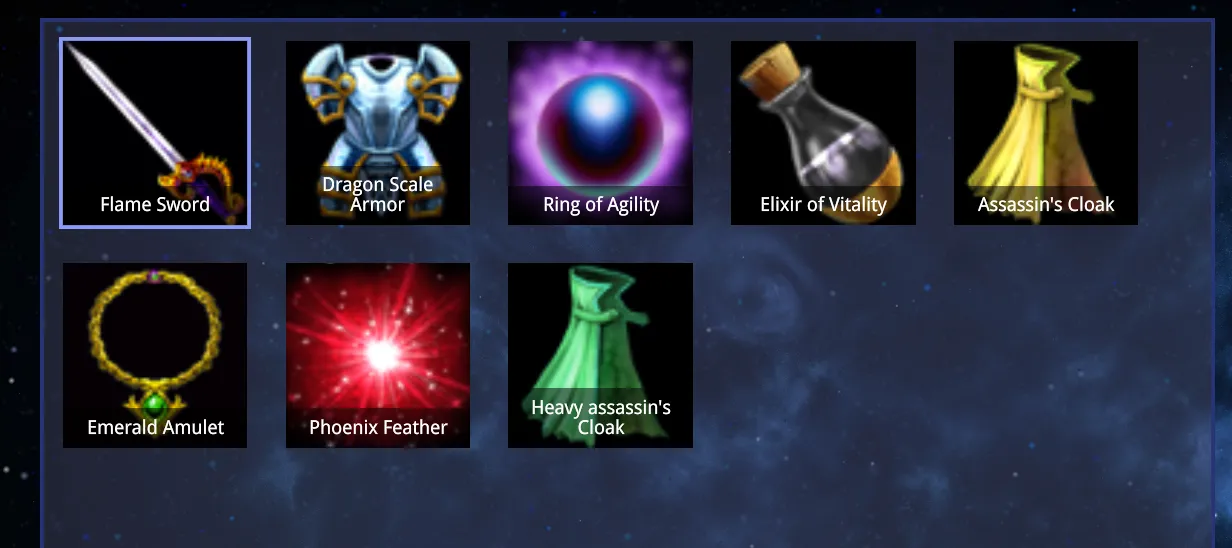
We’ll begin by building the inventory page, which will have a layout similar to the leaderboard, with a scrollable container displaying previews of the user-owned items. On the right side, the stats of the selected item will be visible.
To enable scrolling through the list of items, we will use the gameface-scrollable-container component. Additionally, we’ll leverage the useFetch custom hook for fetching data from the server and the useLocalStorage custom hook to retrieve the currently logged-in user’s ID.
Let’s start by setting up the necessary states and hooks:
1import useFetch from '../../hooks/useFetch';2import { useLocalStorage } from '../../hooks/useLocalStorage';3import React, { useCallback, useEffect, useState } from 'react';4
5const Inventory = () => {6    const [user] = useLocalStorage('user');7    const [selectedItemId, setSelectedItemId] = useState('');8    const [itemsData, setItemsData] = useState([]);9    const [fetch, loadingData] = useFetch();
When the page is mounted, we’ll fetch the items for the currently logged-in user using the useEffect hook with no dependencies:
1useEffect(() => {2    updateUserItems();3}, []);4
5const updateUserItems = useCallback(async () => {6    const [xhr, error] = await fetch('GET', `${process.env.SERVER_URL}/api/users/${user.id}/items`);7    if (error) return console.error(error);8
9    const items = JSON.parse(xhr.responseText);10    setItemsData(items);11});
Now that we have the data, let’s render the items. We’ll use the Loader component to display a loading indicator until the data is fetched.
Inside the gameface-scrollable-container, we’ll map through the fetched items and render each one using the ItemPreview component, which we will create later:
9 collapsed lines
1import Loader from '../../components/Loader';2import 'coherent-gameface-grid/style.css';3import 'coherent-gameface-scrollable-container';4import 'coherent-gameface-scrollable-container/coherent-gameface-components-theme.css';5import 'coherent-gameface-scrollable-container/style.css';6import 'coherent-gameface-slider/styles/vertical.css';7import 'coherent-gameface-slider/styles/horizontal.css';8import ItemPreview from '../../components/ItemPreview';9
10const Inventory = () => {11 return (<>12 <div className='app-wrapper-sub-navigation'>13 </div>14 <div className="inventory">15 <div className="inventory-items app-wrapper-container">16 <Loader className="loader-container" visible={loadingData}></Loader>17 {!itemsData.length && !loadingData && <div className='items-container-wrapper-no-items'>No items</div>}18 <gameface-scrollable-container automatic class="items-container">19 <component-slot class="items-container-wrapper" data-name="scrollable-content">20 {itemsData.map((item) => {21 return <ItemPreview key={item.id}22 id={item.id}23 className={`${selectedItemId === item.id ? 'item-selected' : ''}`}24 image={item.image}25 name={item.name}26 />27 })}28 </component-slot>29 </gameface-scrollable-container>30 </div>31 </div>32 </>33 )34}Display item stats in the inventory
On the inventory page, we will display item stats on the right side. To achieve this, we will create a method that toggles the stats based on the selected item’s ID from the inventory and renders the stats within the inventory interface.
For this, we’ll use the ItemStats component, which we will build later.
1import ItemStats from '../../components/ItemStats';2
3const Inventory = () => {4 const toggleItemStats = useCallback((event) => {5 const next = event.currentTarget.dataset.id;6
7 setSelectedItemId(next);8 }, []);9
10 return (<>9 collapsed lines
11 <div className='app-wrapper-sub-navigation'>12 </div>13 <div className="inventory">14 <div className="inventory-items app-wrapper-container">15 <Loader className="loader-container" visible={loadingData}></Loader>16 {!itemsData.length && !loadingData && <div className='items-container-wrapper-no-items'>No items</div>}17 <gameface-scrollable-container automatic class="items-container">18 <component-slot class="items-container-wrapper" data-name="scrollable-content">19 {itemsData.map((item) => {20 return <ItemPreview key={item.id}21 id={item.id}22 className={`${selectedItemId === item.id ? 'item-selected' : ''}`}23 image={item.image}24 name={item.name}25 toggleItemStats={toggleItemStats}26 />27 })}28 </component-slot>29 </gameface-scrollable-container>30 </div>31 <ItemStats id={selectedItemId} />32 </div>33 </>34 )35}Adding spatial navigation to the inventory
To enhance the user experience, we will add spatial navigation to the inventory, allowing users to navigate items using arrow keys.
For this, we’ll use spatial navigation provided by the interaction-manager package.
First, install the interaction manager by running the command: npm i coherent-gameface-interaction-manager.
Next, initialize spatial navigation:
3 collapsed lines
1import React from 'react';2import { createRoot } from 'react-dom/client';3import App from './App';4import { spatialNavigation } from 'coherent-gameface-interaction-manager';5
6spatialNavigation.init([]);4 collapsed lines
7
8const container = document.getElementById('root');9const root = createRoot(container);10root.render(<App />);Now, integrate spatial navigation into the Inventory page:
1import { spatialNavigation } from 'coherent-gameface-interaction-manager';2
3const Inventory = () => {4    useEffect(() => {5        spatialNavigation.remove();6
7        if (itemsData.length) {8            spatialNavigation.add(['.item-preview']);9            spatialNavigation.focusFirst();10        }11    }, [itemsData]);12}
Whenever the items data changes, we clear any existing items in the spatial navigation with the remove method, then add items identified by the .item-preview CSS class to it, and focus on the first item.
ItemPreview component

The ItemPreview component is designed to display the name and icon of the item. When focused, it triggers the display of item stats on the right side of the inventory.
To display the item icon, we use the background-image CSS property, loading the image based on the provided item data. The image URL follows this template: ${server-host}/items/${image-name}.
1import React, { useEffect, useRef } from 'react';2import './ItemPreview.scss';3
4const ItemPreview = ({ id, image, name, toggleItemStats, className }) => {5    const itemPreviewRef = useRef(null);6
7    useEffect(() => {8        itemPreviewRef.current.style.backgroundImage = `url(${process.env.SERVER_URL}/items/${image})`;9    }, []);10
11    return <div ref={itemPreviewRef} className={`item-preview ${className}`} onFocus={toggleItemStats} data-id={id}>12        <div className='item-preview-name'>{name}</div>13    </div>14}15
16export default ItemPreview;
ItemStats component

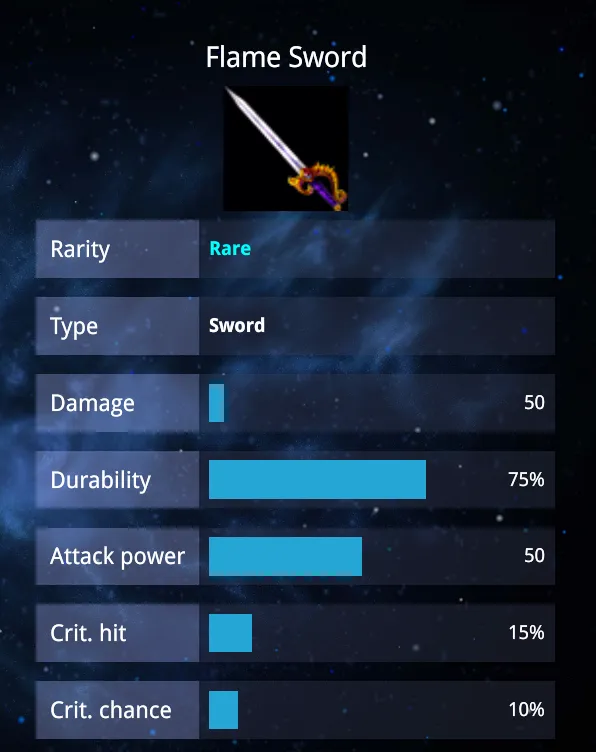
To display item stats on the right side of the inventory, we’ll show the item’s name, image, and its stats below.
In this tutorial, we will use the gameface-progress-bar component to present some of the stats for a more well-looking UI.
We’ll begin by fetching the complete item data using the item ID passed from the inventory to our ItemStats component:
1import useFetch from '../hooks/useFetch';2import React, { useEffect, useState } from 'react';3
4const ItemStats = ({ id }) => {5    const [fetch, loading] = useFetch();6    const [itemData, setItemData] = useState(null);7
8    useEffect(() => {9        async function getItemData() {10            if (!id) return;11
12            const [itemStatsXhr, error] = await fetch('GET', `${process.env.SERVER_URL}/api/items/${id}`);13            if (error) return console.error(error);14            setItemData(JSON.parse(itemStatsXhr.responseText));15        }16        getItemData();17    }, [id]);18}
Next, we can render a loader while the data is being fetched, and display the item stats once ready:
1return <div className={`item-stats-wrapper ${id ? 'item-stats-wrapper-visible' : ''}`}>2 <Loader className="item-stats-wrapper-loader" visible={loading}></Loader>3 <div className={`item-stats ${!id || loading ? 'item-stats-invisible' : ''}`}>4 {!itemData && 'Unable for fetch item data.'}5 {itemData && <>6 <div className='item-stats-name'>{itemData.name}</div>7 <div className='item-stats-image' style={{ backgroundImage: `url(${process.env.SERVER_URL}/items/${itemData.image})` }}></div>8 <div className='item-stats-container'>9 <StatItem title="Rarity" showStat={itemData.rarity}>10 <RarityStatItem value={itemData.rarity} />11 </StatItem>3 collapsed lines
12 <StatItem title="Type" showStat={itemData.type}>13 <RarityStatItem value={itemData.type} />14 </StatItem>15 <StatItem title="Armor" showStat={itemData.stats.armor}>16 <ProgressStatItem value={itemData.stats.armor} />17 </StatItem>18 collapsed lines
18 <StatItem title="Damage" showStat={itemData.stats.damage}>19 <ProgressStatItem value={itemData.stats.damage} calculatedValue={itemData.stats.damage / MAX_DAMAGE * 100} />20 </StatItem>21 <StatItem title="Durability" showStat={itemData.stats.durability}>22 <ProgressStatItem value={itemData.stats.durability} inPercents={true} />23 </StatItem>24 <StatItem title="Attack power" showStat={itemData.stats.attackPower}>25 <ProgressStatItem value={itemData.stats.attackPower} />26 </StatItem>27 <StatItem title="Crit. hit" showStat={itemData.stats.criticalHit}>28 <ProgressStatItem value={itemData.stats.criticalHit} inPercents={true} />29 </StatItem>30 <StatItem title="Crit. chance" showStat={itemData.stats.criticalChance}>31 <ProgressStatItem value={itemData.stats.criticalChance} inPercents={true} />32 </StatItem>33 <StatItem title="Effect" showStat={itemData.stats.effect}>34 {itemData.stats.effect}35 </StatItem>36 </div>37 </>38 }39 </div>40</div>As you can see, different UI elements are used to represent various stats. For instance, the item name is displayed as text, the image is set as a background image, and the remaining stats are presented using the StatItem component.
For the StatItem children, we utilize either RarityStatItem, ProgressStatItem, or plain text, depending on the type of stat.
These components are simple and can be defined within the ItemStats.jsx file:
1const StatItem = ({ title, children, showStat } = { showStat: true }) => {2    if (!showStat) return null;3
4    return <div className='item-stats-container-item'>5        <div className='item-stats-container-item-title'>{title}</div>6        <div className='item-stats-container-item-data'>{children}</div>7    </div>8}9
10const RarityStatItem = ({ value }) => {11    return <div className={`item-stats-container-item-data-rarity item-stats-container-item-data-rarity-${value}`}>12        {value.charAt(0).toUpperCase() + value.slice(1)}13    </div>14}15
16const ProgressStatItem = ({ value, calculatedValue, inPercents } = { inPercents: false }) => {17    return <>18        <gameface-progress-bar class="item-stats-container-item-data-progress" animation-duration="1000" target-value={calculatedValue || value}></gameface-progress-bar>19        <span>{value}{inPercents && '%'}</span>20    </>21}
The StatItem component uses the showStat prop to conditionally render only if the stat exists. This ensures that only relevant stats are displayed. The ProgressStatItem utilizes the gameface-progress-bar to visually represent the stat’s value.
Wrapping the inventory page
Now when the inventory page is complete, it’s time to integrate it into the UI.
First, we need to define a route for it in App.jsx:
1import Inventory from './pages/Inventory/Inventory';2
3const App = () => (4 <HashRouter basename='/'>5 <AuthProvider>6 <Routes>7 <Route path='/' element={<ProtectedRoute><Home /></ProtectedRoute>} >3 collapsed lines
8 <Route element={<LeaderboardPageWrapper />} >9 <Route index element={<Rankings />} />10 </Route>11 <Route path="inventory" element={<Inventory />} />4 collapsed lines
12 <Route path="friends" element={<FriendsPageWrapper />} >13 <Route index element={<FriendsList />} />14 <Route path="add-friends" element={<AddFriends />} />15 </Route>16 </Route>17 </Routes>18 </AuthProvider>19 </HashRouter>20);Next, we need to add a button for it in the navigation menu at the top of the UI:
1<div className='app-wrapper-navigation'>2 <NavLink className='nav-btn' to="/">Leaderboard</NavLink >3 <NavLink className='nav-btn' to="/inventory">Inventory</NavLink >4 <NavLink className='nav-btn' to="/friends">Friends</NavLink >5</div>
Now, you’re all set to navigate to the newly added inventory page.
Resources
For the item icons, we used the free Basic RPG Item Icons from this resource.